2hi
Retro Helper
- Oct 12, 2014
- 52
- 2

After a long long time trying to build a R63B Hotel with no updated tutorials or anything I have successfully accomplished it and I would like to share it with the public.
First things first get all your downloads ready:
- A VPS / Dedicated Server
-
-
- IIS
-
-
-
-
I DO NOT own any of the links and all rights go to their respective owners.
I have Uploaded all downloads to my own Mega.co.nz Account, Don't Trust don't download. But Mad Shoutoutz to @BenHands for original downloads.
Step 1)-
You must be registered for see links
-
You must be registered for see links
- IIS
-
You must be registered for see links
-
You must be registered for see links
(Installation Tutorial not included)-
You must be registered for see links
-
You must be registered for see links
You must be registered for see links
I DO NOT own any of the links and all rights go to their respective owners.
I have Uploaded all downloads to my own Mega.co.nz Account, Don't Trust don't download. But Mad Shoutoutz to @BenHands for original downloads.
Login to VPS
- First you're going to want to log-in to your VPS with Remote Desktop Connector. Search mstsc.exe in your Start menu, open it and you should get something like:
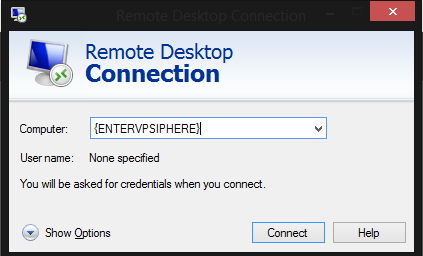
Click connect and it'll ask for your credentials, click the "Administrator" Account and enter your password
- First you're going to want to log-in to your VPS with Remote Desktop Connector. Search mstsc.exe in your Start menu, open it and you should get something like:

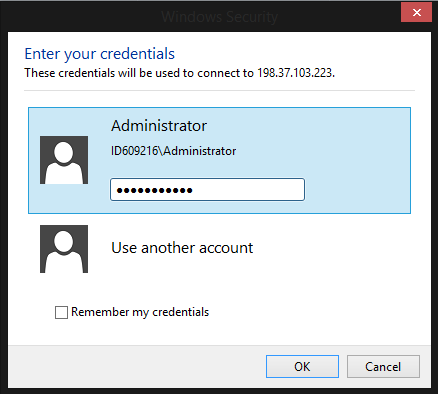
Step 2)
Install IIS
- Once you have logged into your VPS, Search in the start menu for "Server Manager" Open it up and depending on what OS your VPS Is running it may look different.
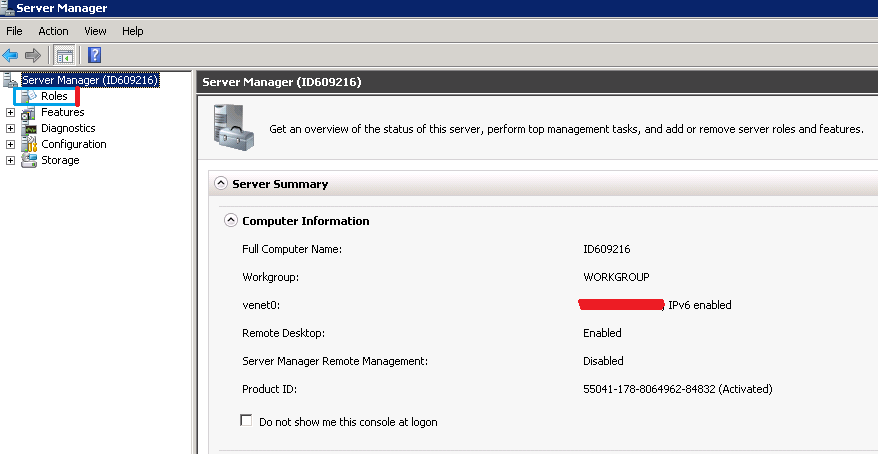
Click on Roles, it'll be on either the left hand side if yours looks like mine or the top right hand side if yours is the newer version; After click on roles you're going to want to press 'Add Roles'

Once clicked a new page will pop up, Click next and you'll be shown a list of things to be downloaded, make sure Web Server IIS is ticked.
Click next, you will than be shown a page with a list of additional downloads to go with IIS WebSever, please make sure that:
All of the 'Performance' category,
All of 'Application Development' and
Under the 'Management Tools' make sure that IIS Management Console,
IIS Scripts and Tools and Management Service are all ticked.
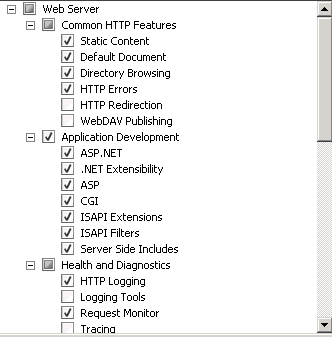
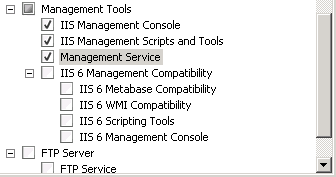
Cick Next > Click Install and IIS Will finish installing.
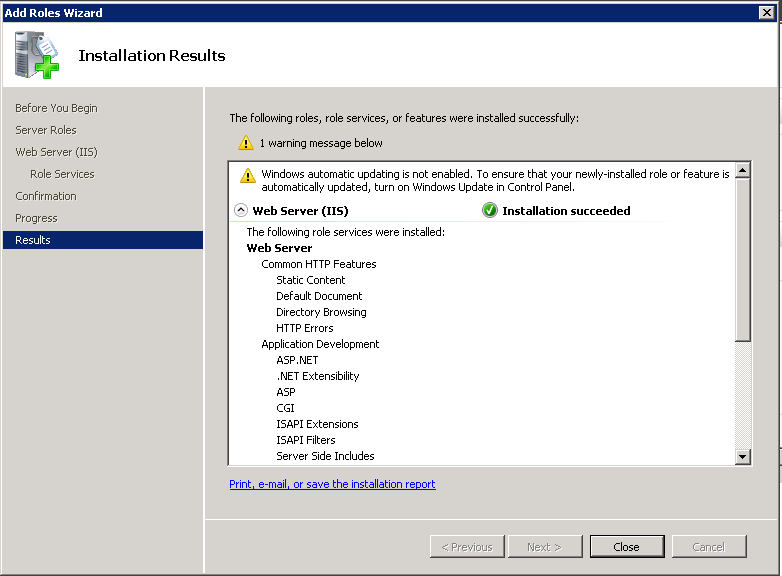
AFTER THIS STEP PLEASE RESTART YOUR VPS
Now That you've restarted your VPS, Go into your Downloads folder and look for mysql-installer-community-5.6.22.0 If you do not have it please download by
Once it has downloaded or if it was already downloaded, open the file up; Follow the Installation Instructions; Select "Server Only" Keep clicking next until you come across "Development Machine" and choose a password for Root User, YOU DO NOT NEED TO MAKE A NEW USER ON THE BOTTOM. Make sure you click "Make Server automatically start on Start Up" so you don't have to start it everytime. After the install is finished close it.
Now you're going to want to download the WPI (Web Platform Installer) if it isn't already you can download it by
Once installed your going to want to open it and you'll see something that looks like:
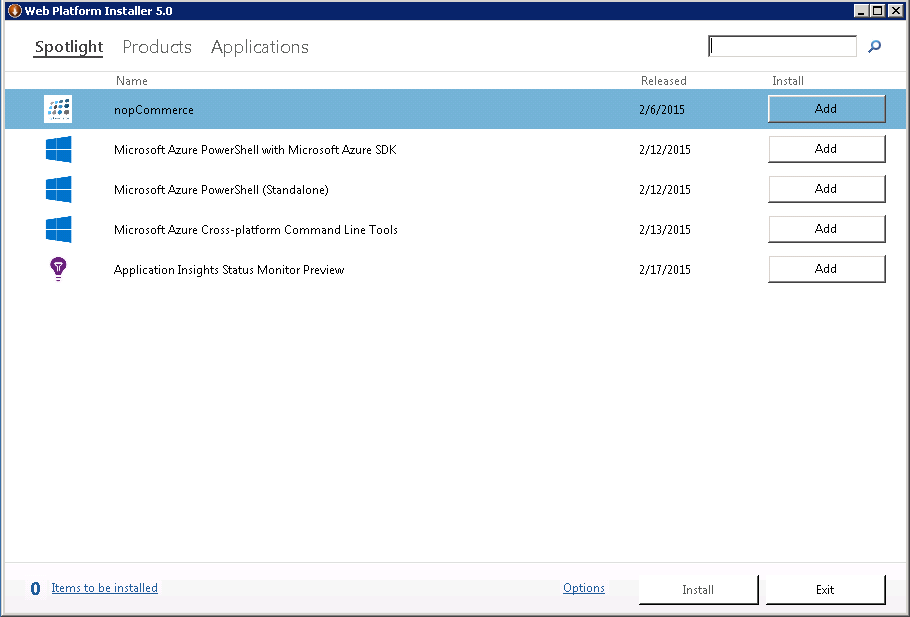
Youre now going to want to search for and add each of the following; If they are already installed move on.
Once you have added them all to the list click install, a warning message may pop up asking for a password as your installing MYSQL, Use the password you used for the root account we made previously! Let them all install.
Time To see if you've installed everything properly - On your vps open up your internet and go to
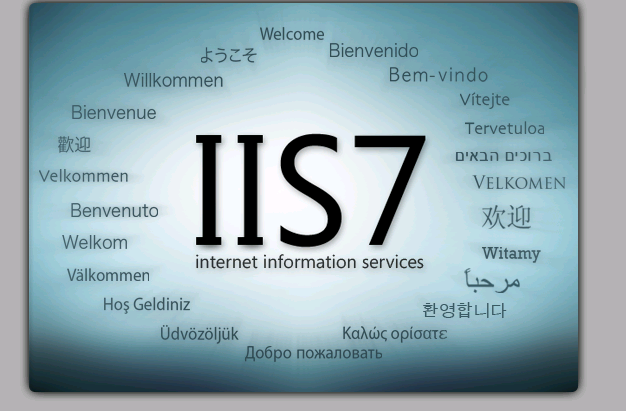
We've made progress.
Step 3)- Once you have logged into your VPS, Search in the start menu for "Server Manager" Open it up and depending on what OS your VPS Is running it may look different.

Click on Roles, it'll be on either the left hand side if yours looks like mine or the top right hand side if yours is the newer version; After click on roles you're going to want to press 'Add Roles'

Once clicked a new page will pop up, Click next and you'll be shown a list of things to be downloaded, make sure Web Server IIS is ticked.
Click next, you will than be shown a page with a list of additional downloads to go with IIS WebSever, please make sure that:
All of the 'Performance' category,
All of 'Application Development' and
Under the 'Management Tools' make sure that IIS Management Console,
IIS Scripts and Tools and Management Service are all ticked.


Cick Next > Click Install and IIS Will finish installing.

AFTER THIS STEP PLEASE RESTART YOUR VPS
Now That you've restarted your VPS, Go into your Downloads folder and look for mysql-installer-community-5.6.22.0 If you do not have it please download by
You must be registered for see links
;Once it has downloaded or if it was already downloaded, open the file up; Follow the Installation Instructions; Select "Server Only" Keep clicking next until you come across "Development Machine" and choose a password for Root User, YOU DO NOT NEED TO MAKE A NEW USER ON THE BOTTOM. Make sure you click "Make Server automatically start on Start Up" so you don't have to start it everytime. After the install is finished close it.
Now you're going to want to download the WPI (Web Platform Installer) if it isn't already you can download it by
You must be registered for see links
.Once installed your going to want to open it and you'll see something that looks like:

Youre now going to want to search for and add each of the following; If they are already installed move on.
PHP 5.x
Application Request Routing 2.5
Web Farm Framework 1.1
SQL Server Express 2008 R2 Service Pack
IIS 8 Express
Web Deployment Tool 2.1
Microsoft .NET Framework 4
URL Rewrite 2.0
PHP Manager for IIS
MySQL Windows 5.1
IIS 8 Recommended Configuration
Application Request Routing 2.5
Web Farm Framework 1.1
SQL Server Express 2008 R2 Service Pack
IIS 8 Express
Web Deployment Tool 2.1
Microsoft .NET Framework 4
URL Rewrite 2.0
PHP Manager for IIS
MySQL Windows 5.1
IIS 8 Recommended Configuration
Once you have added them all to the list click install, a warning message may pop up asking for a password as your installing MYSQL, Use the password you used for the root account we made previously! Let them all install.
Time To see if you've installed everything properly - On your vps open up your internet and go to
You must be registered for see links
If you see
We've made progress.
Now we want to open the ports that your Emu & Client are going to run on, on your VPS search for "Server Manager" and open it. On the left hand side you'll see "Go To Windows FireWall"
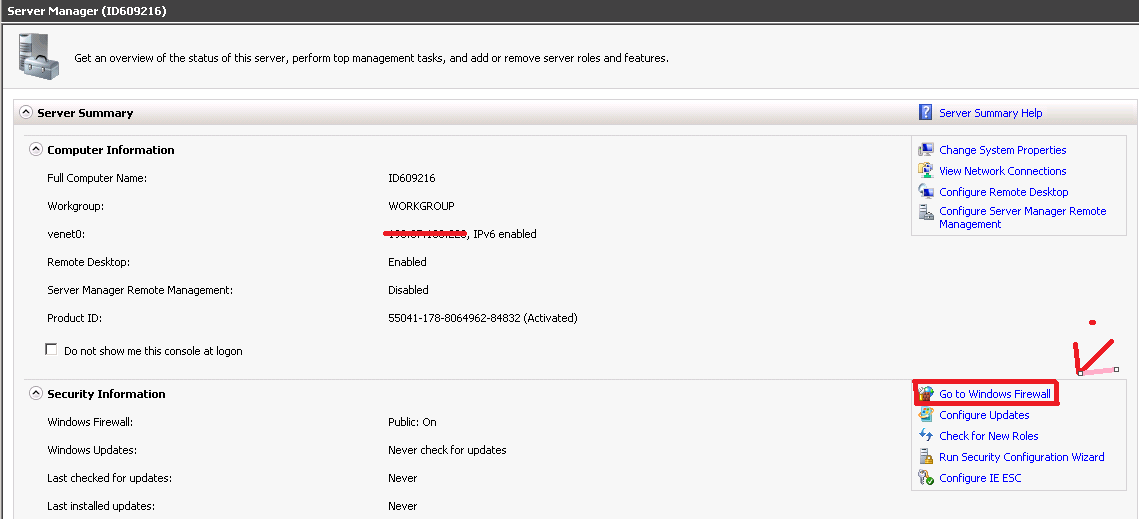
Open it and scroll down you will see:
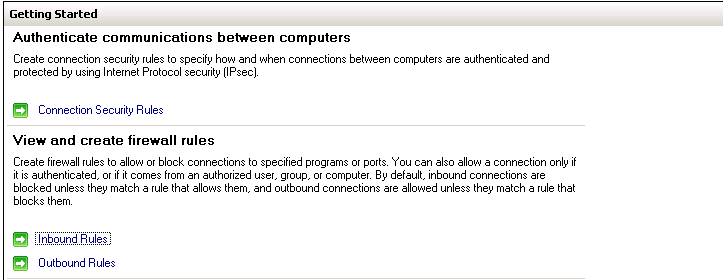
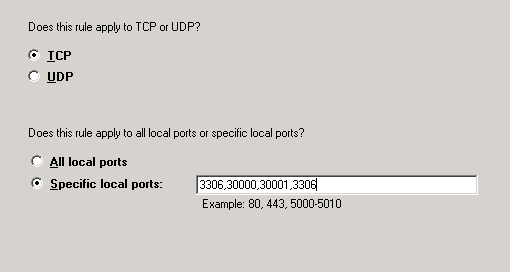
Click Inbound Rules, On the left side you'll see "New Rule" Click it, Choose "Port" Make cure its a TCP and put 3306,30000,30001,3306 as the port, Name it Retro, Emu, or anything Hotel related so you know what they're for. Do the same for Outbound connections. Make sure you Allow All connections, don't block it.
If you haven't already please install WinRAR & NotePad++ Now. Links can be found at the top.
Step 4)
If you haven't already please install WinRAR & NotePad++ Now. Links can be found at the top.
Now we need to set up the CMS, (The SWFS are already set up in the CMS Package)
First youre going to want to extract the files from the RevCMS & SWF Package posted at top to your C:/inetpub/wwwroot Folder located on your VPS. Once it's done you should be left with something like this
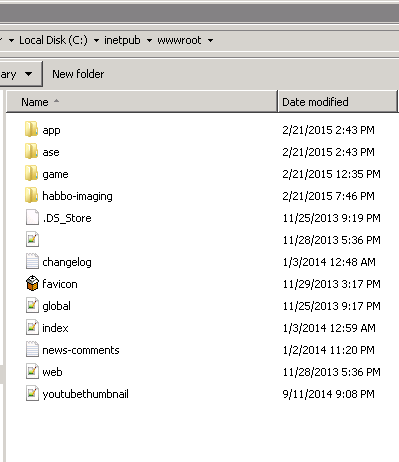
Now youre going to want to click App > Management > and open the 'config.php' file in NotePad++
Edit The MYSQL Password & Database NOT Hostname or username or port.

Continue scrolling down and you will see more information, Your going to want to change the information below, make sure to put your VPS IP as The Server IP"
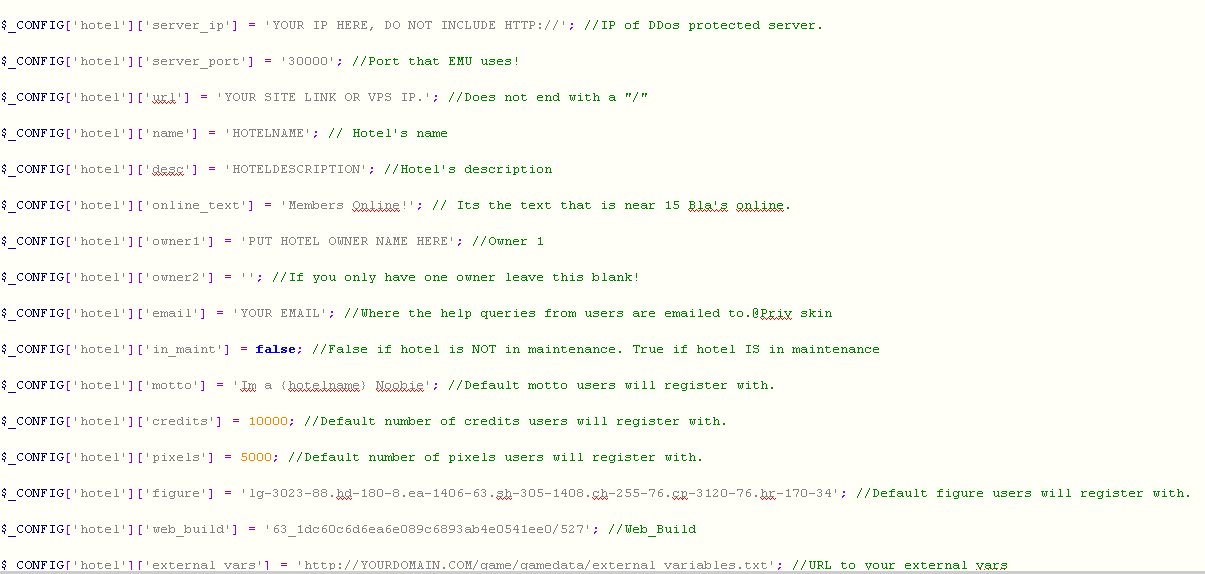 Towards the bottom of the page you will see
First youre going to want to extract the files from the RevCMS & SWF Package posted at top to your C:/inetpub/wwwroot Folder located on your VPS. Once it's done you should be left with something like this

Now youre going to want to click App > Management > and open the 'config.php' file in NotePad++
Edit The MYSQL Password & Database NOT Hostname or username or port.

Continue scrolling down and you will see more information, Your going to want to change the information below, make sure to put your VPS IP as The Server IP"


Replace 'YOURDOMAIN.COM' with your domain name and press Save.
Now we need to set up the database for which the hotel is going to run of off. For this there is two ways to do it. 1. PHPMyAdmin or 2. Navicat. PHP is a huge security risk so i recommend staying away from it, or if you do use it take it out of wwwroot when its not being used. There are plenty of Navicats released with Free Cracks, NaviCat offers a free trial from their website which can be downloaded
In the top corner of Navicat You'll see 'Connection' Click it and click 'MySQL'

A new window will pop open and fill it out like this:
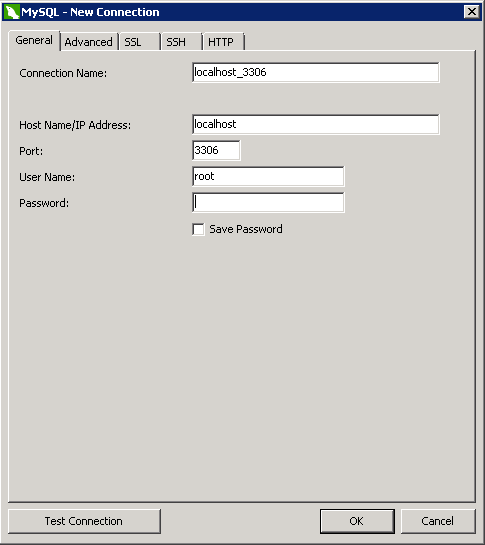
Put your MYSQL Password where it asks for it, Click 'Ok'
Now on the left hand side you'll see your 'localhost_3306' Double click it so it brings up the drop down menu of 4 others, right click on the 'Localhost_3306' and press 'New Database' use the Database name you used in the config.php file during Step 4.
Now under 'localhost_3306' you should see your database name, double click it
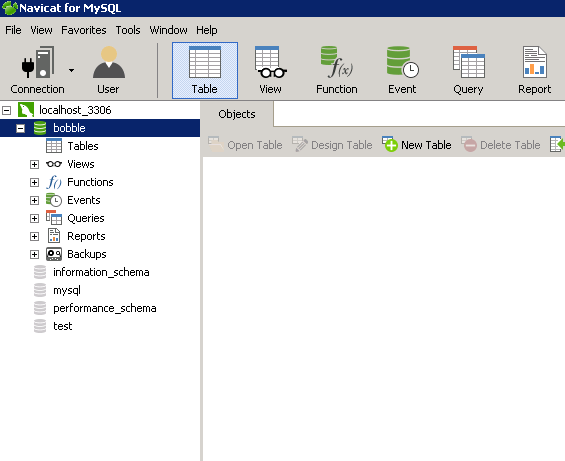
Now Download and extract the 'Mercury SQL' Posted at top to your desktop. Now go back into Navicat and
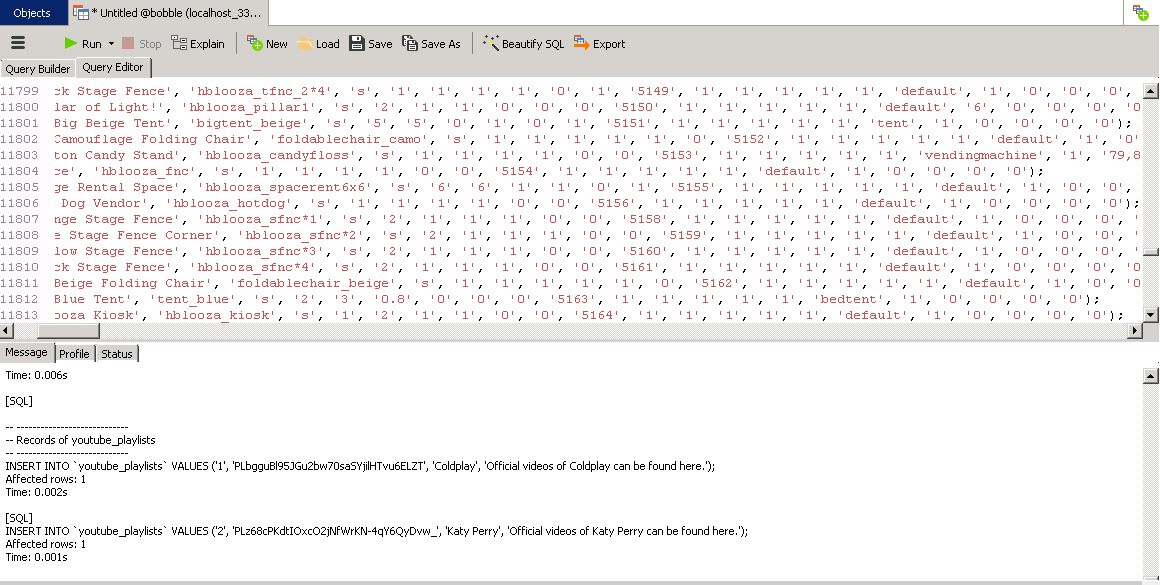
on the Top you'll see 'Query' Press it, 'New Query' Press it. Now head over to where your the Mercury.SQL is and open it with notepad, right click > Select all > Copy. Now go back to the New Query Screen of Navicat and Copy and paste it than press 'Run'
Once it's finished it should look like
Step 6) Emulator Set Up.
Okay Now, what youre going to want to do is extract the 'Mercury Emu' folder to a folder on your desktop Named Mercury, open it, go to bin > x86 > debug > and open up config.ini
Edit the MYSQL Password & database name and change YOUR IP to your IP.
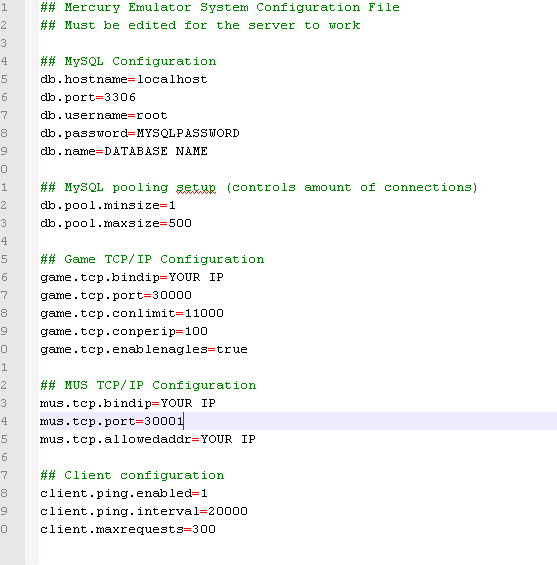
Save & Close. Now go back to the debug folder and open extra_settings.txt - This is where you can set some settings, how many credits you get, diamonds, so on so fouth the only main thing you gotta edit is at the bottom and change YOURIPADDRESS to your IP.
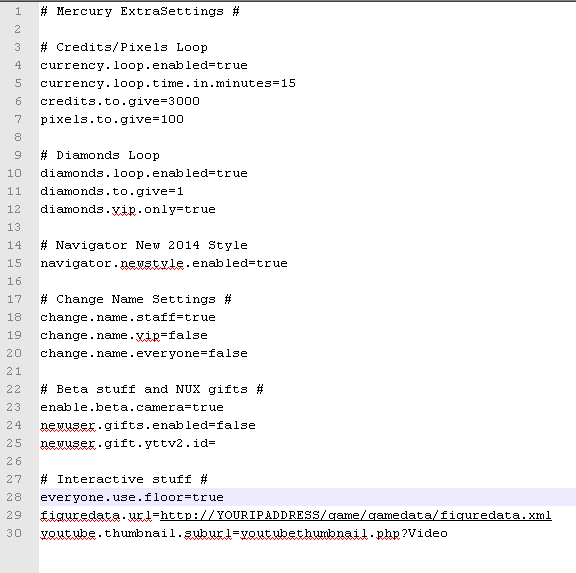
Save & Close.
Please note: BEFORE EMU WILL OPEN YOU MUST OPEN THE EMULATOR IN VISUAL STUDIOS, GO TO CORE > EXTRASETTINGS AND CHANGE THE FIGUREDATA_URL TO
Step 7) SWFS -
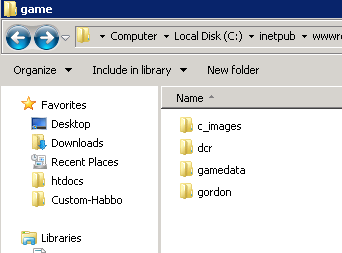
The SWFS have already been added into the wwwroot for you, so head over to your wwwroot > game > gamedata > and open 'External_variables' & you're going to want to press ctrl h in 'Find What' Put "
Assuming it was all editted properly close and save it.
Voila, now visit your domain, register an account, go into Navicat > Tables > Users > Change your rank > Load Client.
If anyone has any errors please feel free to let myself know and i'll help you walk through them!
I'm going to go over this again tomorrow and make sure i haven't missed anything.. I spent long enough on it that by the end my brain was fried. Anyways First Tut Accomplished. Enjoy
You must be registered for see links
. Proceed through the installation and open Navicat once it's finished.In the top corner of Navicat You'll see 'Connection' Click it and click 'MySQL'

A new window will pop open and fill it out like this:

Put your MYSQL Password where it asks for it, Click 'Ok'
Now on the left hand side you'll see your 'localhost_3306' Double click it so it brings up the drop down menu of 4 others, right click on the 'Localhost_3306' and press 'New Database' use the Database name you used in the config.php file during Step 4.
Now under 'localhost_3306' you should see your database name, double click it

Now Download and extract the 'Mercury SQL' Posted at top to your desktop. Now go back into Navicat and
on the Top you'll see 'Query' Press it, 'New Query' Press it. Now head over to where your the Mercury.SQL is and open it with notepad, right click > Select all > Copy. Now go back to the New Query Screen of Navicat and Copy and paste it than press 'Run'
Once it's finished it should look like

Step 6) Emulator Set Up.
Okay Now, what youre going to want to do is extract the 'Mercury Emu' folder to a folder on your desktop Named Mercury, open it, go to bin > x86 > debug > and open up config.ini
Edit the MYSQL Password & database name and change YOUR IP to your IP.

Save & Close. Now go back to the debug folder and open extra_settings.txt - This is where you can set some settings, how many credits you get, diamonds, so on so fouth the only main thing you gotta edit is at the bottom and change YOURIPADDRESS to your IP.

Save & Close.
Please note: BEFORE EMU WILL OPEN YOU MUST OPEN THE EMULATOR IN VISUAL STUDIOS, GO TO CORE > EXTRASETTINGS AND CHANGE THE FIGUREDATA_URL TO
You must be registered for see links
. If you can't please post here the link to your figuredata and I will be glad to do it for you.Step 7) SWFS -

The SWFS have already been added into the wwwroot for you, so head over to your wwwroot > game > gamedata > and open 'External_variables' & you're going to want to press ctrl h in 'Find What' Put "
You must be registered for see links
" and replace with your domain, and than ctrl h again and search for LINKHERE and replace with yourdomain without www. or http:// infront of it.Assuming it was all editted properly close and save it.
Voila, now visit your domain, register an account, go into Navicat > Tables > Users > Change your rank > Load Client.

If anyone has any errors please feel free to let myself know and i'll help you walk through them!
I'm going to go over this again tomorrow and make sure i haven't missed anything.. I spent long enough on it that by the end my brain was fried. Anyways First Tut Accomplished. Enjoy

Last edited:
