Johno
:: xHosts :: www.xhosts.uk
- Sep 12, 2011
- 586
- 255
Hey everyone
I have had many customers contacting me because of others in the community or ex technical staff on their hotels flooding the IIS directly as they had knowledge of the servers IP address. This may help people that are using providers who will not provide support on such issues or may charge a fee to change an IP address.
This will work on any version of IIS
Firstly you need to download IP Address and Domain Restrictions this can be done via the Microsoft website or using web platform installer, in this tutorial I will use web platform installer
Depending on your server providers DDOS protection by using this method you may not need a TCP proxy

You need to choose this option

Once this has installed, return to IIS main page and select the IP address and Domain Restrictions icon

Once you have opened this tab, right click and choose Add Allow Entry
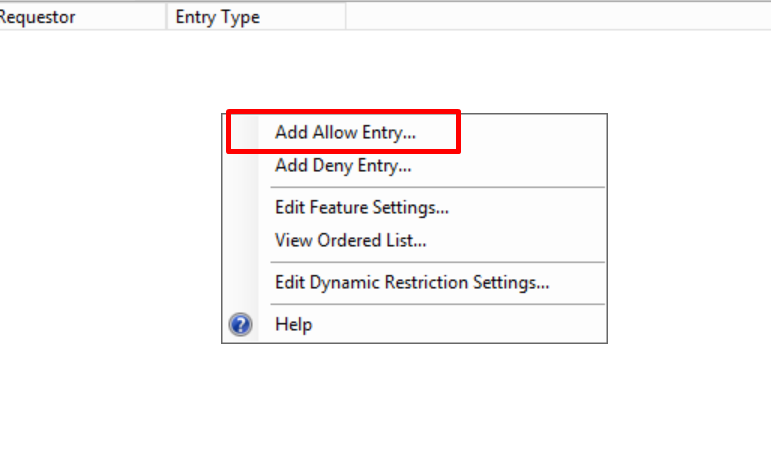
Now you can begin to add IP addresses to the allowed list, as this tutorial is showing you how to allow CloudFlare IP addresses only I will show you how to add these ranges, thew same method applies to both IPv4 and IPv6
You can find the latest IP ranges list here on the CloudFlare website
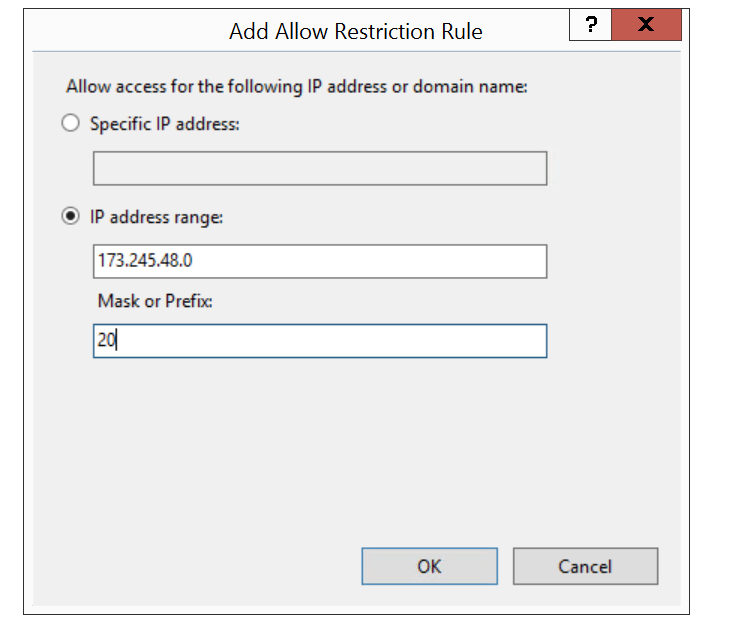
You add the IP address and the number after the slash into the Mask or Prefix box, you do this for each range from the CloudFlare website
Next you need to Configure IIS to enforce the allowed list
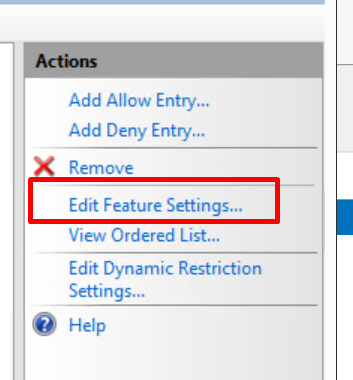
You need to select the Edit Feature Settings option on the right side of the IP and Domain Restrictions window you have open
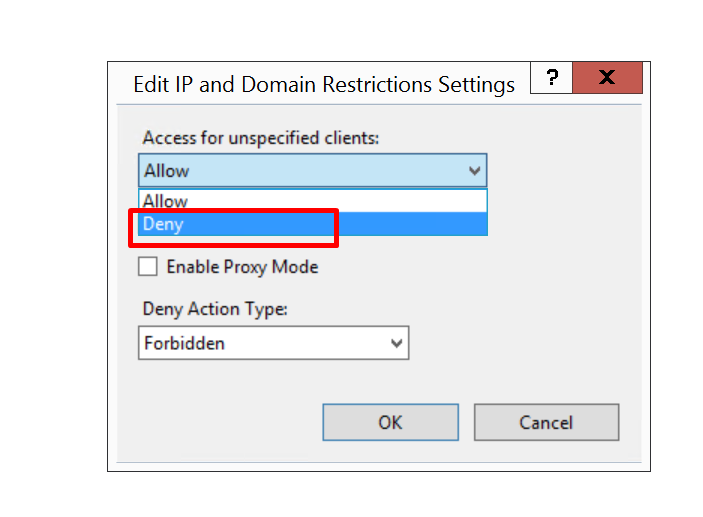
You need to now set the Access for unspecified clients to Deny
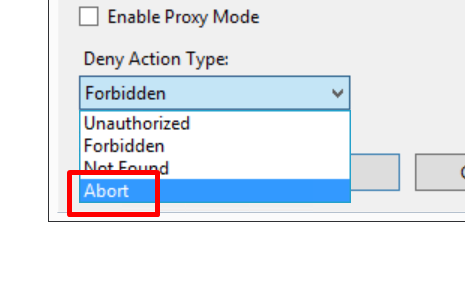
You need to set the Deny action type to Abort or the connections will still be allowed to make an attempted connection making this useless
If you need to still access your server locally add 127.0.0.1 to the allowed list and visit
This will not stop all DDOS attacks but can help prevent direct IIS flooding and possibly remove the need for a TCP proxy too.
This can also be achieved using the Windows firewall to block all connections apart from those in the allowed list as stated by @yoyok - If using this method be very careful as incorrect changes to the firewall can leave you unable to connect to the server and some providers may not assist in helping you undo the changes to the firewall.
I have had many customers contacting me because of others in the community or ex technical staff on their hotels flooding the IIS directly as they had knowledge of the servers IP address. This may help people that are using providers who will not provide support on such issues or may charge a fee to change an IP address.
This will work on any version of IIS
Firstly you need to download IP Address and Domain Restrictions this can be done via the Microsoft website or using web platform installer, in this tutorial I will use web platform installer
Depending on your server providers DDOS protection by using this method you may not need a TCP proxy

You need to choose this option

Once this has installed, return to IIS main page and select the IP address and Domain Restrictions icon

Once you have opened this tab, right click and choose Add Allow Entry

Now you can begin to add IP addresses to the allowed list, as this tutorial is showing you how to allow CloudFlare IP addresses only I will show you how to add these ranges, thew same method applies to both IPv4 and IPv6
You can find the latest IP ranges list here on the CloudFlare website
You must be registered for see links
You add the IP address and the number after the slash into the Mask or Prefix box, you do this for each range from the CloudFlare website

Next you need to Configure IIS to enforce the allowed list

You need to select the Edit Feature Settings option on the right side of the IP and Domain Restrictions window you have open

You need to now set the Access for unspecified clients to Deny

You need to set the Deny action type to Abort or the connections will still be allowed to make an attempted connection making this useless
If you need to still access your server locally add 127.0.0.1 to the allowed list and visit
You must be registered for see links
instead of
You must be registered for see links
This will not stop all DDOS attacks but can help prevent direct IIS flooding and possibly remove the need for a TCP proxy too.
This can also be achieved using the Windows firewall to block all connections apart from those in the allowed list as stated by @yoyok - If using this method be very careful as incorrect changes to the firewall can leave you unable to connect to the server and some providers may not assist in helping you undo the changes to the firewall.
Last edited:


