peterq123123
Member
- Sep 5, 2013
- 166
- 14
Hey Guys,
I will show you how to make a RP retro using IIS, and I know this might help alot of you guys.This tutorial was made while using a Windows 2008 Standard Edition R2 VPS!
Before we start, I wanted to give credits to KyleVonnie , for the photos and how to install IIS.
Download Links:
You can find all the links here;
SWF :
DB SQL :
EMU :
CMS :
WinRAR :
MySQL:
Step One :
Credits to KyleVonnie for this part, I copied it directly from his thread!
100% Credits to him for steps 1 - 3!
Install MySQL on your VPS
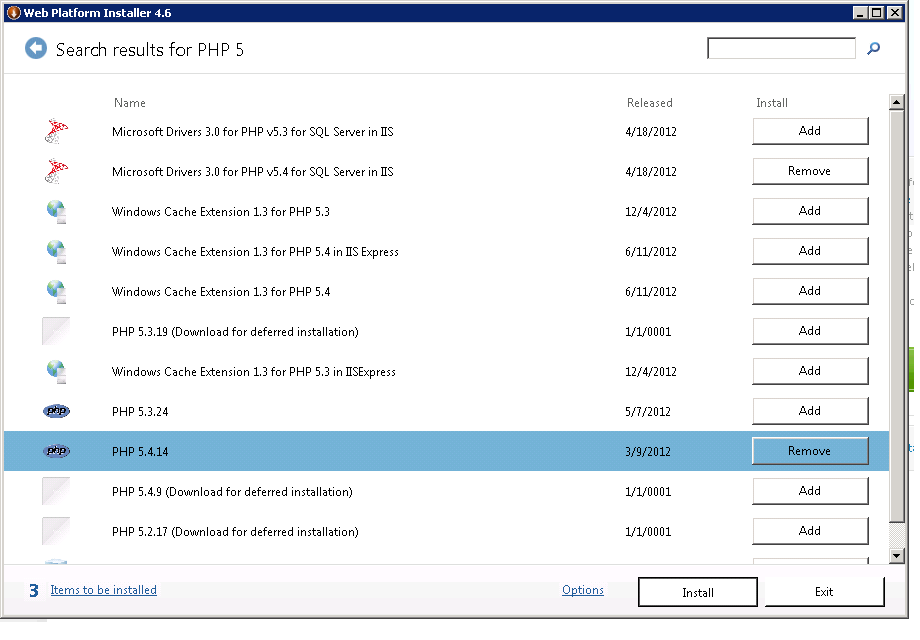
- Search for "PHP 5" in the search box. Choose any PHP 5.x
 - Search for "IIS Recommended Configuration"
 - Next download "URL Rewrite 2.0" . This will be already installed for a lot of you.
 Step Three:
Go to
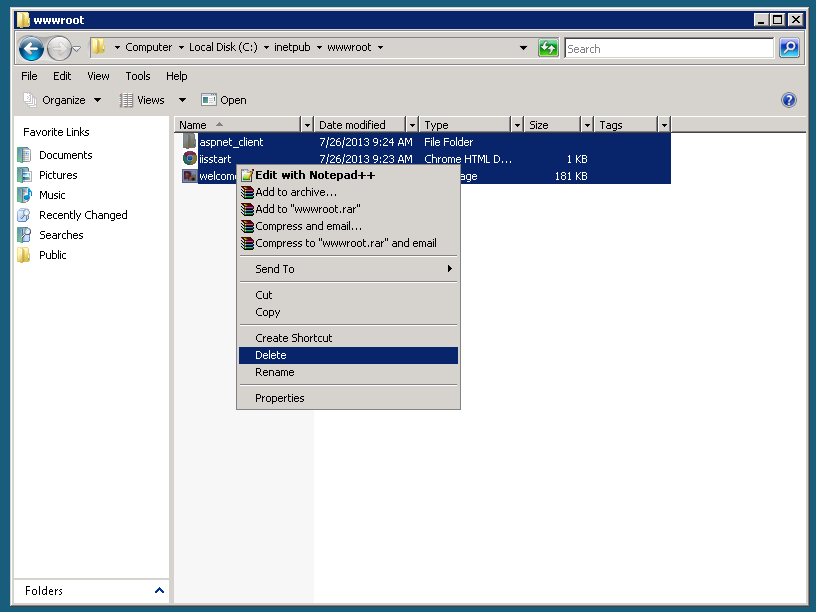
 - Next, go to C:\inetpub\wwwroot and delete all files that are there.
- Next, Download Winrar from the link above.
- Then Download/Extract the CMS also from the link above.

Step Four:
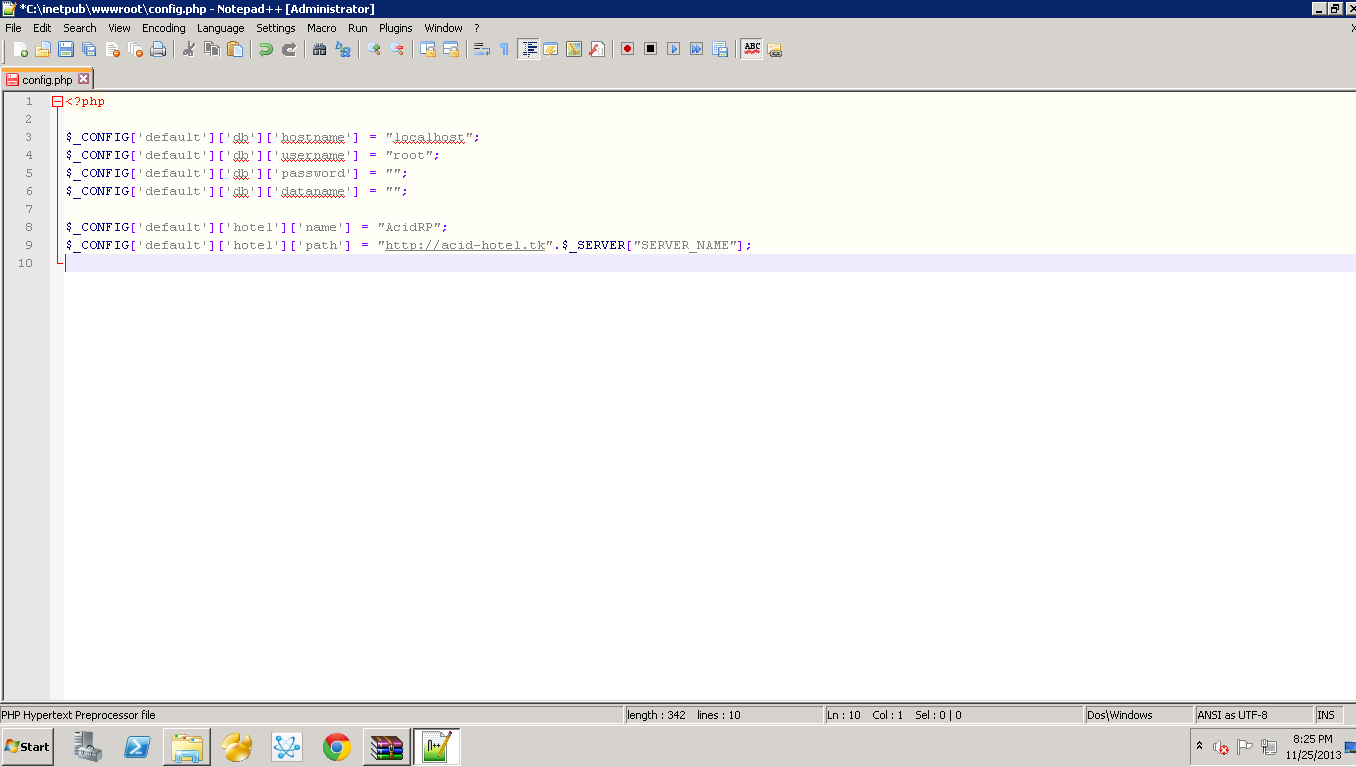
- Next, go to C:\inetpub\wwwroot\config.php and open config.php. I suggest using Notepad ++ or Sublime Text.
Step Five:
Download Navicat Premium :
- On the Top Left, Click Connection. Name it whatever you choose.
- Make sure the username says "Root" and enter your Root Password below that.

- Click on "Query" then choose "New Query", select "Load".
- Choose the Sql file from the link above.

Step six:
- Go back to
Step Seven: [SWFS]
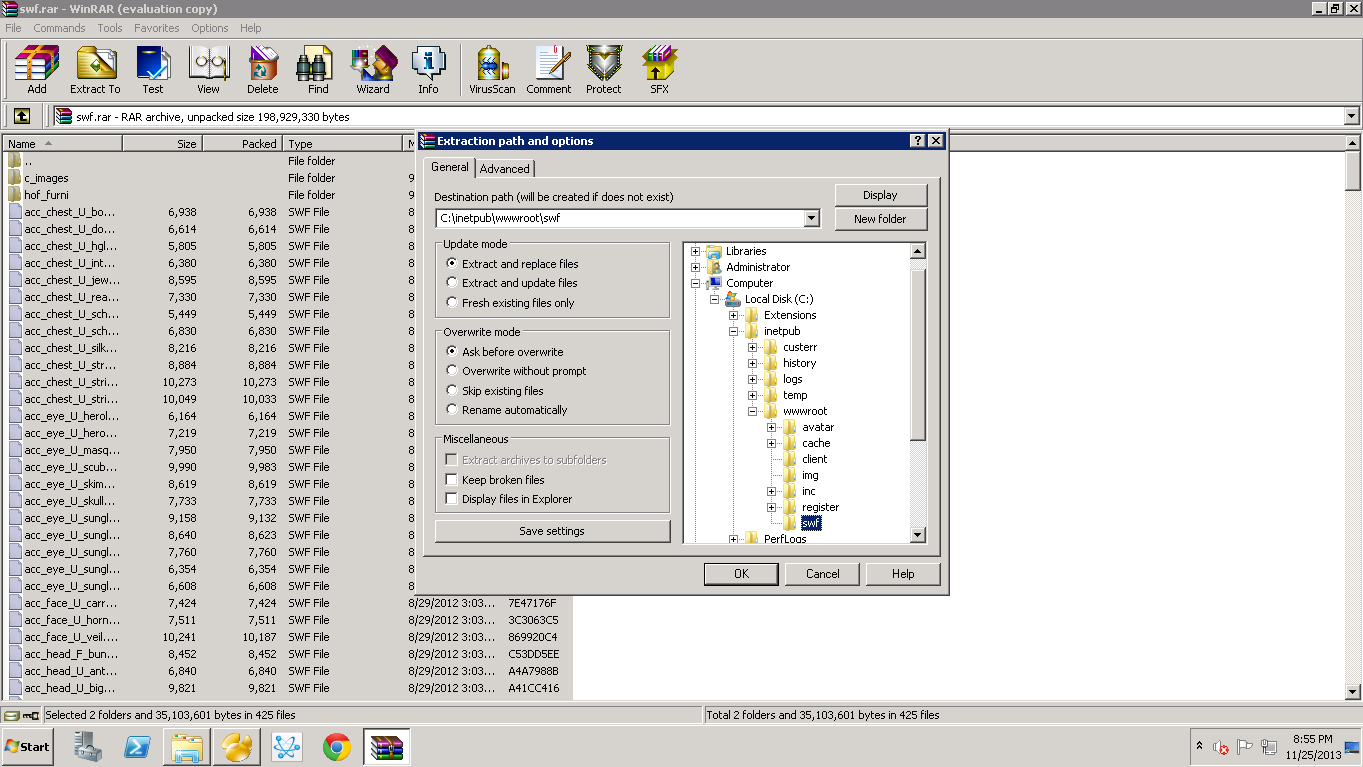
- Download the SWF Pack from either the original link or the mirror above.
- Create a folder called swf not swfs!
- Extract the whole folder to /wwwroot/swf.
(THIS WILL TAKE A WHILE)
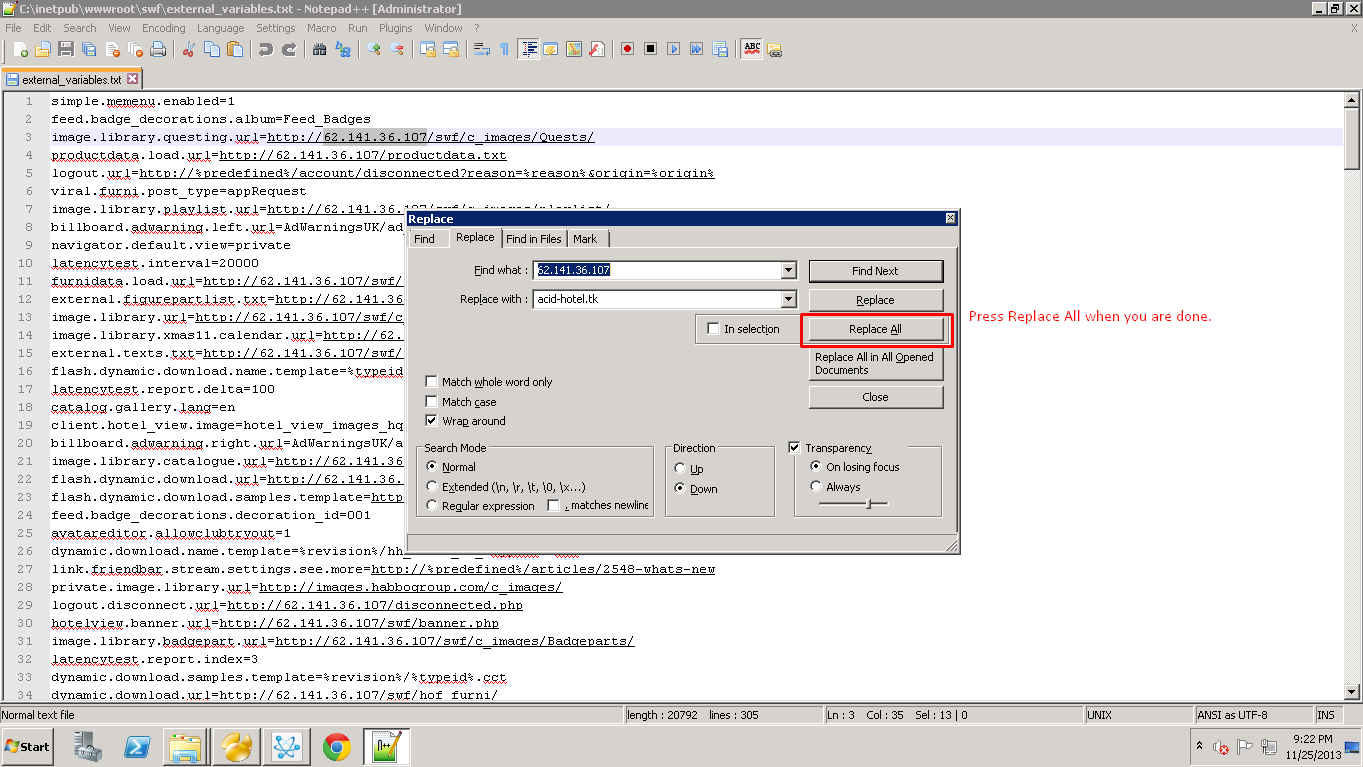
Step Nine:
- Now go to swf> external_variables.
- Press Ctrl + H and type in localhost, IP, or Domain.
- Press Replace All when you are done.
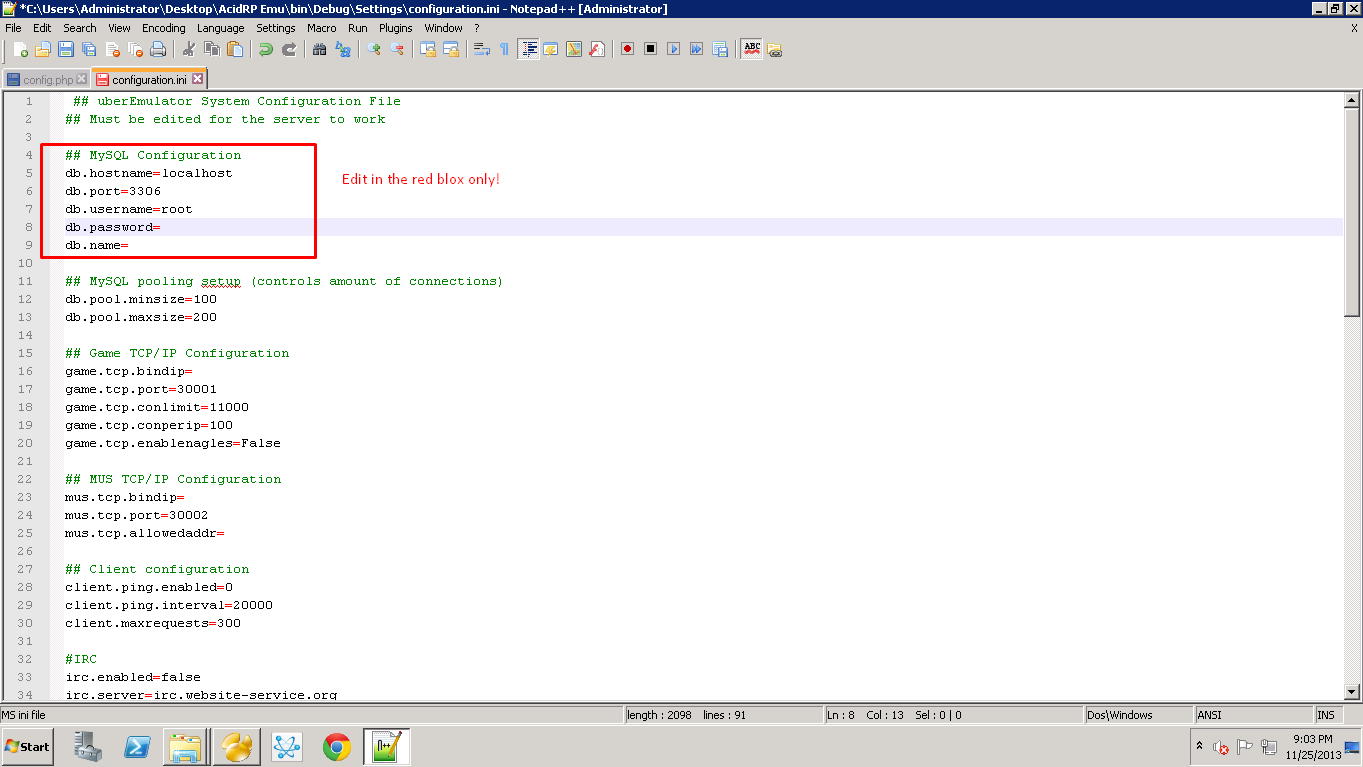
Step Ten:
- Download the Reality Emulator from the link above.
- Extract the folder to your desktop.
- Go to bin> debug> settings> and open configuration.
Step Eleven:
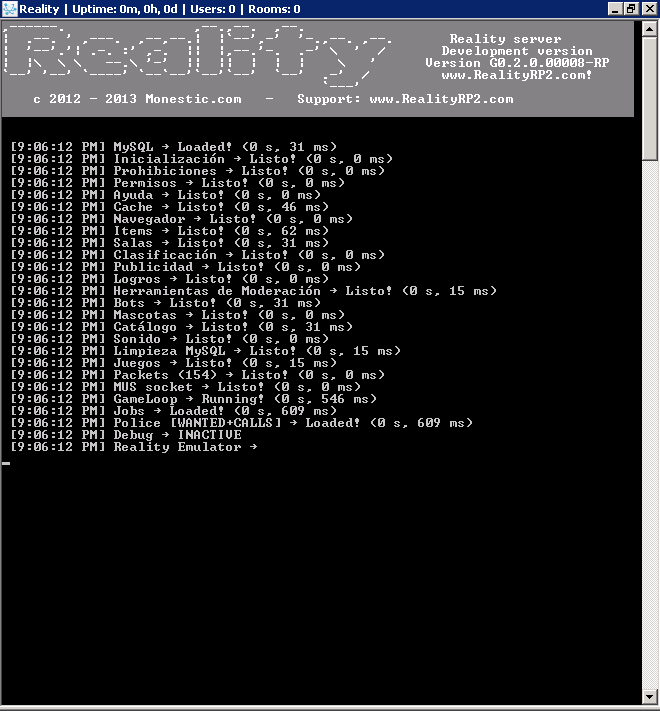
Go back to bin>debug> and open Reality Emulator.
- Once loaded, should look like this:
Step Twelve:
- Register on
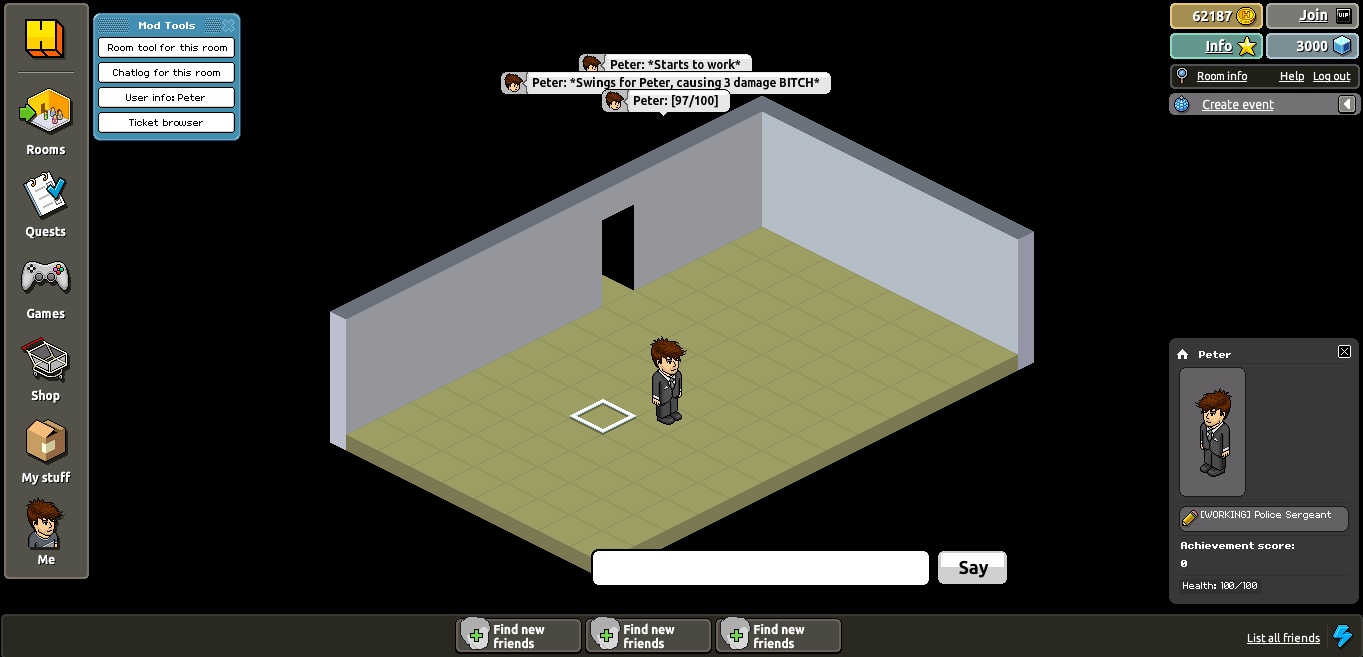
- Congratulations you now own a RP r63b retro! If you did it right.")
All strings are editable in the locale.ini!
------------------------------------------------------------------------------------------------------------------------------------------------------------------------------------
Credits:
Divde - RealityRP Emu, CMS, SWF, and SQL DB
Kyle - His Tutorial Helped me on IIS, thanks.
Peter - Tut
---------------------------------------------------------------------------------------------------------------------------------------------------------------------------------------------------------------------------------
Please message me if I missed something, had an error, or need help on anything else!
Thanks,
Peter
I will show you how to make a RP retro using IIS, and I know this might help alot of you guys.This tutorial was made while using a Windows 2008 Standard Edition R2 VPS!
Before we start, I wanted to give credits to KyleVonnie , for the photos and how to install IIS.
Download Links:
You can find all the links here;
SWF :
You must be registered for see links
DB SQL :
You must be registered for see links
EMU :
You must be registered for see links
CMS :
You must be registered for see links
WinRAR :
You must be registered for see links
MySQL:
You must be registered for see links
Step One :
Credits to KyleVonnie for this part, I copied it directly from his thread!
100% Credits to him for steps 1 - 3!
Install MySQL on your VPS
You must be registered for see links
You must be registered for see links
- Search for "PHP 5" in the search box. Choose any PHP 5.x
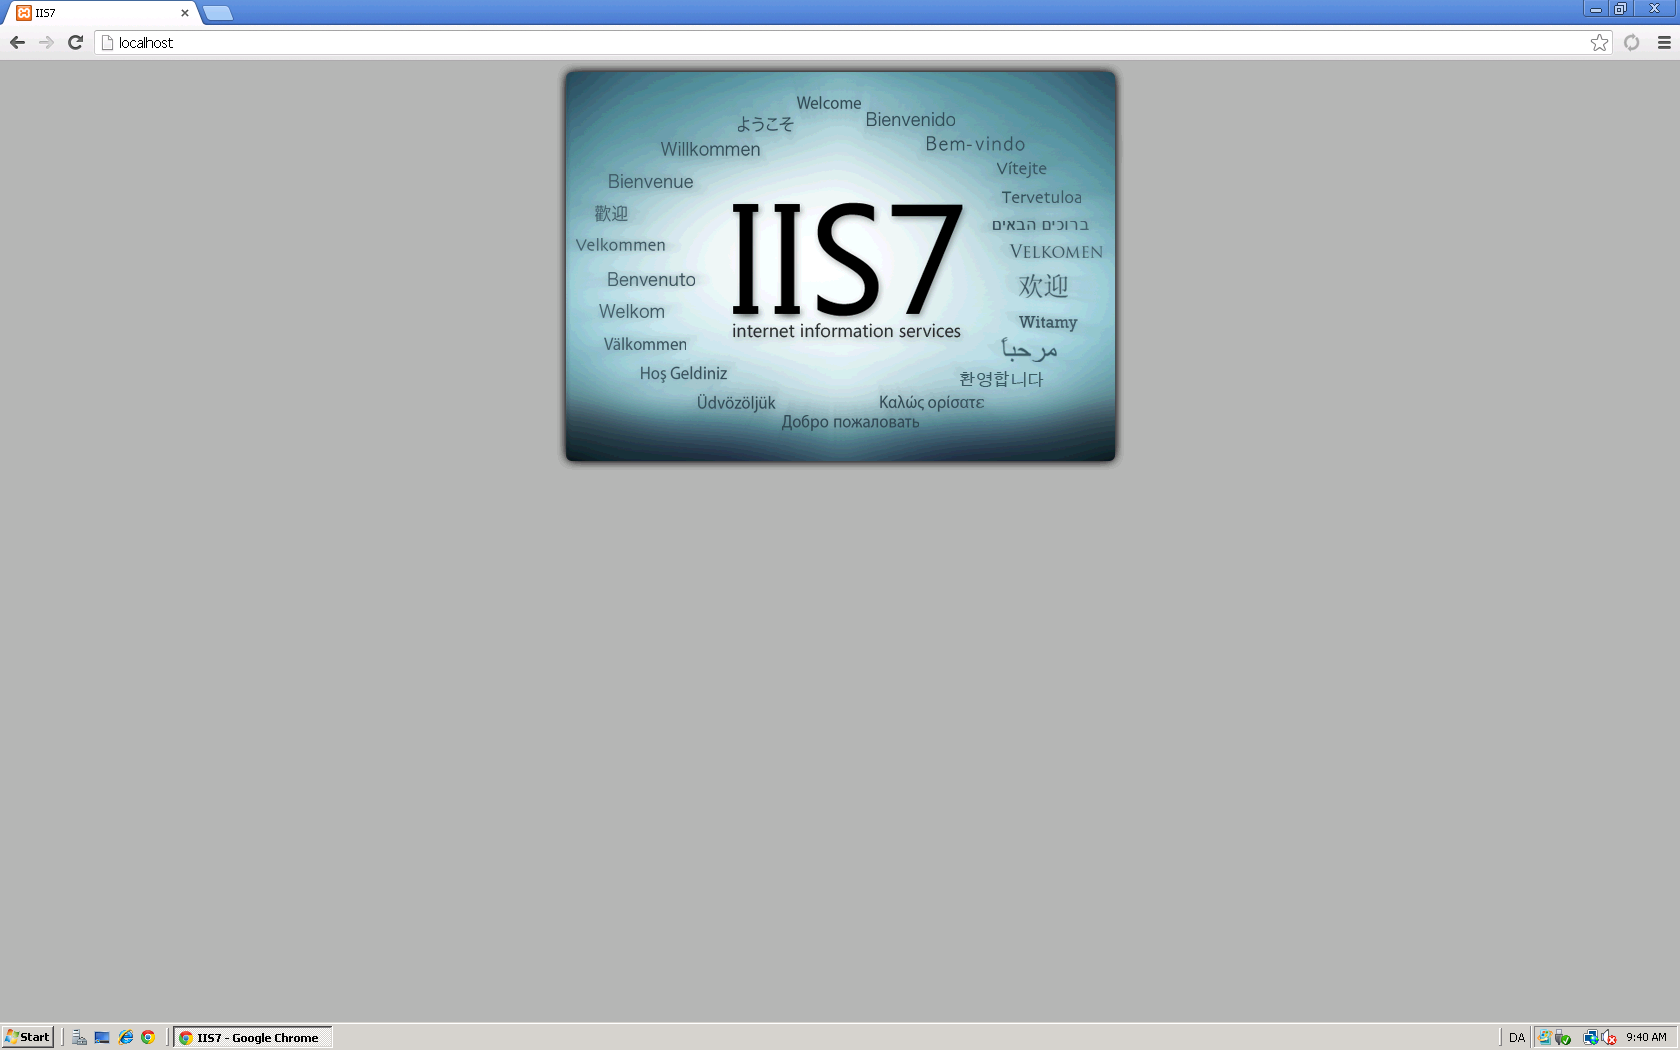
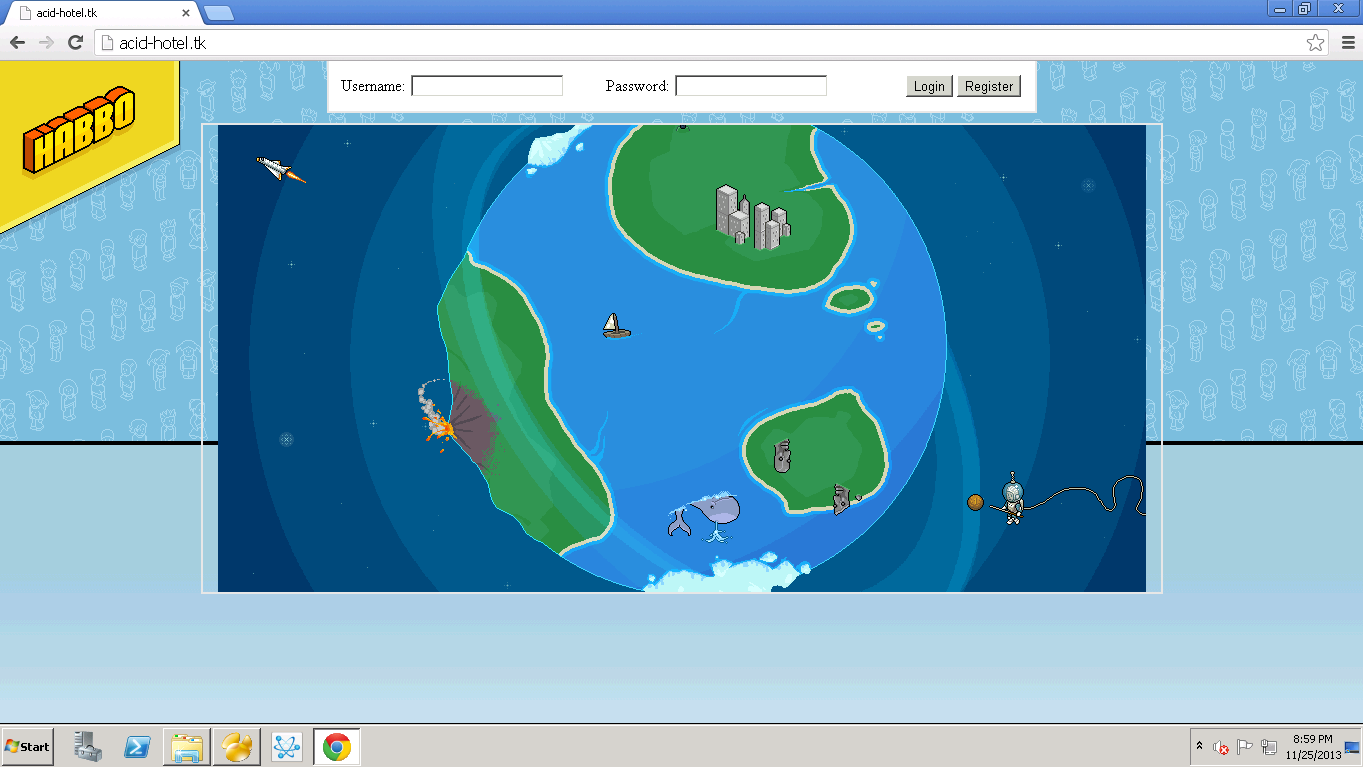
Go to
You must be registered for see links
, you should see a screen similar to below.
- Next, Download Winrar from the link above.
- Then Download/Extract the CMS also from the link above.
Step Four:
- Next, go to C:\inetpub\wwwroot\config.php and open config.php. I suggest using Notepad ++ or Sublime Text.
Step Five:
Download Navicat Premium :
You must be registered for see links
- On the Top Left, Click Connection. Name it whatever you choose.
- Make sure the username says "Root" and enter your Root Password below that.
- Click on "Query" then choose "New Query", select "Load".
- Choose the Sql file from the link above.
Step six:
- Go back to
You must be registered for see links
,IP or Domain, you should see this now:
Step Seven: [SWFS]
- Download the SWF Pack from either the original link or the mirror above.
- Create a folder called swf not swfs!
- Extract the whole folder to /wwwroot/swf.
(THIS WILL TAKE A WHILE)
Step Nine:
- Now go to swf> external_variables.
- Press Ctrl + H and type in localhost, IP, or Domain.
- Press Replace All when you are done.
Step Ten:
- Download the Reality Emulator from the link above.
- Extract the folder to your desktop.
- Go to bin> debug> settings> and open configuration.
Step Eleven:
Go back to bin>debug> and open Reality Emulator.
- Once loaded, should look like this:
Step Twelve:
- Register on
You must be registered for see links
,IP ,or Domian and enter the client.- Congratulations you now own a RP r63b retro! If you did it right.
All strings are editable in the locale.ini!
------------------------------------------------------------------------------------------------------------------------------------------------------------------------------------
Credits:
Divde - RealityRP Emu, CMS, SWF, and SQL DB
Kyle - His Tutorial Helped me on IIS, thanks.
Peter - Tut
---------------------------------------------------------------------------------------------------------------------------------------------------------------------------------------------------------------------------------
Please message me if I missed something, had an error, or need help on anything else!
Thanks,
Peter

