[TUT] How to make r63b Habbo Retro

Did this tutorial help you?


  • Total voters
    142
Status
Not open for further replies.

Cedar

Member
Jan 24, 2013
339
98
But i dont want to build it, i want the official one. and the other official rooms.

You can build the official rooms with the 'public furni' which should be in the catalog, if not, then you are going to have to add that, lol.
The only other way you can get the official rooms with the furni in the room without doing any effort on building it, you get someone else to build it for you, lol.
 

invincible64

New Member
Aug 14, 2012
16
1
You can build the official rooms with the 'public furni' which should be in the catalog, if not, then you are going to have to add that, lol.
The only other way you can get the official rooms with the furni in the room without doing any effort on building it, you get someone else to build it for you, lol.
I don't have any of the furni you described and i don't know how to add it.
 

purenico44

New Member
Dec 29, 2012
15
0

KyleVonnie

Come @ me Bro!
Oct 26, 2011
993
176
Ahhm, what is IIS all about? it is like a XAMMP or better of it? And can anyone teach me to use IIS?
IIS is similar to Xampp, it does the same thing. But its much more secure and better. People usually use it is they have a server, like a VPS, not on their PC.
 

Solved

Member
Sep 3, 2012
41
0
Hey Devbest, Kyle here!
As you probably know, r63b's are the "new thing" and they are fairly simple to make, so I thought I'd make a quick tutorial on how to, I hope this is noob friendly and works for you! Enjoy :p
___________________________________________________________________________________________
Downloads : Password for all files is : KyleVonnie
Xampp 1.7.3 :
BcStorm Emulator (Credits to Leon) :
DB SQL :
RevCMS :
SWFS :
WinRAR :
___________________________________________________________________________________________
Making of Retro :
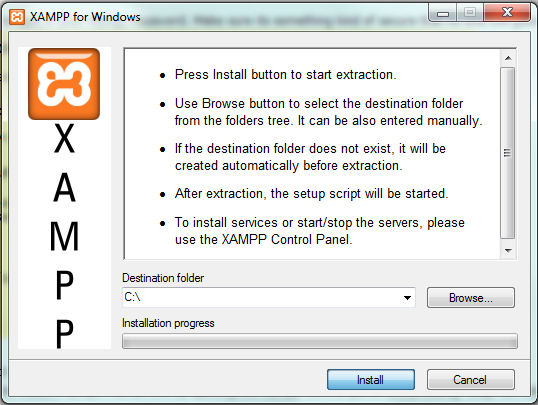
1. Download Xampp 1.7.3 from the link above. Open the downloaded .exe file and you should see something similar to this:

y7ueS0c.png


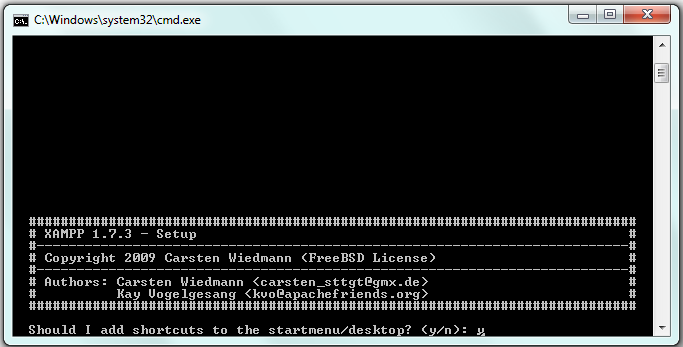
- Press Install, and Xampp should install by itself. Once the main setup is complete, another screen should popup.

xEJ66wH.png


- Press enter twice.
- Then It should ask "Your Choice ? <y/n>", make sure its "n" and press enter.
- Once again, press enter twice, then at the next question type "x" and enter.
- Xampp is successfully installed!

2. Open the Xampp control panel, which is in C: > Xampp > xampp-control
- Start "Apache" and "MySql".
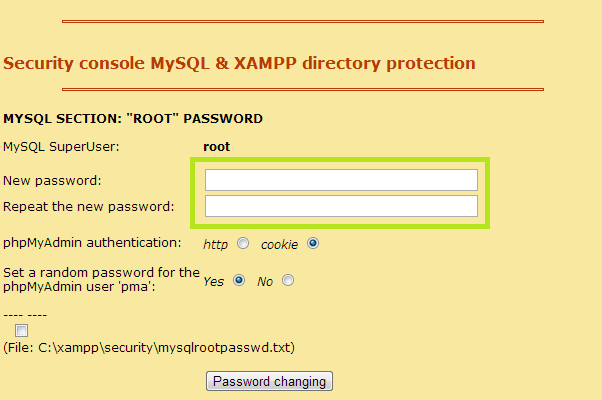
- Go to
- Type in a MySql password where it says "New Password" and "Repeat the new password" and press Password Changing.
REMEMBER THIS PASSWORD!

XrrRIRO.png


3. Download the DB SQL
- Go to and make a new database named r63b .
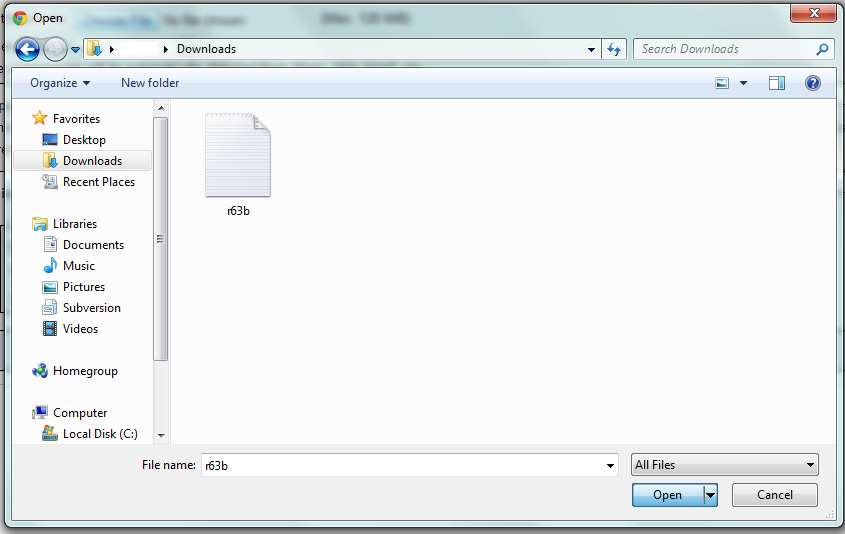
- Press Import and then Choose File
- Find the downloaded SQL and press open.
- Press "Go" and wait for the DB to import. (This might take a while).
(If you get an error about Xampp not being able to import DB, then download Navicatt and use that)

K3Go8GY.png


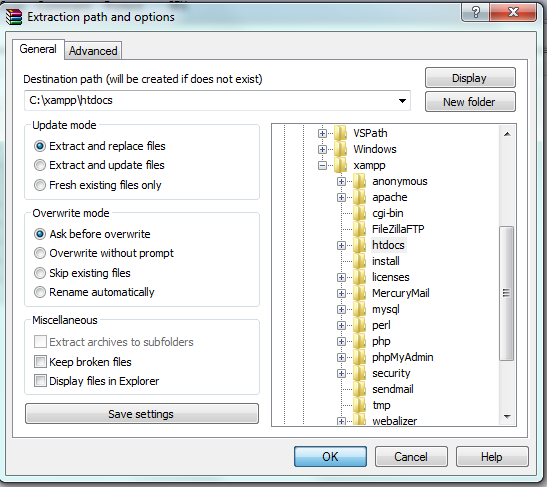
4. Next, go to your htdocs in your xampp folder.
- Delete everything in there.
- Download the RevCMS from the link above, and export them into your htdocs.

NdihWmp.png


5. Open htdocs > app > management > config.php
- Fill out the config based on the codes below. Do not change anything if it's not said so.

Code:
$_CONFIG['mysql']['connection_type'] = 'pconnect'; //Type of connection: It must be connect, or pconnect: if you want a persistent connection.


$_CONFIG['mysql']['hostname'] = 'localhost'; //MySQL host


$_CONFIG['mysql']['username'] = 'root'; //MySQL username


$_CONFIG['mysql']['password'] = 'DBPASSWORD'; //MySQL password


$_CONFIG['mysql']['database'] = 'r63b'; //MySQL database


$_CONFIG['mysql']['port'] = '3306'; //MySQL's port


/*
 
*
 
*    Hotel management  - All URLs do not end with an "/"
 
*
 
*/


$_CONFIG['hotel']['server_ip'] = 'ServerIP'; //IP of VPS/DEDI/etc


$_CONFIG['hotel']['url'] = 'http://localhost'; //Does not end with a "/"


$_CONFIG['hotel']['name'] = 'HOTEL NAME'; // Hotel's name


$_CONFIG['hotel']['desc'] = 'HOTEL MOTTO!'; //Hotel's description

6. Download the SWFS from above. Export these into your htdocs, this is a big file, so it will take some time to download and export. Be Patient ;)
- If you didn't change the name of the folder or the config, everything should be already set up for you!


7. Download the BcStorm Emulator and export them onto your desktop or anything else you want.
- Go into BcStorm Folder > Bin > Debug > Settings > Open configuration and fill it out accordingly :

Code:
## MySQL Configuration
 
db.hostname=localhost
 
db.port=3306
 
db.username=root
 
db.password=DBpassword
 
db.name=r63b
(Everything else should be fine)

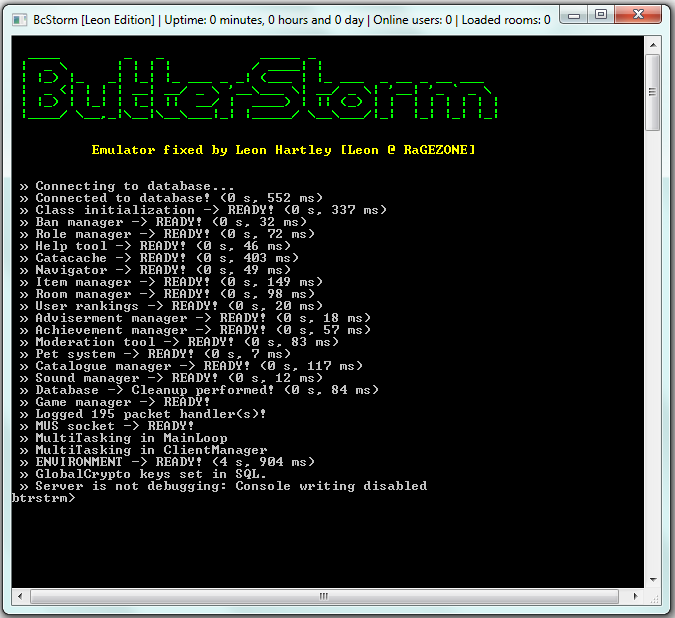
8. Go to BcStorm Folder > Bin > Debug > and open "Butterfly Emulator". Should run perfectly if you set everything up properly.

2z50pk6.png


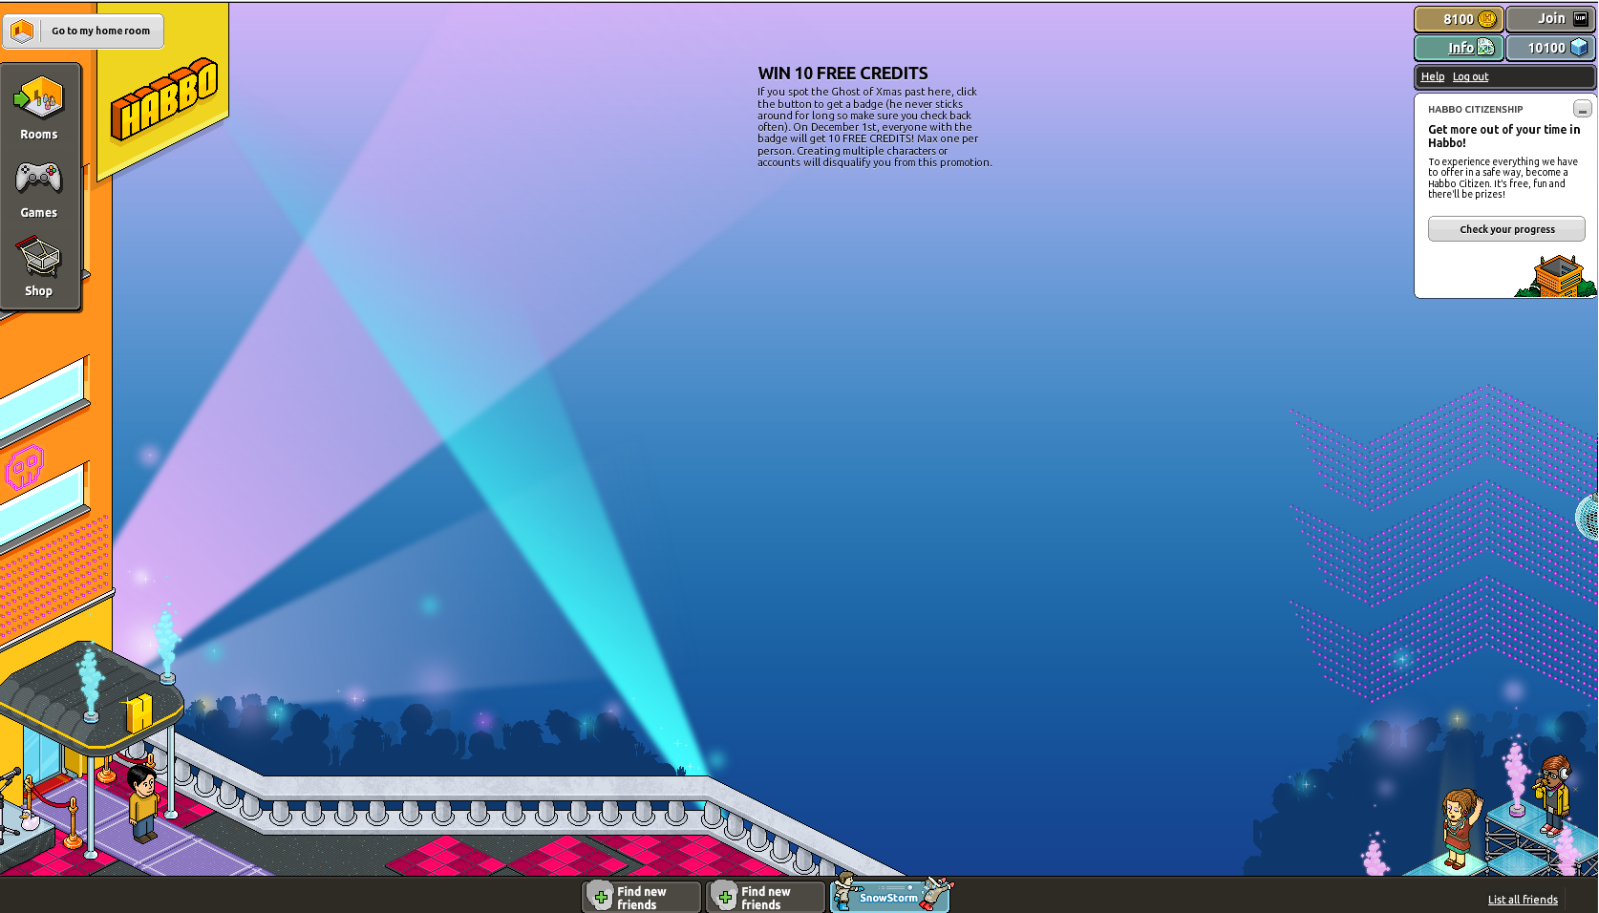
9. Make an account, and enter client, congratulations you now own a r63b retro! (That is if you did everything right :p )

2iboizn.png

___________________________________________________________________________________________
Credits:
Leon - BcStorm Emu
Kryptos - RevCMS
Kyle - Tut
Sadly, I have no clue on who I should give the credits to for the Swfs or SQL, so please tell me if you know!
___________________________________________________________________________________________

We must have a vps?
 
Status
Not open for further replies.

Users who are viewing this thread

Top