Kareem
Member
- Jul 6, 2012
- 54
- 11
Minecraft Server Tutorial
Hello and welcome to the noob-friendly tutorial on how to create a Minecraft Server! In this tutorial, you will learn the easier way to make a Minecraft Server. In my next tutorial, you will learn how to create a Spigot / Bukkit server! You will also be learning how to port forward your Minecraft Server!
Requirements:
- 15 Minutes Or Less Of Your Time
- Java Installed
- A Decent Computer
- Having Notepad++ Installed
VANILLA MINECRAFT:
To start things off, you are going to need to go to
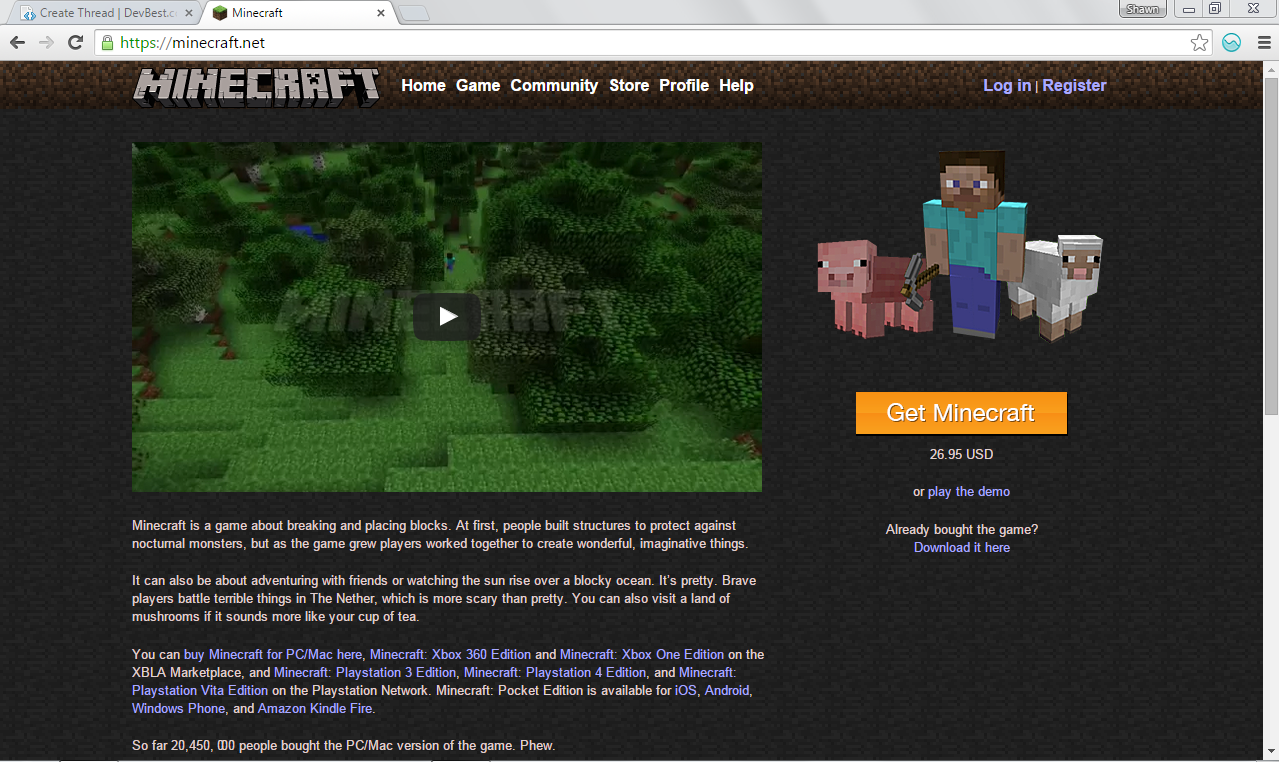
Next, where it says "Already bought the game? Download it here" you want to click "Download It Here".
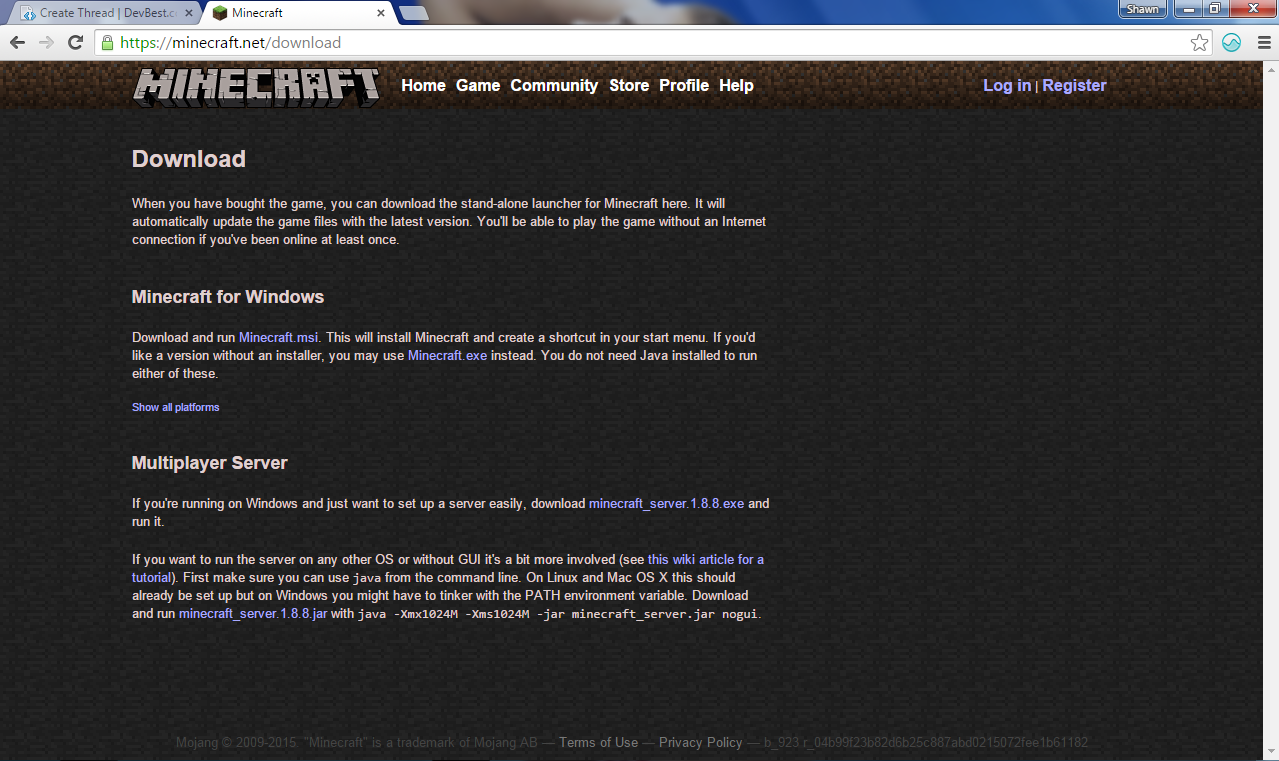
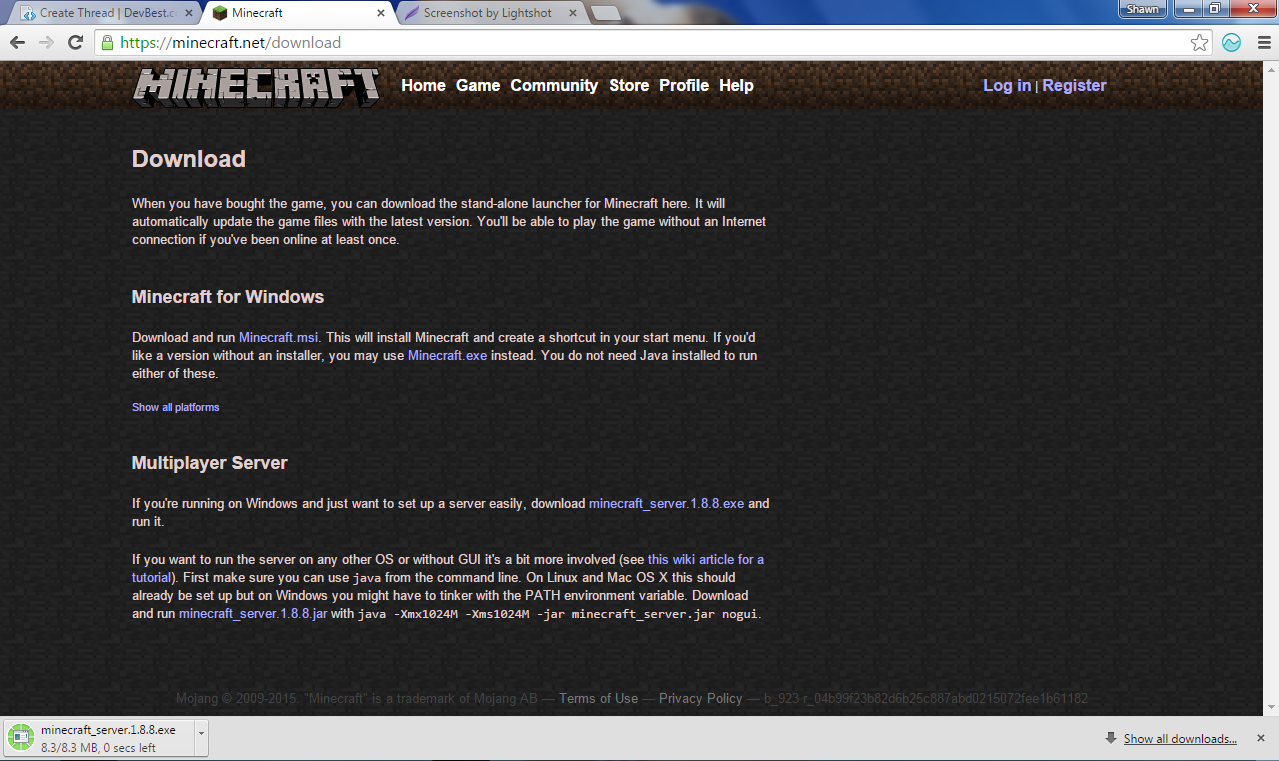
Then, navigate to where it says "Multiplayer Server" and click the download button (where it says download minecraft_server.1.8.8.exe). Warning: Do not open this file just yet!
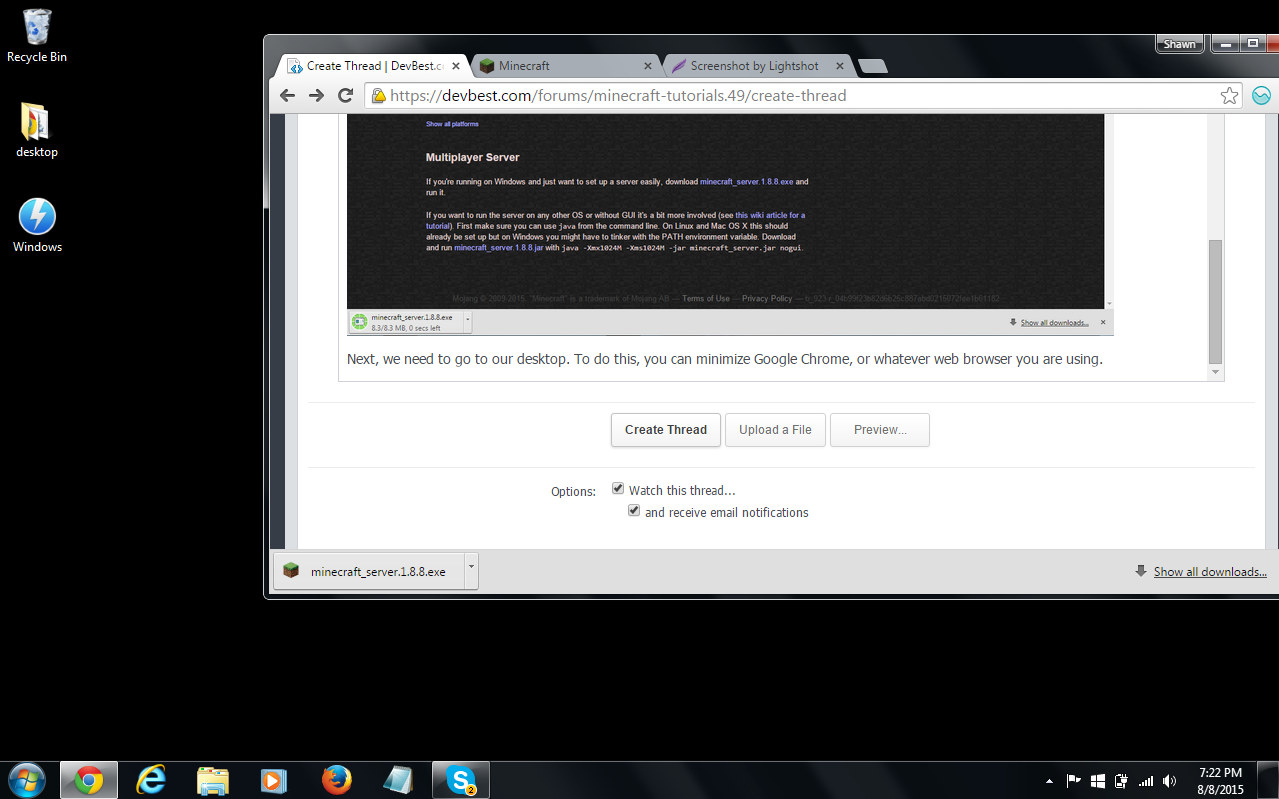
Next, we need to go to our desktop. To do this, you can minimize Google Chrome, or whatever web browser you are using.
Next, we need to create a folder called "Minecraft Server" or whatever you want the folder to be called.
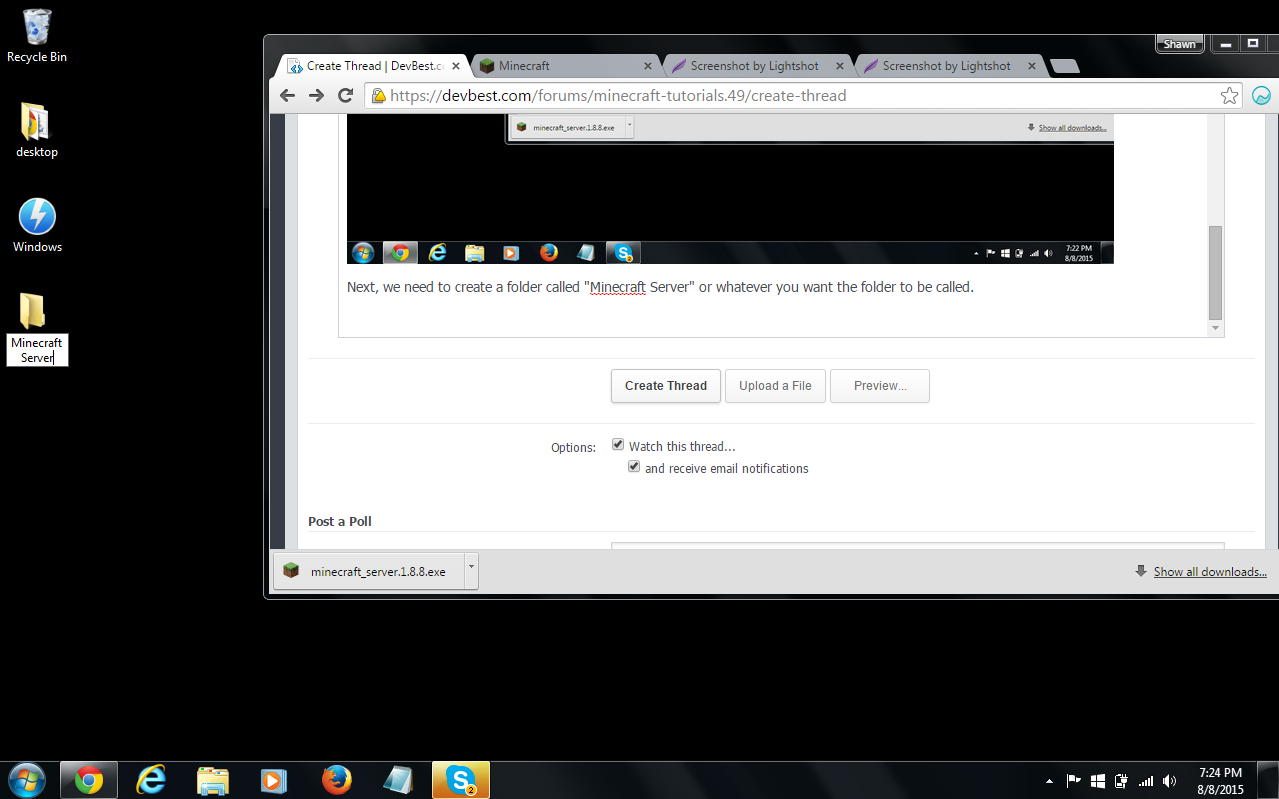
From here, we can then drag the minecraft_server.1.8.8.exe into the "Minecraft Server" folder or whatever you named the folder.
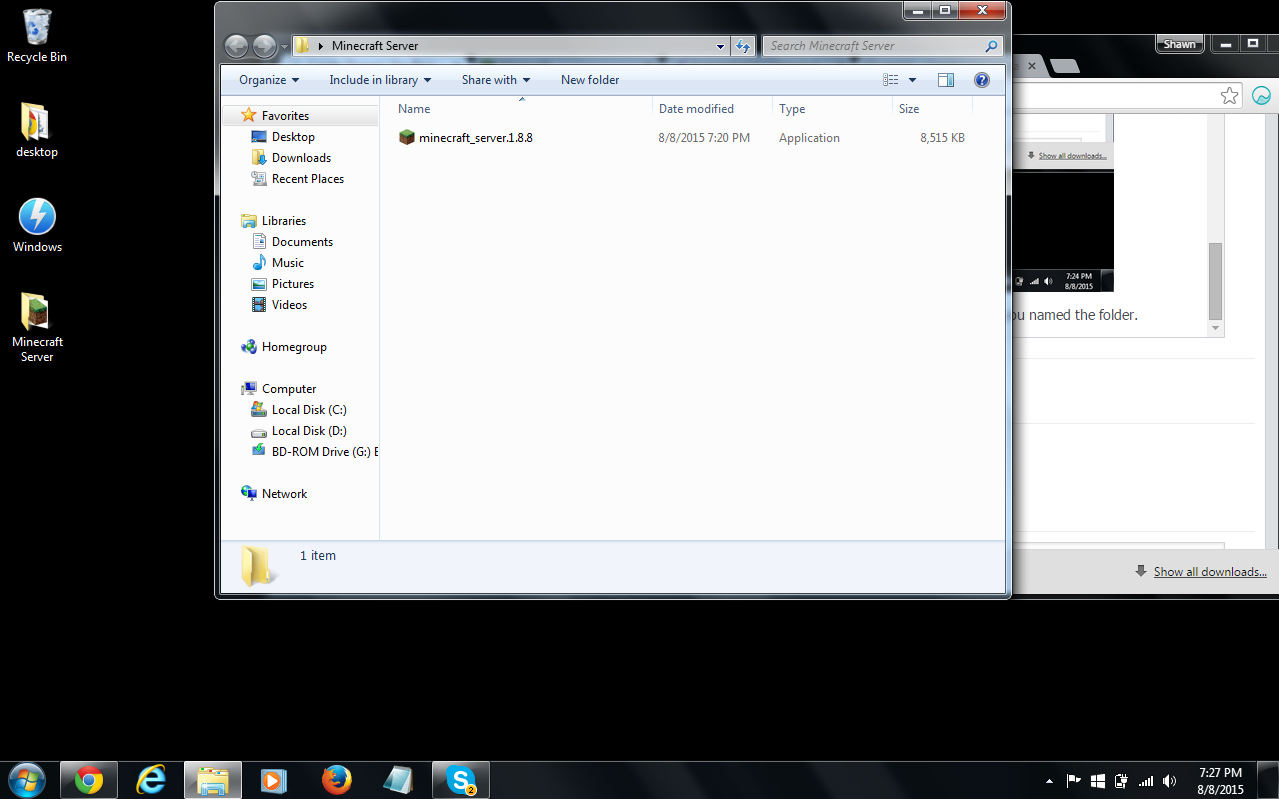
Next, let's double click on the minecraft_server.1.8.8.exe file. You will then see some files appear and a console running. When this happens, don't worry about it. Everything is alright and it's doing it's job. It can take up to 3 minutes. If the file fails, this means that there is something wrong. Paste a screenshot in the description, and i'll be able to help out!
After that, you want to go ahead and shutdown the program that has popped up by hitting the X button. (my computer is not compatible with this program, so I cannot show you a screenshot of what it looks like.)
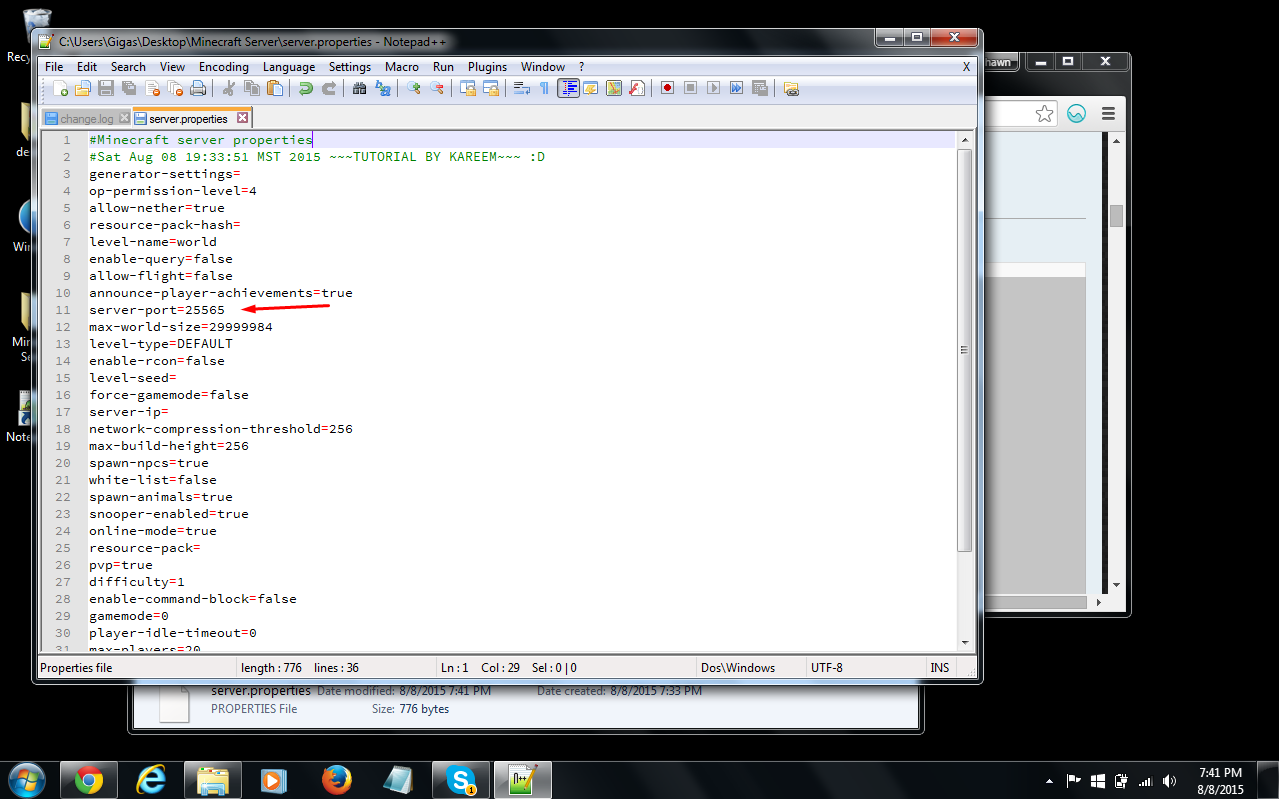
You are almost done! Now we just need to go to the server.properties file. To do this, you must have Notepad++ installed (Highly Recommended!). Right click the file, and hit "Edit with Notepad++". The file properties folder should popup, and show something like this:
#Minecraft server properties
#(File Modification Datestamp)
generator-settings=
op-permission-level=4
allow-nether=true
resource-pack-hash=
level-name=world
enable-query=false
allow-flight=false
announce-player-achievements=true
server-port=25565
max-world-size=29999984
level-type=DEFAULT
enable-rcon=false
level-seed=
force-gamemode=false
server-ip=
network-compression-threshold=256
max-build-height=256
spawn-npcs=true
white-list=false
spawn-animals=true
snooper-enabled=true
online-mode=true
resource-pack=
pvp=true
difficulty=1
enable-command-block=false
gamemode=0
player-idle-timeout=0
max-players=20
max-tick-time=60000
spawn-monsters=true
generate-structures=true
view-distance=10
motd=A Minecraft Server
If this is the case, good! If it's a little bit different, I was probably using a little bit of an outdated server.properties file. Anyways, we want to make sure that the servers port is "25565". This arrow will show you where the servers port is:
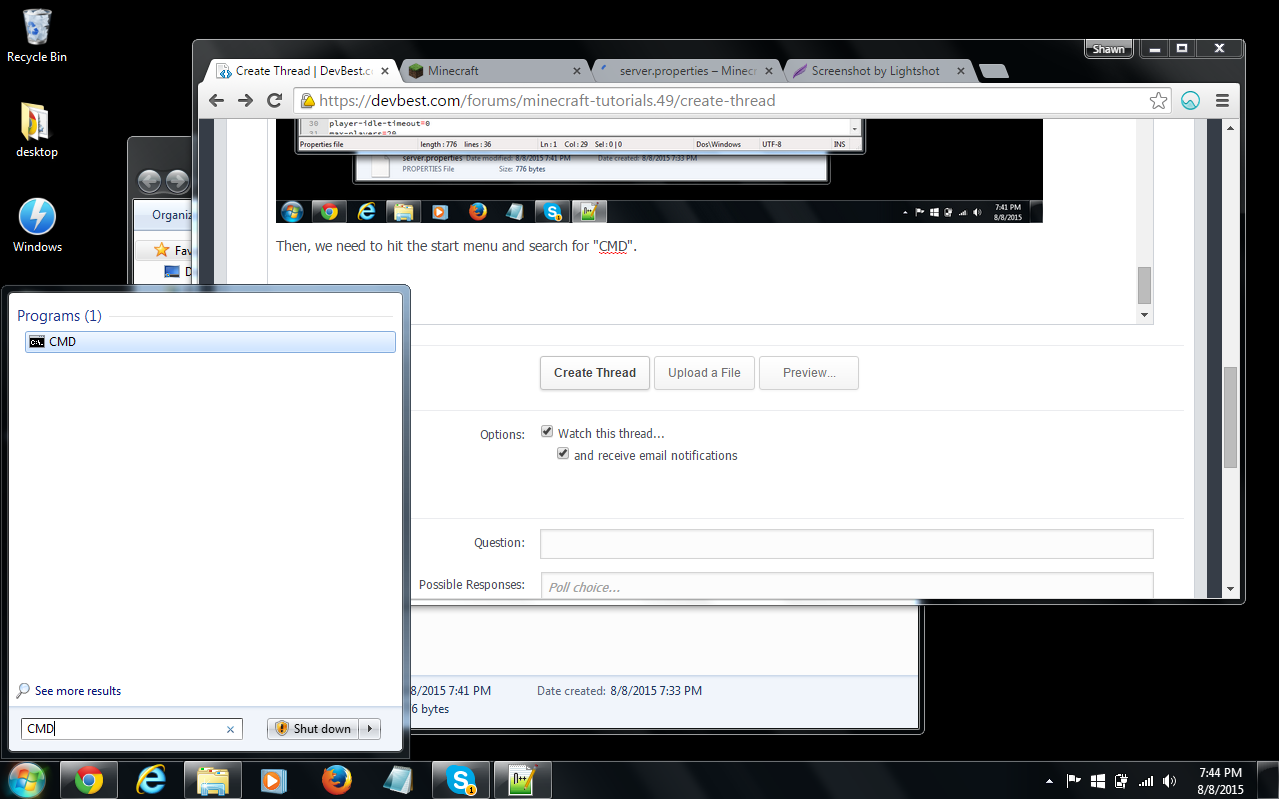
Then, we need to hit the start menu and search for "CMD".
Next, open up CMD and type "Ip-Config". I am going to be blocking mine on purpose here, but yours should not be blocked. Scroll up until you see "IPv4 Address".
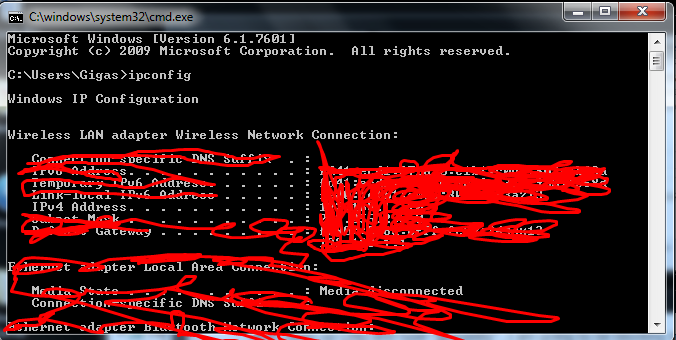
You need to copy this address, and then move it over to the server.properties file. Your IPv4 will be something different than mine. MAKE SURE YOU SAVE!
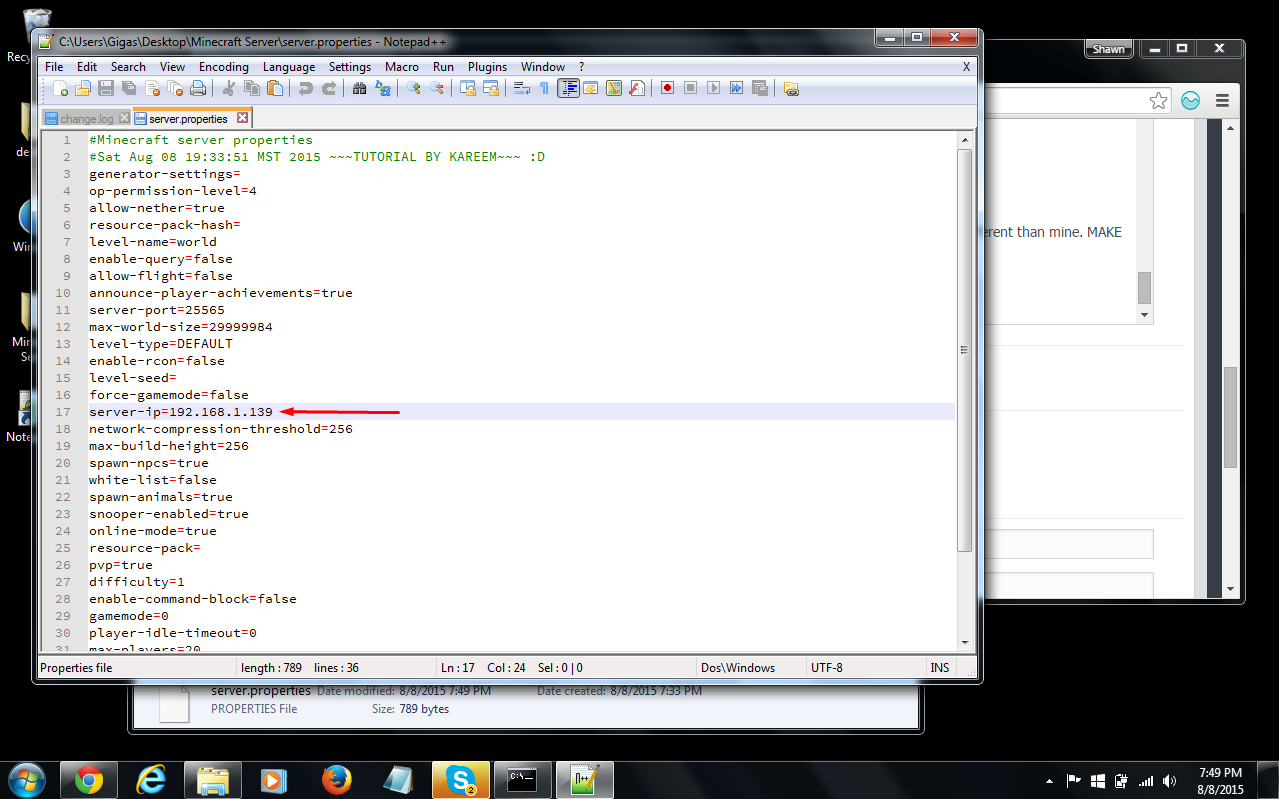
Now you are set! First off, you want to make sure that you are portforwarded. To learn how to portforward, watch this video:(Video not by me)
Then you are set! Now just go to your internet browser, look up "What's my IP" then give your friends that IP to play on! Warning: Do not give this IP out to strangers! You could get DDOSED!
Hello and welcome to the noob-friendly tutorial on how to create a Minecraft Server! In this tutorial, you will learn the easier way to make a Minecraft Server. In my next tutorial, you will learn how to create a Spigot / Bukkit server! You will also be learning how to port forward your Minecraft Server!
Requirements:
- 15 Minutes Or Less Of Your Time
- Java Installed
- A Decent Computer
- Having Notepad++ Installed
VANILLA MINECRAFT:
To start things off, you are going to need to go to
You must be registered for see links
.
Next, where it says "Already bought the game? Download it here" you want to click "Download It Here".

Then, navigate to where it says "Multiplayer Server" and click the download button (where it says download minecraft_server.1.8.8.exe). Warning: Do not open this file just yet!

Next, we need to go to our desktop. To do this, you can minimize Google Chrome, or whatever web browser you are using.

Next, we need to create a folder called "Minecraft Server" or whatever you want the folder to be called.

From here, we can then drag the minecraft_server.1.8.8.exe into the "Minecraft Server" folder or whatever you named the folder.

Next, let's double click on the minecraft_server.1.8.8.exe file. You will then see some files appear and a console running. When this happens, don't worry about it. Everything is alright and it's doing it's job. It can take up to 3 minutes. If the file fails, this means that there is something wrong. Paste a screenshot in the description, and i'll be able to help out!
After that, you want to go ahead and shutdown the program that has popped up by hitting the X button. (my computer is not compatible with this program, so I cannot show you a screenshot of what it looks like.)
You are almost done! Now we just need to go to the server.properties file. To do this, you must have Notepad++ installed (Highly Recommended!). Right click the file, and hit "Edit with Notepad++". The file properties folder should popup, and show something like this:
#Minecraft server properties
#(File Modification Datestamp)
generator-settings=
op-permission-level=4
allow-nether=true
resource-pack-hash=
level-name=world
enable-query=false
allow-flight=false
announce-player-achievements=true
server-port=25565
max-world-size=29999984
level-type=DEFAULT
enable-rcon=false
level-seed=
force-gamemode=false
server-ip=
network-compression-threshold=256
max-build-height=256
spawn-npcs=true
white-list=false
spawn-animals=true
snooper-enabled=true
online-mode=true
resource-pack=
pvp=true
difficulty=1
enable-command-block=false
gamemode=0
player-idle-timeout=0
max-players=20
max-tick-time=60000
spawn-monsters=true
generate-structures=true
view-distance=10
motd=A Minecraft Server
If this is the case, good! If it's a little bit different, I was probably using a little bit of an outdated server.properties file. Anyways, we want to make sure that the servers port is "25565". This arrow will show you where the servers port is:

Then, we need to hit the start menu and search for "CMD".

Next, open up CMD and type "Ip-Config". I am going to be blocking mine on purpose here, but yours should not be blocked. Scroll up until you see "IPv4 Address".

You need to copy this address, and then move it over to the server.properties file. Your IPv4 will be something different than mine. MAKE SURE YOU SAVE!

Now you are set! First off, you want to make sure that you are portforwarded. To learn how to portforward, watch this video:(Video not by me)
Then you are set! Now just go to your internet browser, look up "What's my IP" then give your friends that IP to play on! Warning: Do not give this IP out to strangers! You could get DDOSED!

