Johnniyo
yo.
- May 4, 2012
- 66
- 6
This is part of my other tutorial, the original can be found here:
You must be registered for see links
Integrating PHP with Apache is difficult, and is the hardest step of the webserver installation, therefore you will NEED to follow every single detail to ensure that you have installed it correctly. Please pay close attention to the detail - I will try to make this as noob friendly as possible.
There is an issue with the Spoilers, can't work out what the hell is wrong with it, but I will try to sort it out later. For now, you will just need to click it to find the right content.
Step 1: Extraction!
Begin by looking for the php-5.2.zip in your Web Kit.
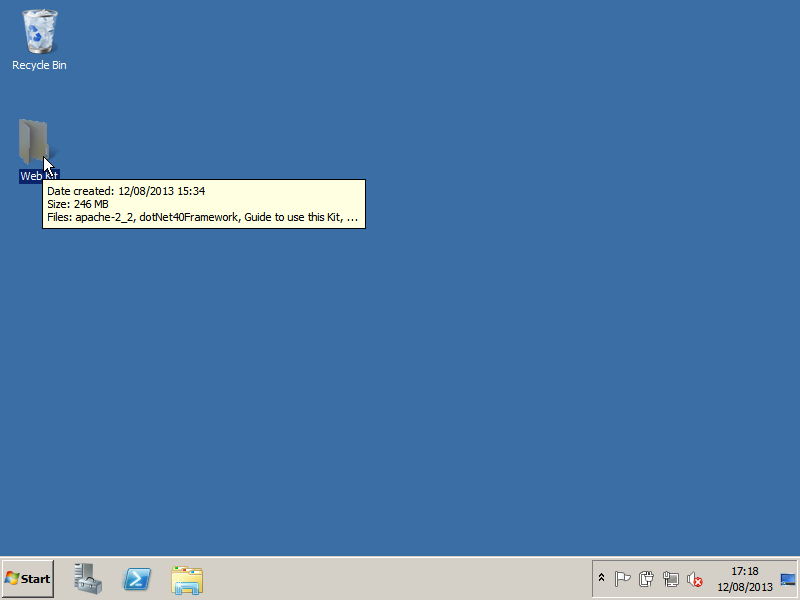
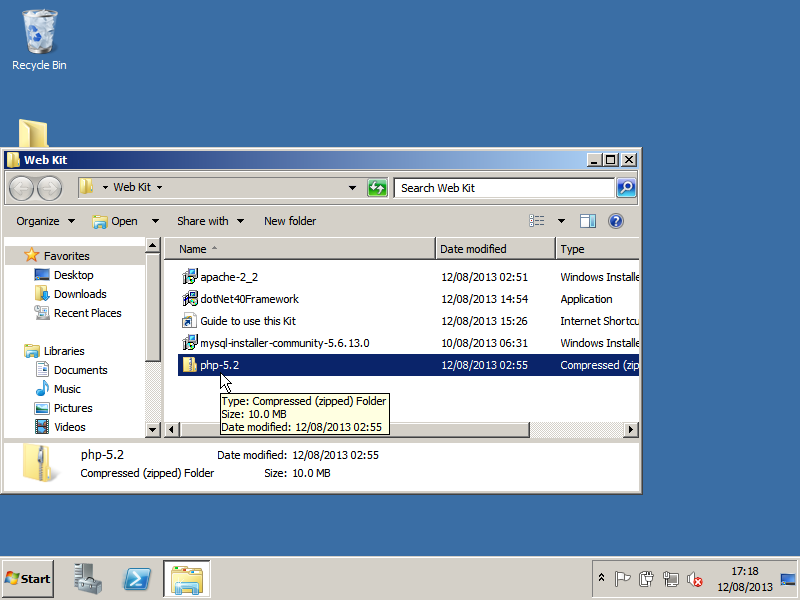
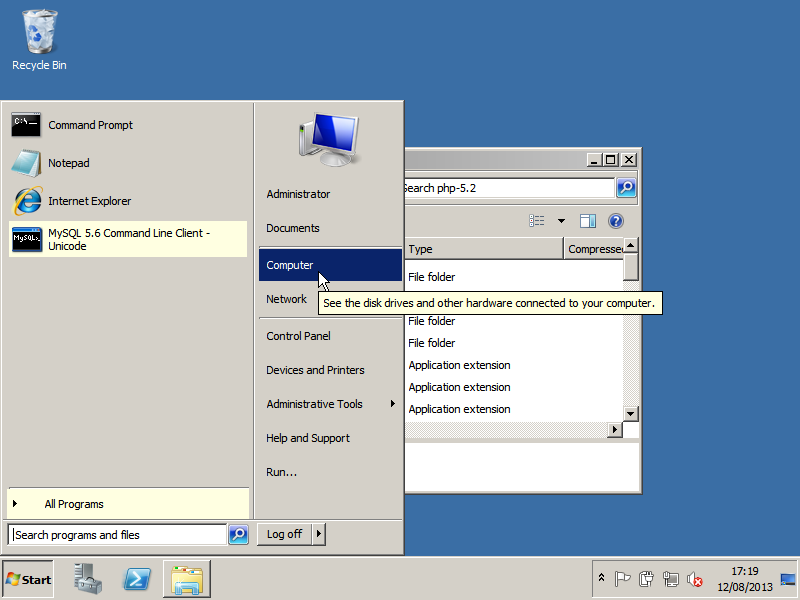
Then, go to the Start Menu and click Computer (whilst leaving your PHP files window OPEN).
On Computer, go to your Local Disk Drive.
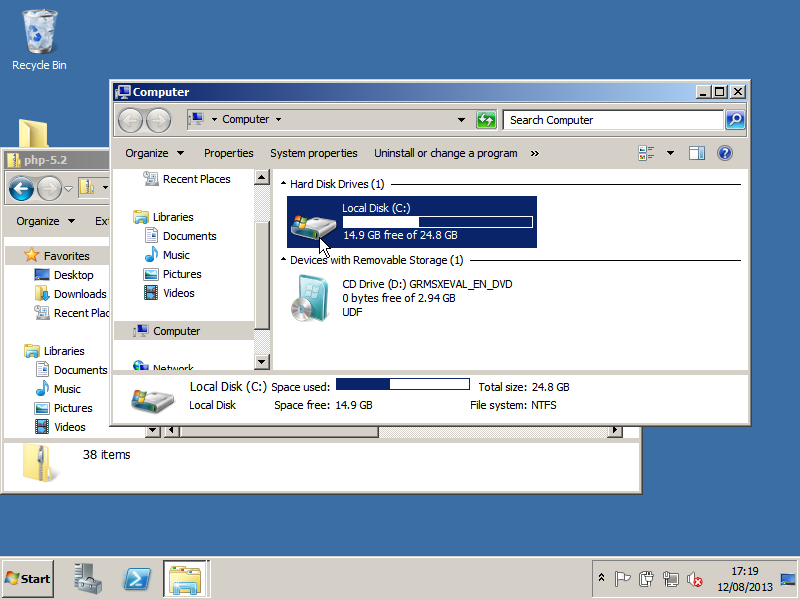
In the Local Disk Drive, create a New Folder, and call it PHP.
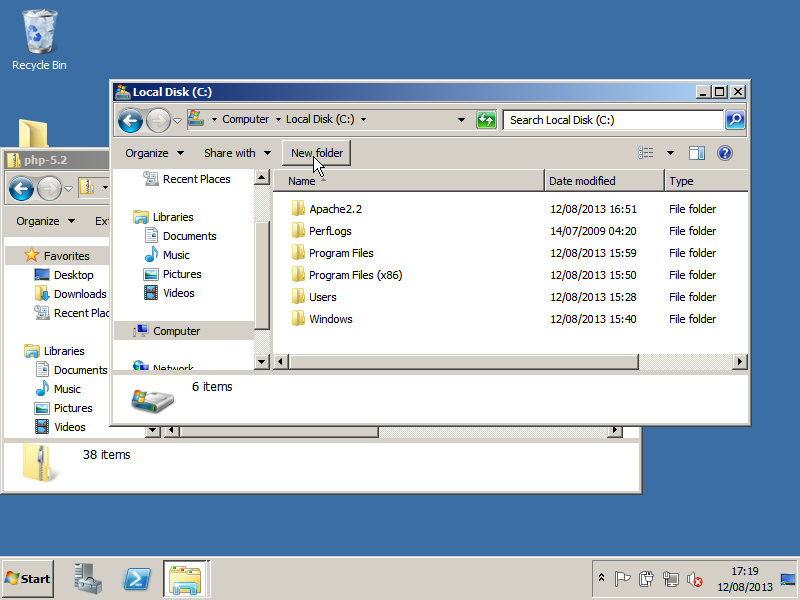
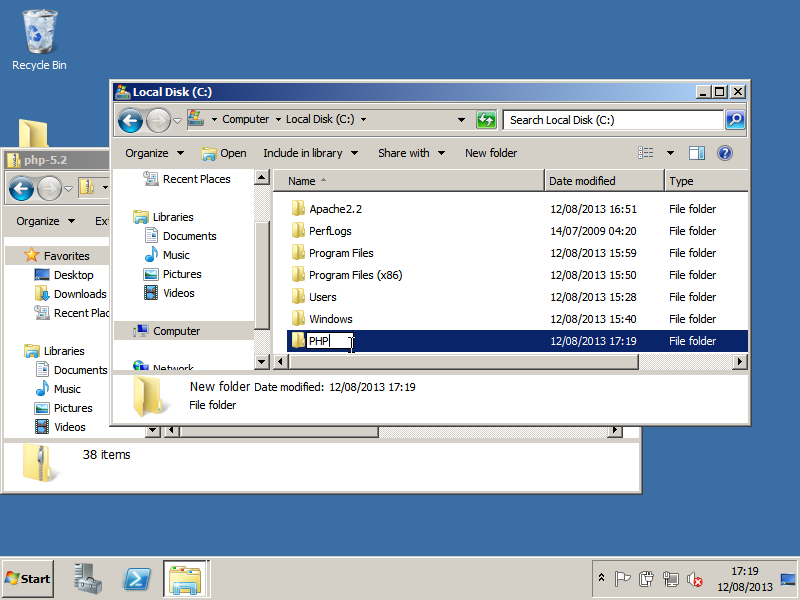
Go back to your php-5.2.zip file, and copy all the contents of the php-5.2.zip to your newPHP folder you made into the Local Disk.
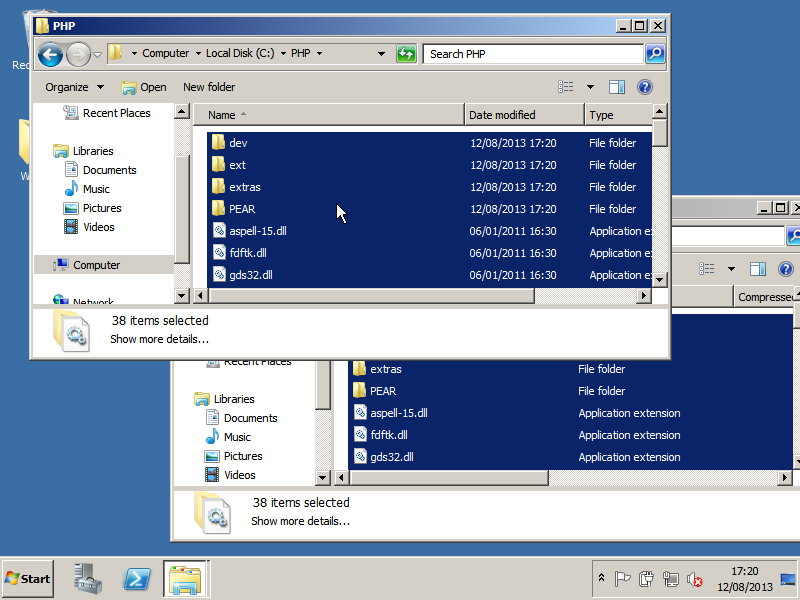
Make sure that there is a php5apache2_2.dll file in your PHP folder. Once you've done that, that is it for extraction!
Step 2: Recognition!
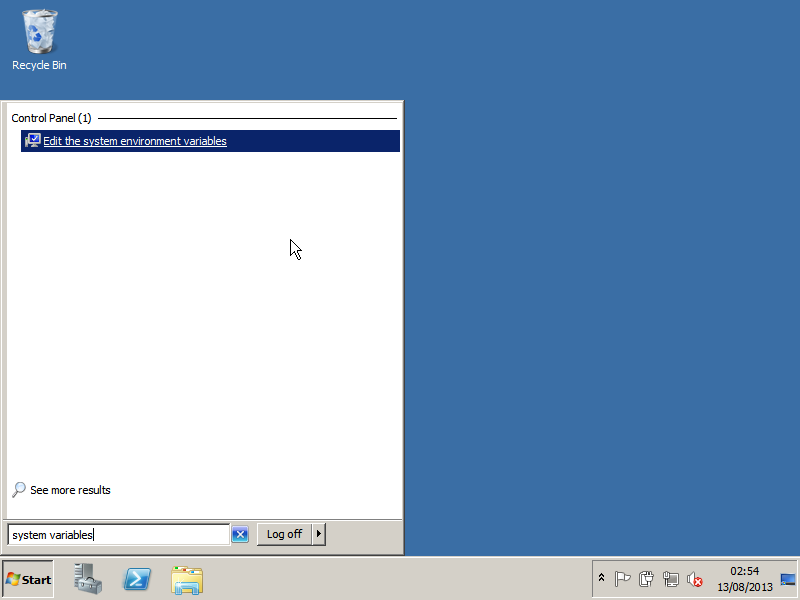
We will need to now add PHP to the System Environment Variables List. To do this, start by going onto the Start Menu and search for "system variables". The result should come as Edit the system environment variables under the Control Panel. Open it.
When the System Properties window comes up, click on the Environment Variables button, located above the Apply button.
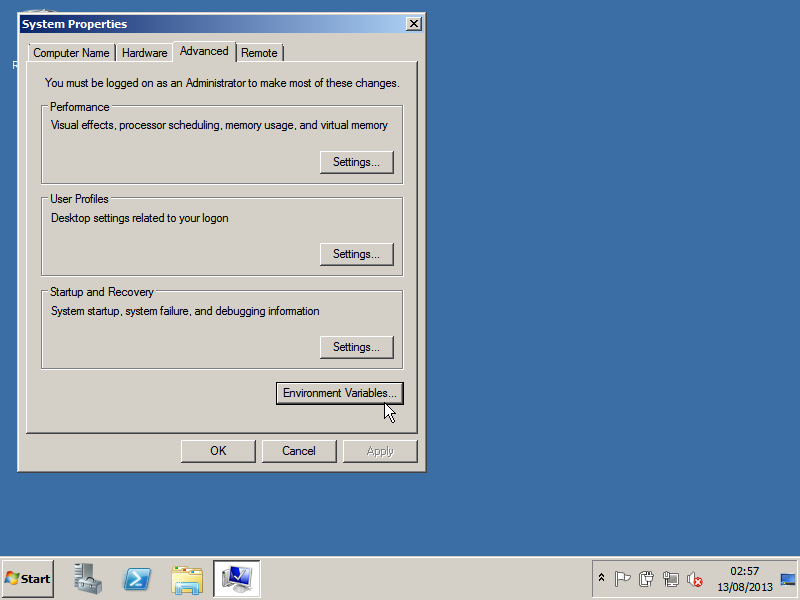
When the Environment Variables come up, look for the Path variable, under the System Variables (hint: under the Variables bar, it should be called Path).
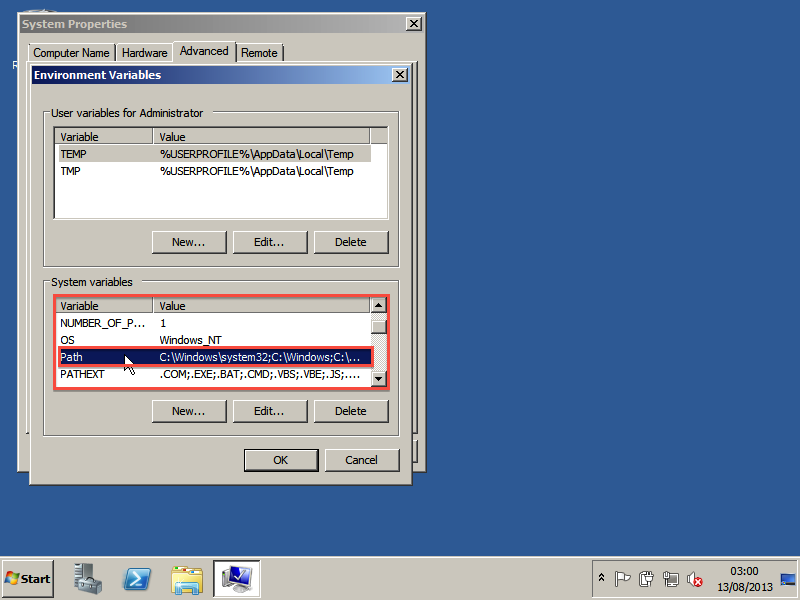
Click Edit to edit the Path variable, and add the following line to the end of the list (make sure it is the very end of the list!)
;C:\PHP;C:\PHP\ext
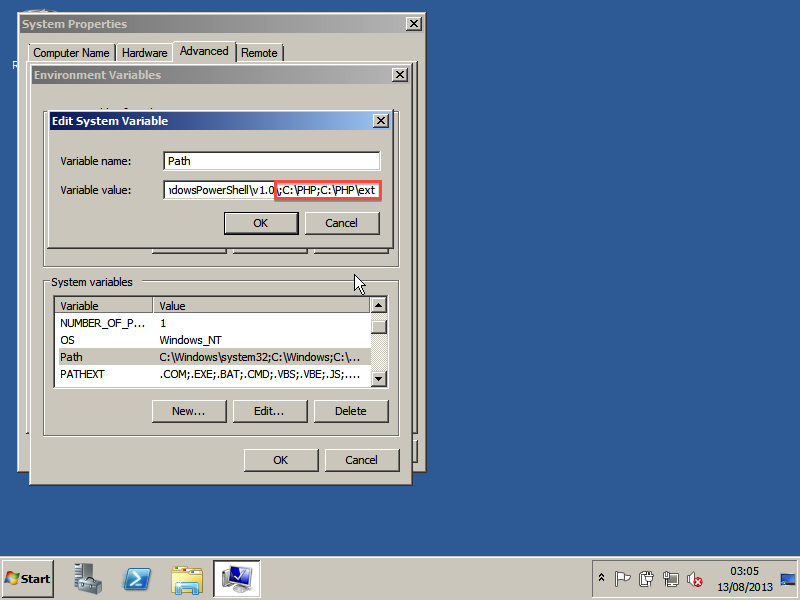
Then click OK, and save your settings. That is it for this step!
Step 3: Integration!
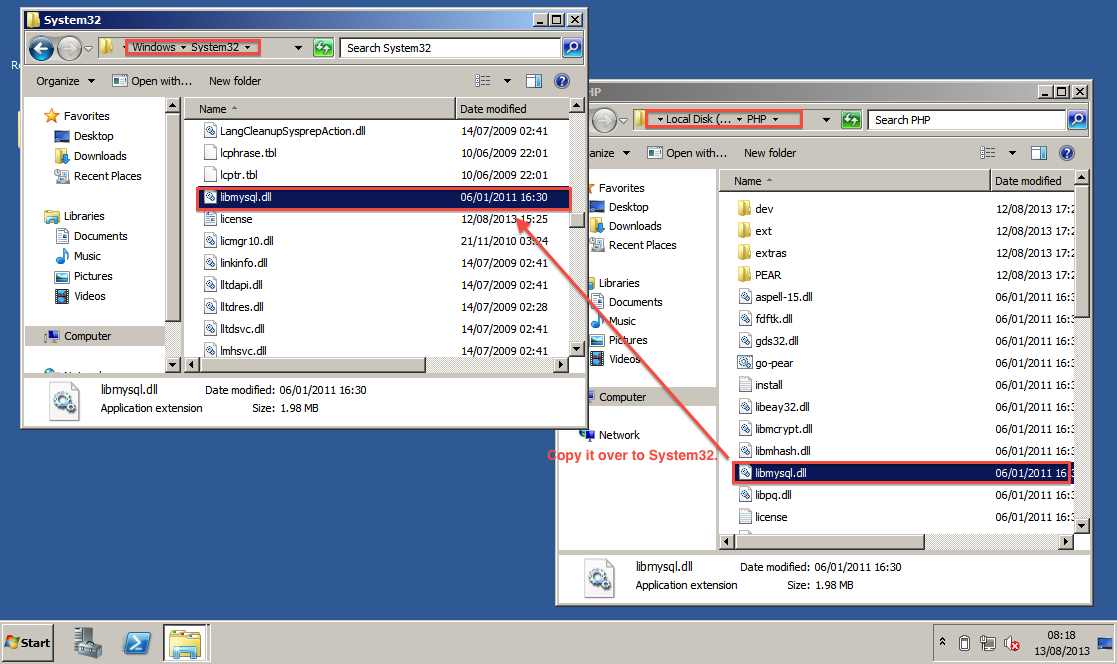
This will be the hardest, and final step. To begin, go to your PHP folder you created in the Local Disk.Look for a file called 'libmysql.dll'. Copy this over to your system32 folder (this folder is located in your Local Disk, under Windows).
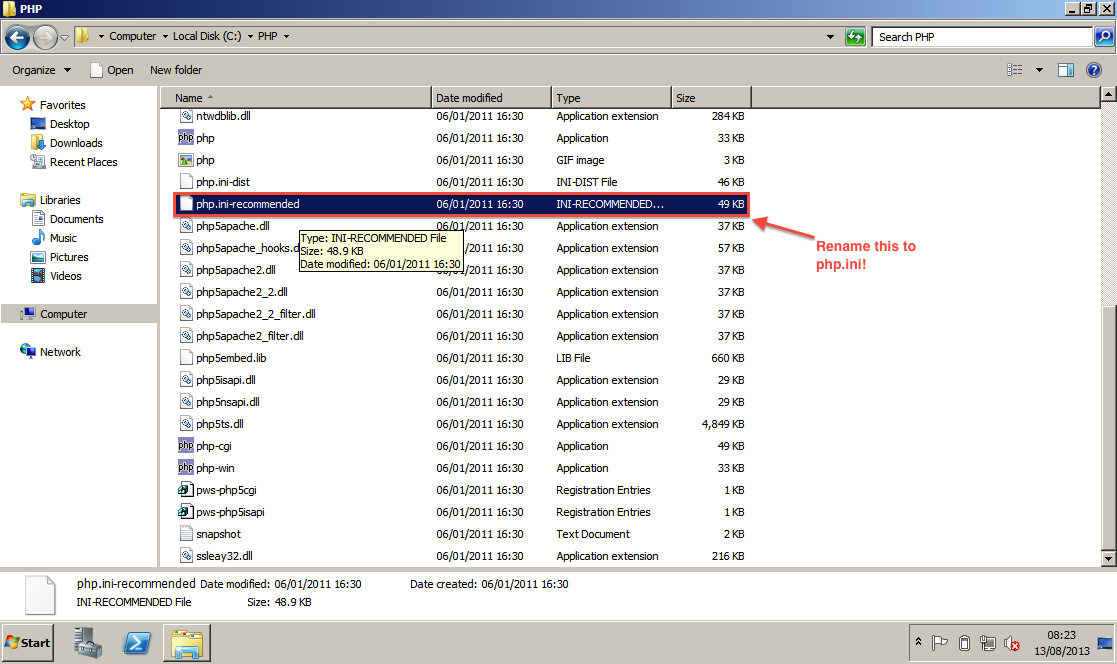
Then, you can close the system32 folder, but keep the PHP folder open. In the folder, find a file called php-recommended.ini. Rename it to php.ini.
Then open your php.ini in a Text Editor. For this, I will use Notepad++ (just a preference). It is useful if you backup your file before editing, in-case something goes wrong. You may also find CTRL+F useful for this step.
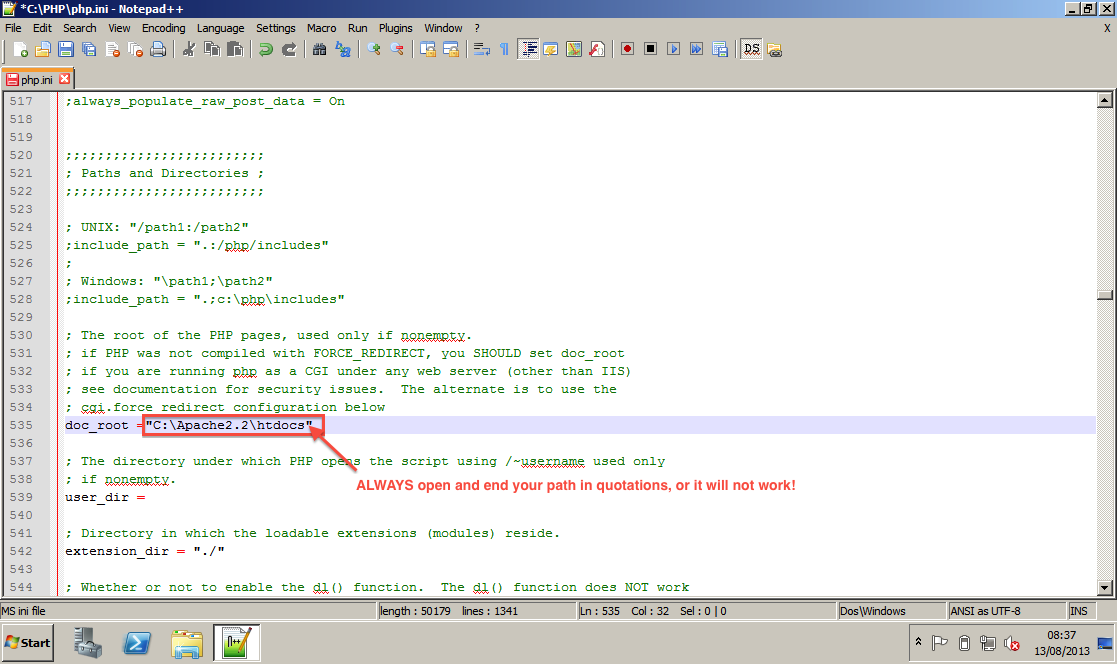
Find the doc_root property in your configuration. Set this to the folder of your apache htdocs. If you installed it using my path, enter "C:\Apache2.2\htdocs". Otherwise, enter the path where your htdocs resides (hint: this is under the Apache Folder, and also always use quotation marks (" ") to open and end your path.
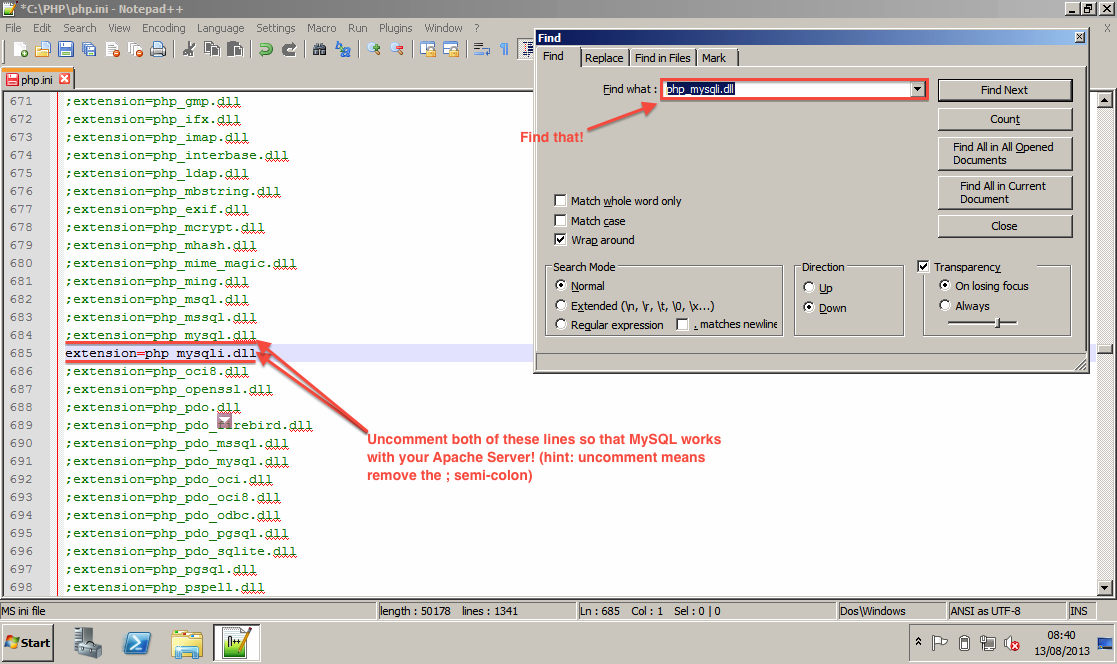
Then, find php_mysqli.dll. Uncomment the 2 lines with php_mysql.dll and php_mysqli.dll. Uncomment means remove the semicolon (the one that shows before the line begins, if you're using Notepad++, when you remove it, it should not be green anymore).
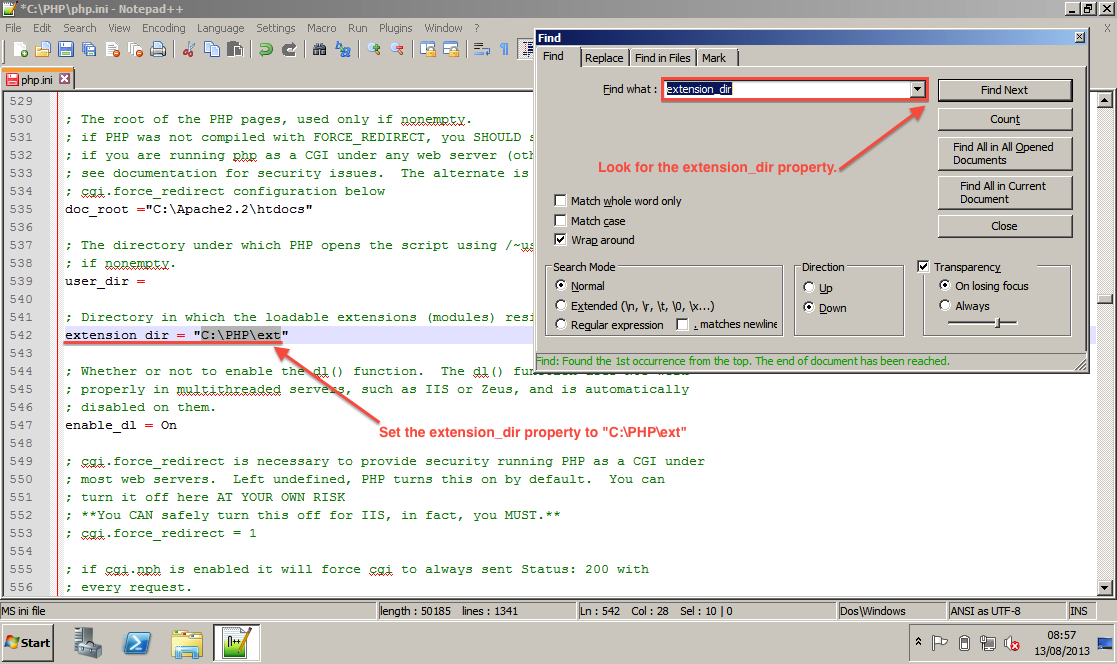
Then, find the property called extension_dir and set it "C:\PHP\ext".
Once that is done, Save it and close it. We will now tell Apache that PHP is installed, and that Apache should use it.
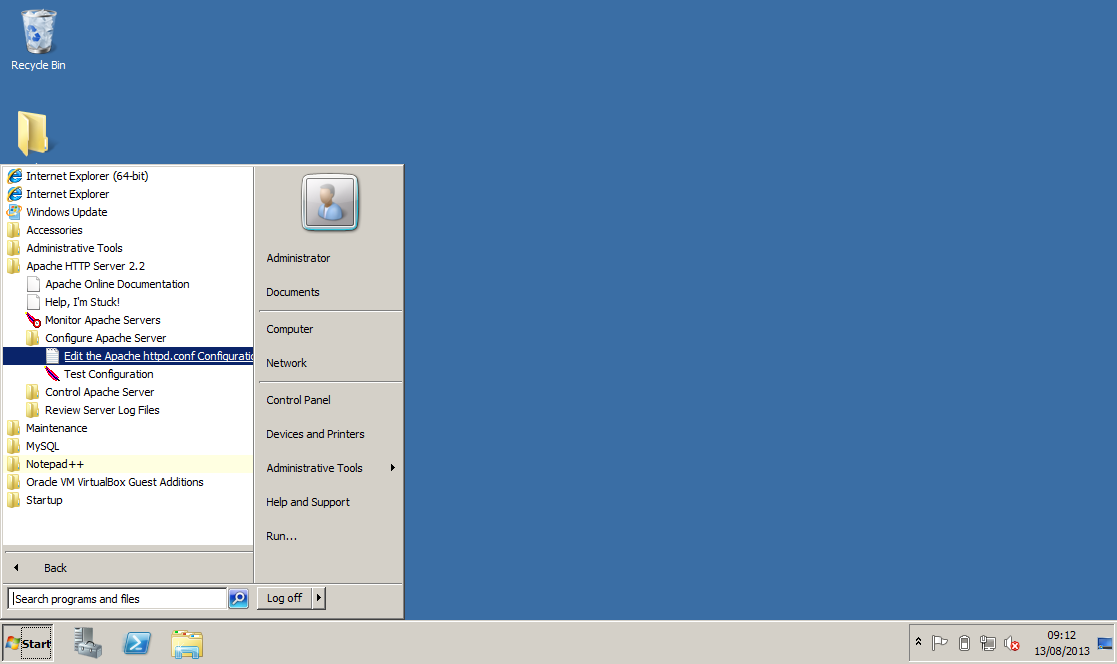
To do this, go to the Start Menu, then All Programs, and then open the Apache HTTP Server 2.2, and then under Configure Apache Server, open the Edit the Apache httpd.conf Configuration File option.
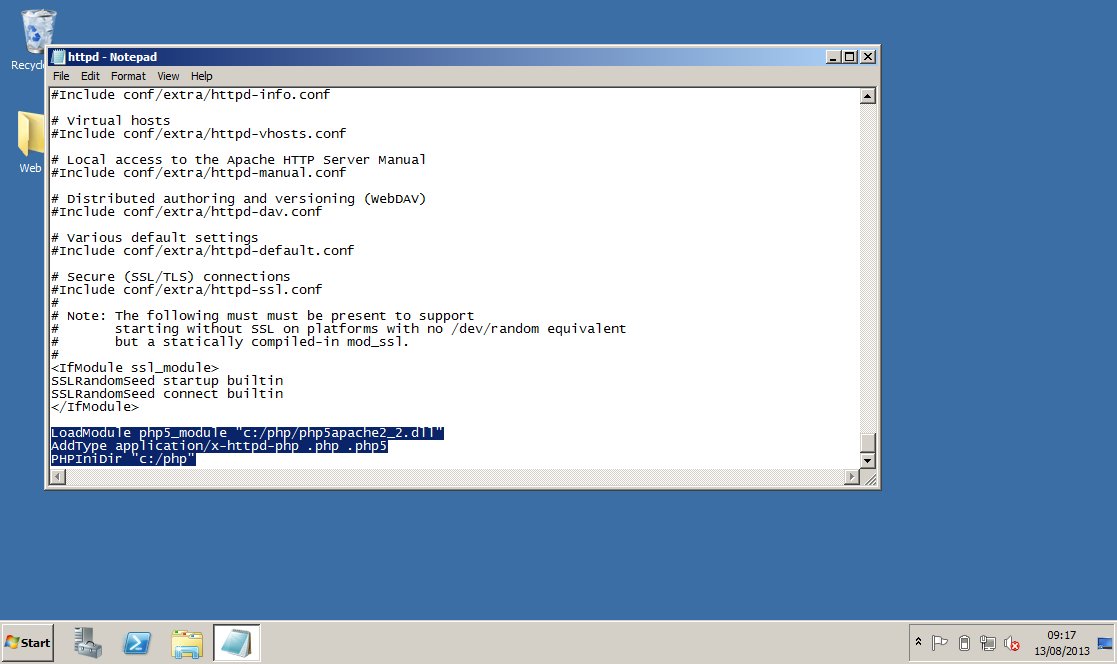
Go to right the very end of the configuration, add the following lines:

Then, you can close the system32 folder, but keep the PHP folder open. In the folder, find a file called php-recommended.ini. Rename it to php.ini.

Then open your php.ini in a Text Editor. For this, I will use Notepad++ (just a preference). It is useful if you backup your file before editing, in-case something goes wrong. You may also find CTRL+F useful for this step.
Find the doc_root property in your configuration. Set this to the folder of your apache htdocs. If you installed it using my path, enter "C:\Apache2.2\htdocs". Otherwise, enter the path where your htdocs resides (hint: this is under the Apache Folder, and also always use quotation marks (" ") to open and end your path.

Then, find php_mysqli.dll. Uncomment the 2 lines with php_mysql.dll and php_mysqli.dll. Uncomment means remove the semicolon (the one that shows before the line begins, if you're using Notepad++, when you remove it, it should not be green anymore).

Then, find the property called extension_dir and set it "C:\PHP\ext".

Once that is done, Save it and close it. We will now tell Apache that PHP is installed, and that Apache should use it.
To do this, go to the Start Menu, then All Programs, and then open the Apache HTTP Server 2.2, and then under Configure Apache Server, open the Edit the Apache httpd.conf Configuration File option.

Go to right the very end of the configuration, add the following lines:
LoadModule php5_module "c:/php/php5apache2_2.dll"
AddType application/x-httpd-php .php .php5
PHPIniDir "c:/php"

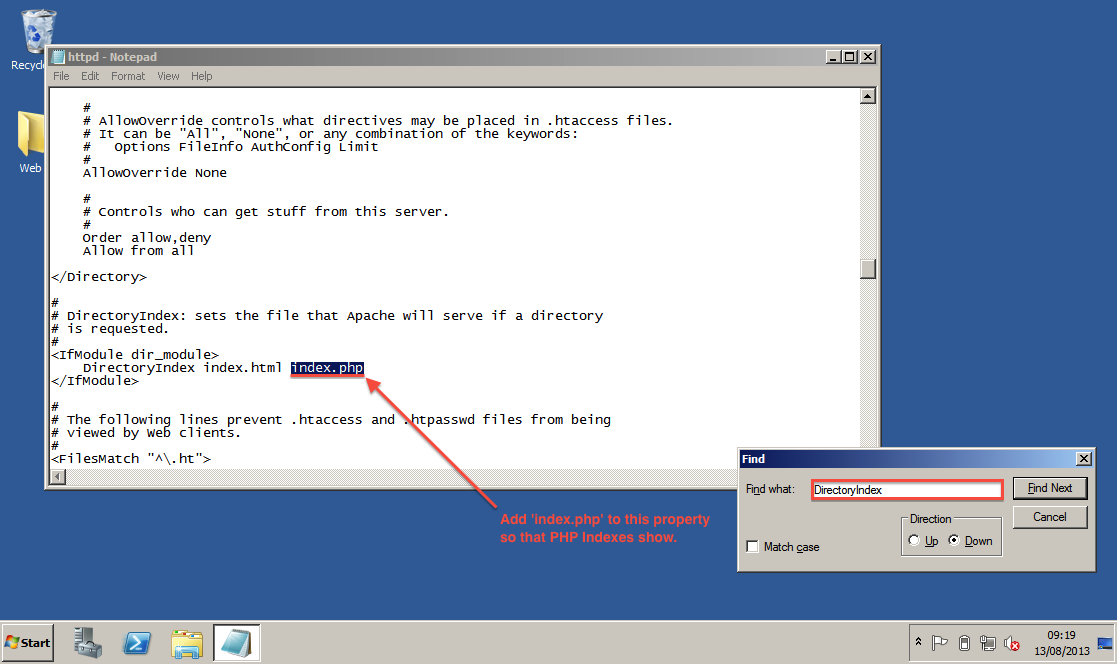
Then, find the property called DirectoryIndex and add index.php and index.php5 to the list. Once you've done that, save it and close it.

Then, restart your Apache Server and it should all be set! A basic working webserver, ready to run any web apps you want!
If you have any issues, PM me or read my Troubleshooting in my original thread.
