Notorious
The Notorious D.E.E
- Mar 2, 2012
- 141
- 86
Have you ever wanted to make your own toplist banner? Now's your chance, I'll be giving a basic tutorial on how you can achieve that. There's a few programmes you can use, I personally use Paint.Net & their custom plugins, they provide excellent tools for a free software. The plugins are an option, they provide the necessary tools to construct premium quality banners. Can't construct a background for your banner? There's tons of templates released by myself. Now let's get started with the downloads.
Install the software & plugin.
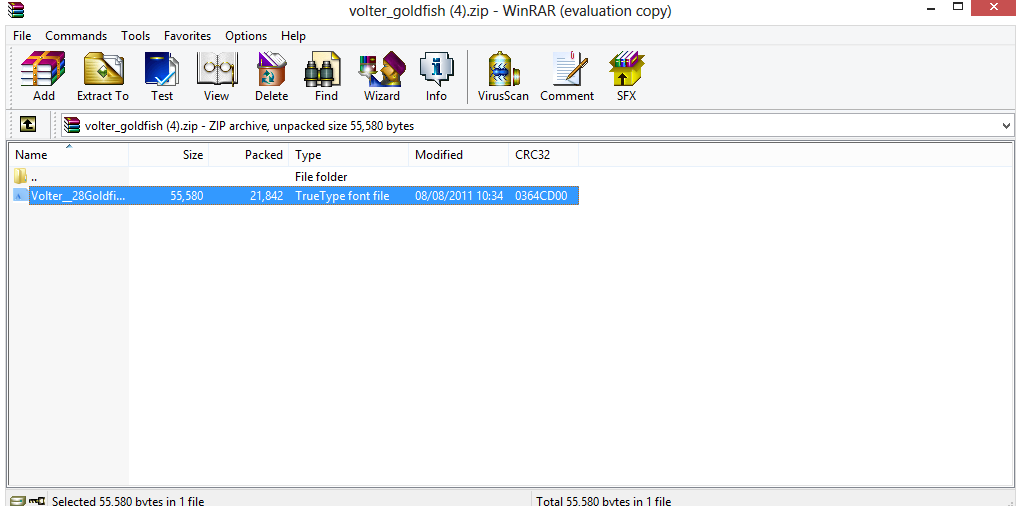
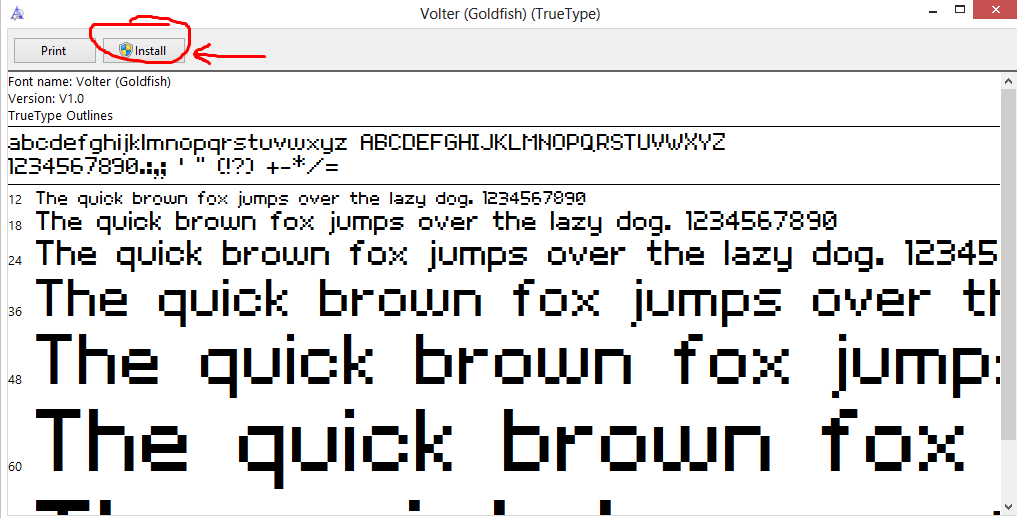
Download the Volter Font. You'll get a zip file, double click the file. You'll see one file, double click the file. Let your computer extract the TrueType font file. A page will flash up showing the font, at the top left, you'll find an install button, click the button and be patient. If you're having troubles, follow the images.

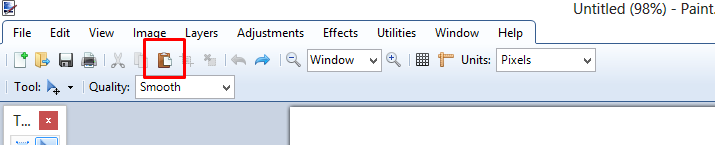
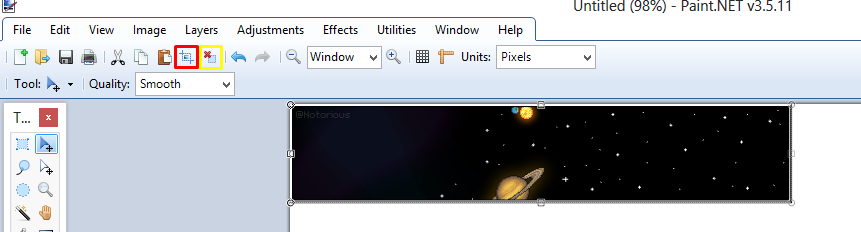
Now that you've got the font installed, go ahead and open paint, Copy the banner from the page, click back on Paint.net and click the paste button or Ctrl+V. Now crop the image (red) & deselect the image (yellow). Sometimes cropping automatically deselects the image.
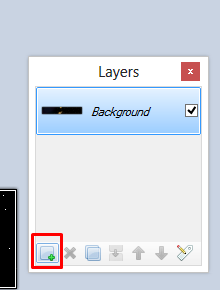
Now prepare yourself for hell, this is the slightly difficult part for people who has never used this software. Create a new layer (red) paste the boarder template over the banner background, even though there's already one attached.
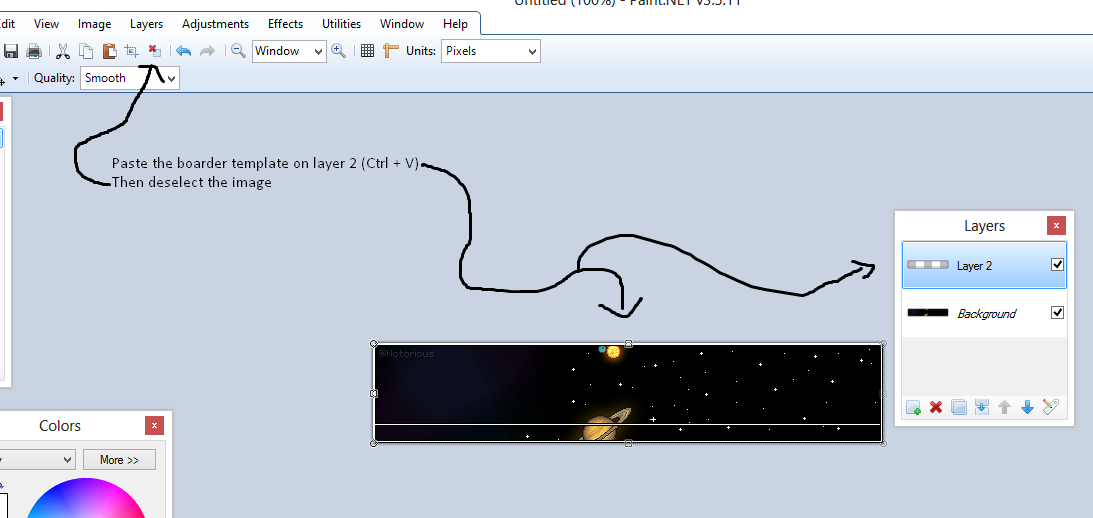
Rename Layer 2 by double clicking it. A small box will pop up, replace the name Layer 2 with Boarder, to keep things organized. Then click OK & deselect the image.

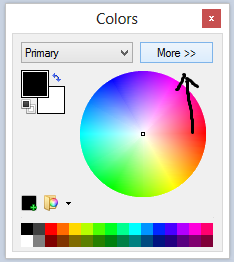
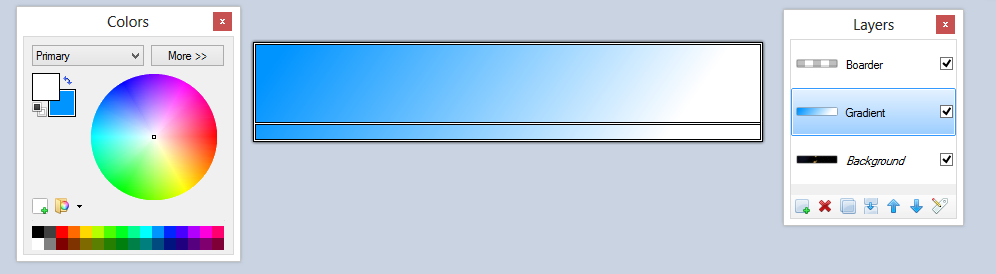
Click the background layer, add a new layer. And like before, rename the layer to Gradient, this is the part we start getting creative. Select two colours you want.
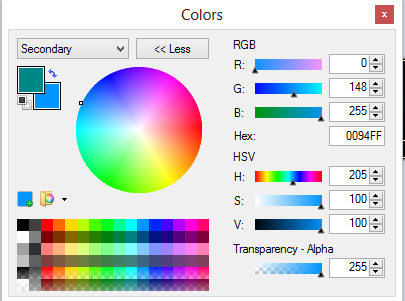
Now click the gradient tool. Drag it across the the image till you find it perfect, there's other options with the gradient tool, so you decide how you want it done.

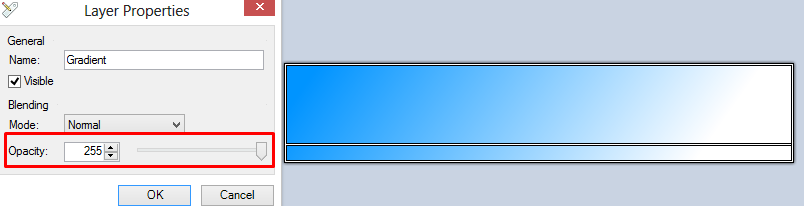
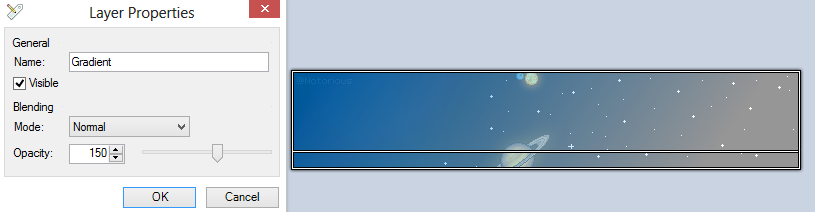
Now that you got the colours overlapping the background, double click the Gradient layer. At the bottom of the pop-up, you can find an opacity bar, drag it sidewards till you find the background visible & also effective. Then click OK, how does the banner look now? If you're unsatisfied, you can always undo.
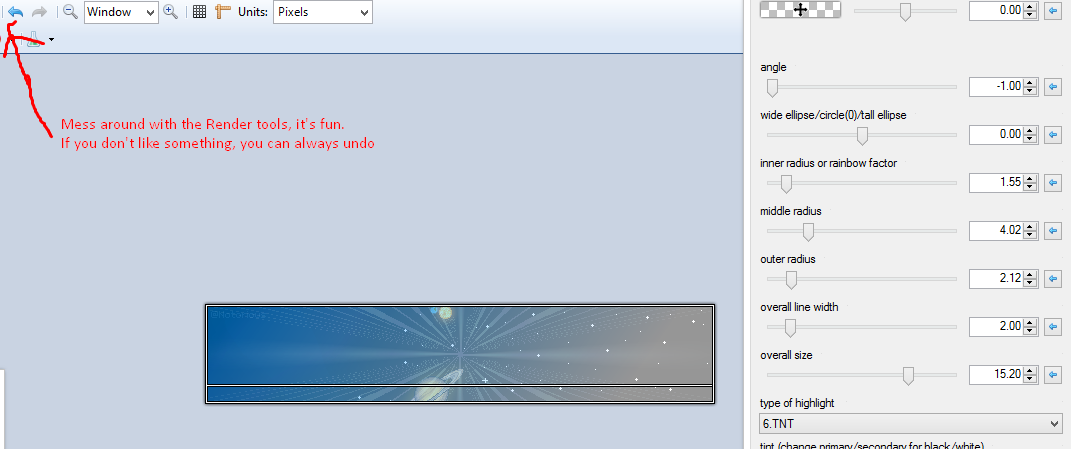
Now here comes the weird part, so try and keep up. If you have the correct plugins, you'll follow through easily. This is just an addon, you don't really need to do this. Create a new layer, and rename it highlight. Click the effects bar at the top, hover over the render button. There's an arrow pointing down under GenTree. Find the Highlight tool.

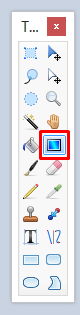
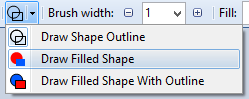
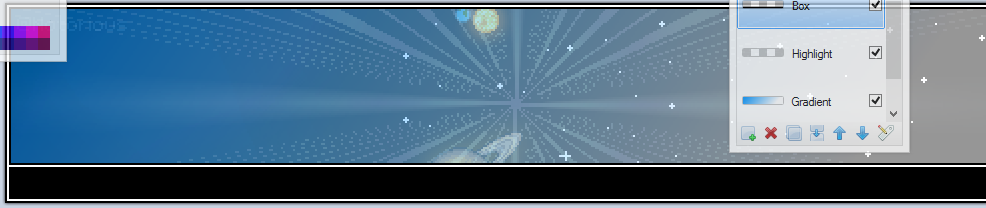
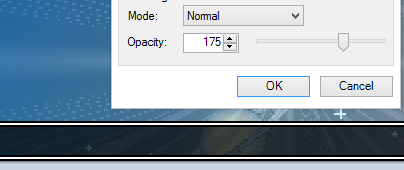
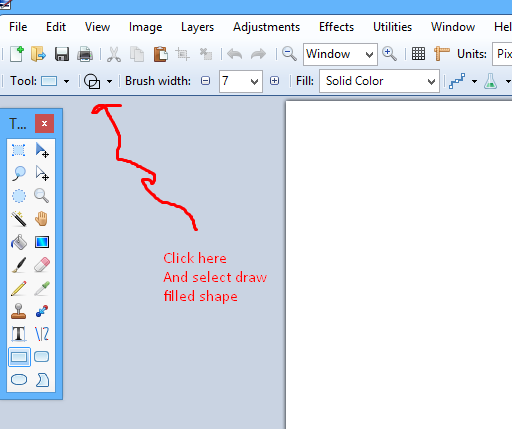
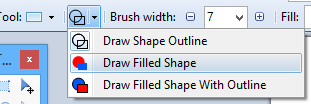
Create another layer and name it Box. Select the square tool, at the top left, you'll find the Tool button with the square to the right, further right there's usually a line shaped in circle & rectangle. the box and click draw filled shape. Drag the square into the box layer, using the boarder template as a guide. Double click the Box layer, change the opacity to 175, or drag the bar.

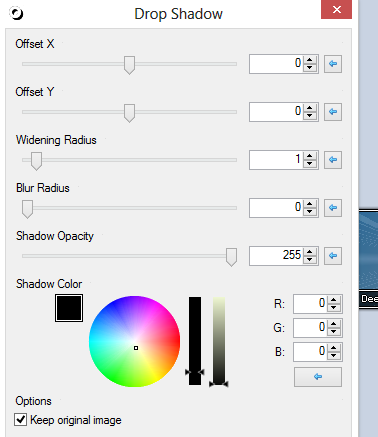
Select white as your primary colour, create a new layer, layer in between the text and boarder layers, and name it Text. Click the T on the tool bar, select the font Volter, size 7. Then Antialiasing disabled. Now you can write down anything related to your hotel. Then click effects, find the object button, then the drop shadow tool. Keep the widening radius 1, and the blur radius at 0.

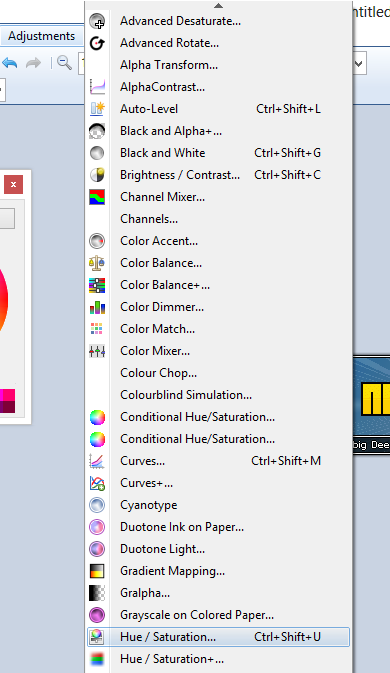
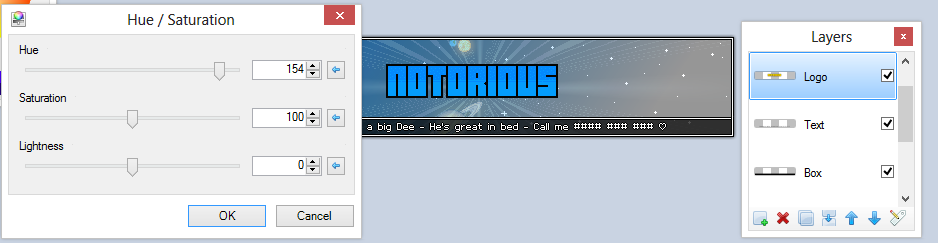
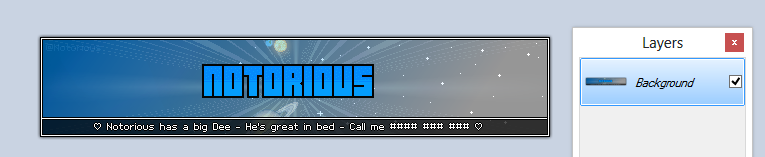
Create the last layer, and rename the layer to Logo, you can now paste in your logo. This is the final part for the basic tutorial. If you want your logo to be a certain colour, click Adjustments at the top, left to effects. Find the Hue/Saturation plugin, and slide the bar around till you find the colour you want. When you're finished, press Ctrl + Shift + F, to flatted the layers together. Save as .PNG and upload. You've made a simple banner! Fiddle around with the tools and eventually, you'll become used to the tools.
---------------------------------------------------------------------------------------------------------------------------------------------------------------------------------------------------
- Software (Paint.Net):
You must be registered for see links
- Software Plugins (First Pack):
You must be registered for see links
- Banner Templates:
You must be registered for see links
- Boarder Template:
You must be registered for see links
- Volter Font:
You must be registered for see links
- Logo Generator:
You must be registered for see links
---------------------------------------------------------------------------------------------------------------------------------------------------------------------------------------------------
Install the software & plugin.
Download the Volter Font. You'll get a zip file, double click the file. You'll see one file, double click the file. Let your computer extract the TrueType font file. A page will flash up showing the font, at the top left, you'll find an install button, click the button and be patient. If you're having troubles, follow the images.
---------------------------------------------------------------------------------------------------------------------------------------------------------------------------------------------------
Now that you've got the font installed, go ahead and open paint, Copy the banner from the page, click back on Paint.net and click the paste button or Ctrl+V. Now crop the image (red) & deselect the image (yellow). Sometimes cropping automatically deselects the image.
---------------------------------------------------------------------------------------------------------------------------------------------------------------------------------------------------
Now prepare yourself for hell, this is the slightly difficult part for people who has never used this software. Create a new layer (red) paste the boarder template over the banner background, even though there's already one attached.
---------------------------------------------------------------------------------------------------------------------------------------------------------------------------------------------------
Rename Layer 2 by double clicking it. A small box will pop up, replace the name Layer 2 with Boarder, to keep things organized. Then click OK & deselect the image.
---------------------------------------------------------------------------------------------------------------------------------------------------------------------------------------------------
Click the background layer, add a new layer. And like before, rename the layer to Gradient, this is the part we start getting creative. Select two colours you want.
---------------------------------------------------------------------------------------------------------------------------------------------------------------------------------------------------
Now click the gradient tool. Drag it across the the image till you find it perfect, there's other options with the gradient tool, so you decide how you want it done.
---------------------------------------------------------------------------------------------------------------------------------------------------------------------------------------------------
Now that you got the colours overlapping the background, double click the Gradient layer. At the bottom of the pop-up, you can find an opacity bar, drag it sidewards till you find the background visible & also effective. Then click OK, how does the banner look now? If you're unsatisfied, you can always undo.
Now here comes the weird part, so try and keep up. If you have the correct plugins, you'll follow through easily. This is just an addon, you don't really need to do this. Create a new layer, and rename it highlight. Click the effects bar at the top, hover over the render button. There's an arrow pointing down under GenTree. Find the Highlight tool.
---------------------------------------------------------------------------------------------------------------------------------------------------------------------------------------------------
Create another layer and name it Box. Select the square tool, at the top left, you'll find the Tool button with the square to the right, further right there's usually a line shaped in circle & rectangle. the box and click draw filled shape. Drag the square into the box layer, using the boarder template as a guide. Double click the Box layer, change the opacity to 175, or drag the bar.
---------------------------------------------------------------------------------------------------------------------------------------------------------------------------------------------------
Select white as your primary colour, create a new layer, layer in between the text and boarder layers, and name it Text. Click the T on the tool bar, select the font Volter, size 7. Then Antialiasing disabled. Now you can write down anything related to your hotel. Then click effects, find the object button, then the drop shadow tool. Keep the widening radius 1, and the blur radius at 0.
---------------------------------------------------------------------------------------------------------------------------------------------------------------------------------------------------
Create the last layer, and rename the layer to Logo, you can now paste in your logo. This is the final part for the basic tutorial. If you want your logo to be a certain colour, click Adjustments at the top, left to effects. Find the Hue/Saturation plugin, and slide the bar around till you find the colour you want. When you're finished, press Ctrl + Shift + F, to flatted the layers together. Save as .PNG and upload. You've made a simple banner! Fiddle around with the tools and eventually, you'll become used to the tools.
---------------------------------------------------------------------------------------------------------------------------------------------------------------------------------------------------
") very Noob Friendly
very Noob Friendly