T3ch
Active Member
- May 23, 2013
- 158
- 24
Introduction:
Everyone has a time when you want to create your own furniture. Many people still dont know how to do this properly. In these tutorial series I'll teach you the basics and the advanced stuff. Every part of coding customs is detailed explained, some parts get pictures to support this tutorial. If you're reading this you're probably attracted to customs and want to know how to code your own stuff. Here is a short list what you need for the basics.
Basics List
- Hex Editor:
- SWF Decompiler:")
- SWF Tools:
- Notepad / Notepad++:
- A working computer
- it takes some time
Part 1 - The beginning!
- Introduction
So you want to code a custom, here is something you should know what coding customs actually is. Making customs is creating your own furniture.swf. All furniture is working from SWF Files. You can modify any SWF file with a flash decompiler. So we want to code our own customs which means we have to edit a existing furniture file. With a flashdecompiler you can edit those SWF files. So lets do that. I'm going to modify my typewriter and create a new one. I'll make a blue one.
- Lets get started!
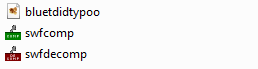
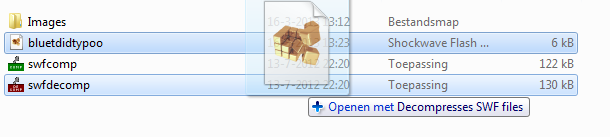
Launch your SWF Decompiler and drag and drop the typingmachine.swf in it.
You'll get something like this:
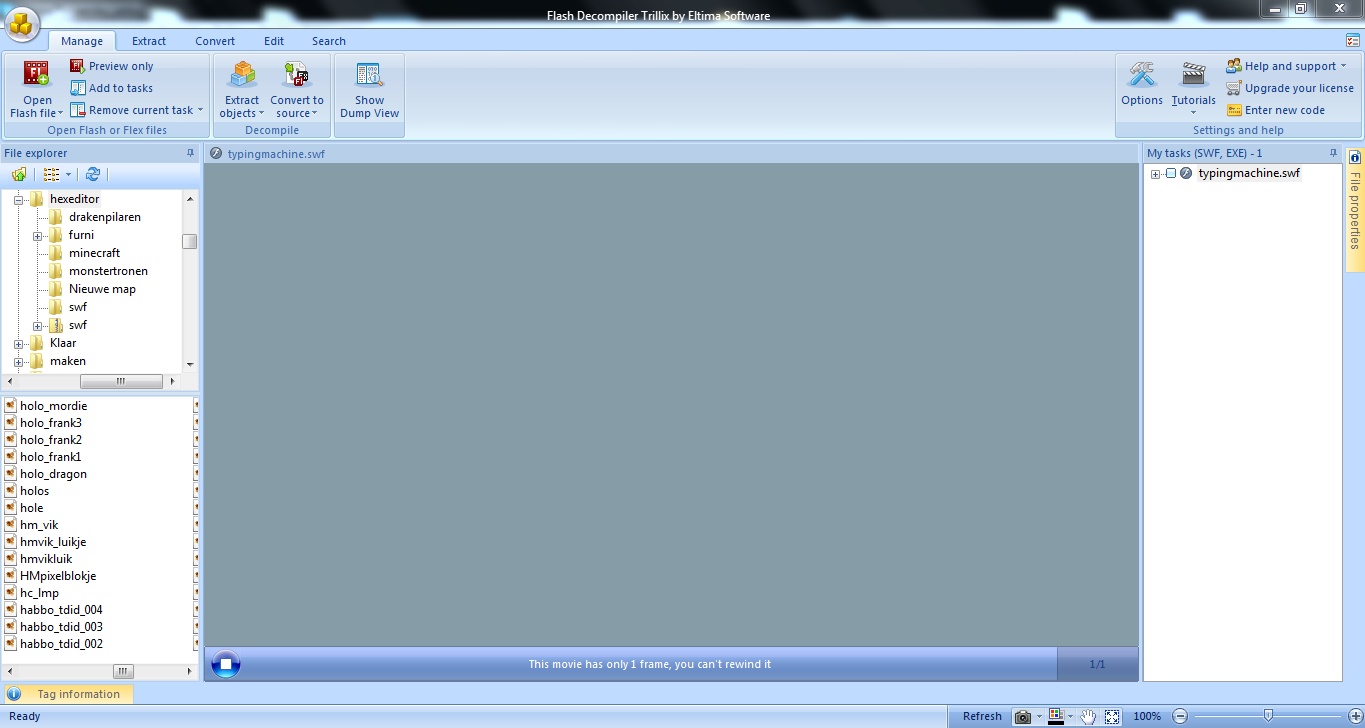
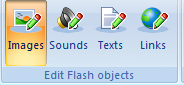
Click on edit at the top:

And then click on images.
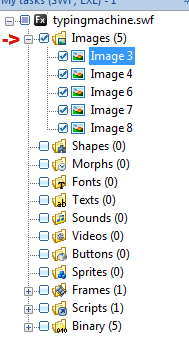
You'll see this SWF has 5 images: 1 typemachine for zoomed in, one for zoomed out and a catalogue icon. There is also a zoomed in shadow and a zoomed out shadow image file. Most of the time you dont need to edit those. I'll get to that later on.
So we now want to edit the files. Click on extract at the top:
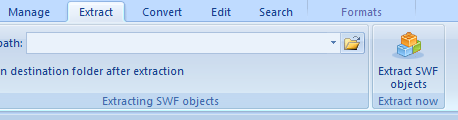
And then select the images folder at the right:
Click export parth and select a nice place to extract them.
Click on "Extract SWF Objects" to save them.

Open up your image editor and modify them to your liking.
I made a blue typewriter.

If you do recolors, dont remove the shading. It is the most important thing in custom making.
So go back to your SWF Decompiler and hit edit, click on images and replace them:
When done click on save as.. at the top and navigate to the folder where you saved the images. Save the SWF under a new name.
There is one rule for the new name: The name must be the same length as the old SWF (without .SWF!). In my case the old SWF used to be: typingmachine(.swf) 13 chars.
I'm making a blue one so I call it: bluetdidtypoo(.swf) 13 chars.
Recheck the length and save it.
Download yourself the SWF Tools if you havent already. Unzip them and place them in the same folder you put the SWF in.
Drag and drop the SWF on decompiler.exe The file size should increase.
Okay so install Hex Editor if you havent already and launch it.
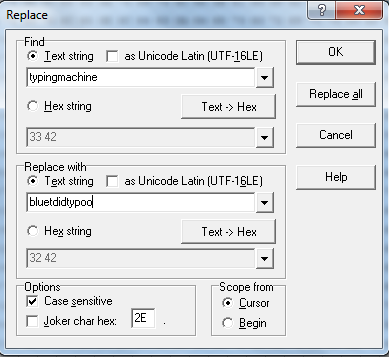
Drag and drop the SWF in it and hit CTRL + R.
At the top put in the old SWF name and at the bottom the new SWF name and hit replace all.
Save it and close Hex Editor.
You can use NotePad ++ instead. Then use CTRL + H. I just prefer Hex Editor
Drag and drop the SWF onto compiler.exe and you're done! Congratulations you made your own custom furniture. Now get yourself some SQLs for your database and you're done!
in part 2 i will teach you how to fix the common bug
Part 2 - Fixing Offset Bug!
Introduction
Sooner or later you'll run into bugs. Today I'm going to tell you the most common bug and how to fix it. For part two you need some additional software.
Go to:
What's this furni editor?
With this tool you're able to edit some of the code from the SWF. This way we can modify code so you can get stuff right. This tool is coded by our God Leenster
- Lets get started!
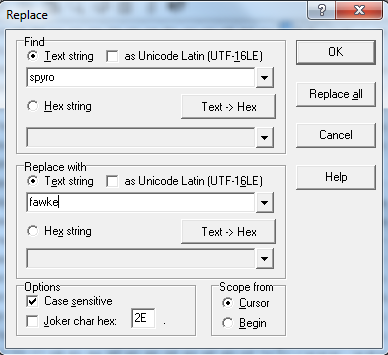
The most common bug is offset. Loading another sized image in a SWF file. Today I'm editing the dino egg (spyro.swf)
Okay so I create my SWF:
Put images in:
I save it as fawke.swf
So lets decompe and rename.
Now I compile it and upload it to my hotel.
Now this is what you get if you put too large images in:
So lets fix that. Download and extract the FurniEditor made by Leenster.
Navigate to the SWF file and open it.
You get something like this:
There are usually 5 or 6 .bin files in there. It depends on how advanced the furniture is. Now you need to find the .bin file that looks like this:
You see the <asset> tags. Now we need to know what <asset> we have to edit. This is fairly easy:
_icon = catalog icon.
_32 = Zoom out in room.
_64 = Normal room view.
Lets start with the "normal" view so we have to edit fawke_64. Now we need to edit the x and y coords of the image so it fits perfect on one tile.
This is the part where you need some time. You can count how many pixels you have to move the image or just guess. I prefer the first method it can save a lot of time.
So
<asset name="fawke_64_a_0_0" x="25" y="42"/>
becomes
<asset name="fawke_64_a_0_0" x="10" y="92"/>
X and Y axis work like this:

So 15 to the right you need to take 15 from the X so it becomes "10".
Hit save.
Hit replace original.
Put the furni in your hof_furni folder and empty your cache and reload the client.
I count roughly 50 pixels up and 15 to the right.
It fits perfectly now repeat this step for the zoom out version _32.
Congratulations you now know how to fix this most common bug!
In part 3 I'll be talking about layers and directions!
Part 3 - Layers and Directions
Introduction
Today we're going to talk about Layers and Directions. But what are these two things? I'm going to learn you what they exactly they do and what they're used for.
Layers
So the layers are like layers in photoshop. Each layer contains a bunch of images. You can move layers within the SWF. If you have to move one image you have to edit the <assets> part so dont start adding x/y/z for no reason.
Example
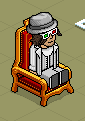
Lets take a throne and we're going to look at the layers.
Open it with Furni Editor and find 9.bin.
Code:
<visualization size="64" layerCount="2" angle="45">
This shows the furniture. size="64" means we're in a normal room and not zooming out.
Layercount means how many layers are there. Here there are two layers (0 and 1).
Angle means when does it start.
Under there you see <layers>
and within this section you see one layer. This is the part of the throne. The z="30" means this layer is above anything else. Now lets add: x="-30"
Before:
After:
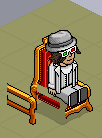
So this means our layer with id="1" is the side bar. Reason why this is in another layer is the fact that it has to be infront of your avatar to make it stand out.
Conclusion
Layers contain a bunch of images. You are not able to move a image inside a layer by editing the <layer> tag.
When coding customs you dont have to edit these there are some exceptions. One I tell you in part 5!
Directions
Directions are not hard to understand. They tell in which directions the furniture is allowed.
For a throne there are 4 directions in the room because you can rotate it in 4 different ways.

There is a bin that tells what direction is allowed:
Code:
I dont think our emulators use this but I think sulake coded their emulator so it reads this XML and then creates the furniture. You can see the z is also given so I think this is the way Habbo is doing it.
Dimensions mean what is the size of it and it even tells the height.
The direction are in degrees.
In visualization you see:
Those are the same directions you see when you say :coords in the hotel.
For the icon there is only one direction because you dont have to turn it.
Thats it for now. In part 4 I'll explain animations. Till then happy coding!
You are now able to:
create your own custom furniture.
fix image bugs like offset.
add directions and/or remove them.
You know what layers are and what they're used for.
Part 4 - Fixing New Furniture!
This is a small guide on how to fix the new furniture that bugs when you load it in your client.
Lets start:
1) Download the SWF you want to fix.
2) Open it with leensters furniture tool.
3) Search in the .bin files for <graphics> Once found remove it!
4) As we know every opening tag has a closing tag so search for </graphics> in the same binfile you found <graphics> in and remove it.
5) Save the swf and you're done!
You now know how to fix up new furniture!
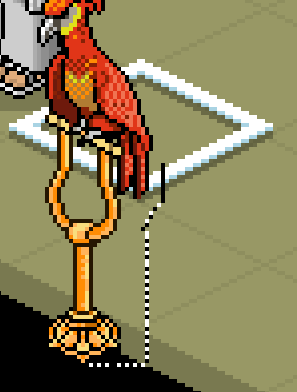
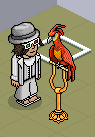
Part 5 - Colorizing Furniture!Today I'll tell you how you can colorize furniture. For example the dragonlamps (rare_dragonlamp.swf) has 10 color options:
*0 till *9. With the color option you can colorize a image. If you open up the swf you see that there is only a silver version of the dragonlamp. Pic:
If you open the swf in the furni editor and find the visualization file you notice that for every view (32 / 64 / icon) there are colors added between the <colors> </colors> tags. Every color has its own unique id and start with the <color> tag. For the color with id = 0 we see:
Code:
This is the red dragon. If you go to your furnidata you can see rare_dragonlamp*0 -> Red Dragon.
Between the color tag we can specify on what layer the color should apply. In this case we apply it on layer 1 and 2 which are the head and the body of the dragon. The color is specified with a hexadecimal number. To find out the color belonging to the number you can use
Well now you know about the colorizing feature but wait there is more!
There are no limitations to the number of colors you want to have. This means you can go past number 9 and thus being able to create a custom color for example <color id="10">
If you do that do not forget to add it also to the zoomed out view and the icon. Add to your furnidata rare_dragonlamp*10 and add it to your database just how you would normally add furniture.
If you did everything right you would now have your own colored dragon!
This is all about the color option. It is not complicated and it is easy to use.
Credits - HarryHils 70%
Credits - Me for releasing 30%
Everyone has a time when you want to create your own furniture. Many people still dont know how to do this properly. In these tutorial series I'll teach you the basics and the advanced stuff. Every part of coding customs is detailed explained, some parts get pictures to support this tutorial. If you're reading this you're probably attracted to customs and want to know how to code your own stuff. Here is a short list what you need for the basics.
Basics List
- Hex Editor:
You must be registered for see links
- SWF Decompiler:
You must be registered for see links
For this one you need a license. PM me for a crack - SWF Tools:
You must be registered for see links
- Notepad / Notepad++:
You must be registered for see links
- A working computer
You must be registered for see links
- it takes some time
Part 1 - The beginning!
- Introduction
So you want to code a custom, here is something you should know what coding customs actually is. Making customs is creating your own furniture.swf. All furniture is working from SWF Files. You can modify any SWF file with a flash decompiler. So we want to code our own customs which means we have to edit a existing furniture file. With a flashdecompiler you can edit those SWF files. So lets do that. I'm going to modify my typewriter and create a new one. I'll make a blue one.
- Lets get started!
Launch your SWF Decompiler and drag and drop the typingmachine.swf in it.
You'll get something like this:
Click on edit at the top:
And then click on images.
You'll see this SWF has 5 images: 1 typemachine for zoomed in, one for zoomed out and a catalogue icon. There is also a zoomed in shadow and a zoomed out shadow image file. Most of the time you dont need to edit those. I'll get to that later on.
So we now want to edit the files. Click on extract at the top:
And then select the images folder at the right:
Click export parth and select a nice place to extract them.
Click on "Extract SWF Objects" to save them.
Open up your image editor and modify them to your liking.
I made a blue typewriter.
If you do recolors, dont remove the shading. It is the most important thing in custom making.
So go back to your SWF Decompiler and hit edit, click on images and replace them:
When done click on save as.. at the top and navigate to the folder where you saved the images. Save the SWF under a new name.
There is one rule for the new name: The name must be the same length as the old SWF (without .SWF!). In my case the old SWF used to be: typingmachine(.swf) 13 chars.
I'm making a blue one so I call it: bluetdidtypoo(.swf) 13 chars.
Recheck the length and save it.
Download yourself the SWF Tools if you havent already. Unzip them and place them in the same folder you put the SWF in.
Drag and drop the SWF on decompiler.exe The file size should increase.
Okay so install Hex Editor if you havent already and launch it.
Drag and drop the SWF in it and hit CTRL + R.
At the top put in the old SWF name and at the bottom the new SWF name and hit replace all.
Save it and close Hex Editor.
You can use NotePad ++ instead. Then use CTRL + H. I just prefer Hex Editor
Drag and drop the SWF onto compiler.exe and you're done! Congratulations you made your own custom furniture. Now get yourself some SQLs for your database and you're done!
in part 2 i will teach you how to fix the common bug
Part 2 - Fixing Offset Bug!
Introduction
Sooner or later you'll run into bugs. Today I'm going to tell you the most common bug and how to fix it. For part two you need some additional software.
Go to:
You must be registered for see links
download and extract it.What's this furni editor?
With this tool you're able to edit some of the code from the SWF. This way we can modify code so you can get stuff right. This tool is coded by our God Leenster
- Lets get started!
The most common bug is offset. Loading another sized image in a SWF file. Today I'm editing the dino egg (spyro.swf)
Okay so I create my SWF:
Put images in:
I save it as fawke.swf
So lets decompe and rename.
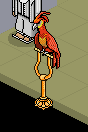
Now I compile it and upload it to my hotel.
Now this is what you get if you put too large images in:
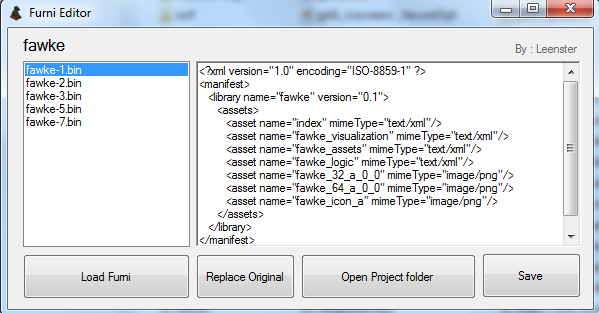
So lets fix that. Download and extract the FurniEditor made by Leenster.
Navigate to the SWF file and open it.
You get something like this:
There are usually 5 or 6 .bin files in there. It depends on how advanced the furniture is. Now you need to find the .bin file that looks like this:
You see the <asset> tags. Now we need to know what <asset> we have to edit. This is fairly easy:
_icon = catalog icon.
_32 = Zoom out in room.
_64 = Normal room view.
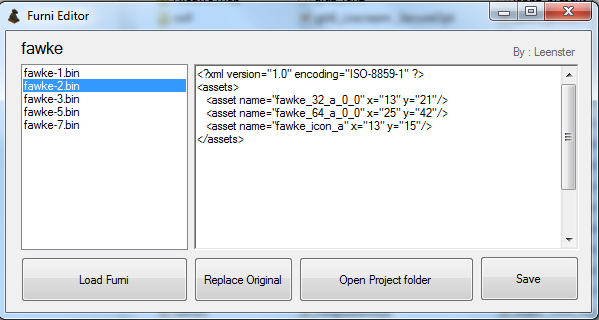
Lets start with the "normal" view so we have to edit fawke_64. Now we need to edit the x and y coords of the image so it fits perfect on one tile.
This is the part where you need some time. You can count how many pixels you have to move the image or just guess. I prefer the first method it can save a lot of time.
So
<asset name="fawke_64_a_0_0" x="25" y="42"/>
becomes
<asset name="fawke_64_a_0_0" x="10" y="92"/>
X and Y axis work like this:
So 15 to the right you need to take 15 from the X so it becomes "10".
Hit save.
Hit replace original.
Put the furni in your hof_furni folder and empty your cache and reload the client.
I count roughly 50 pixels up and 15 to the right.
It fits perfectly now repeat this step for the zoom out version _32.
Congratulations you now know how to fix this most common bug!
In part 3 I'll be talking about layers and directions!
Part 3 - Layers and Directions
Introduction
Today we're going to talk about Layers and Directions. But what are these two things? I'm going to learn you what they exactly they do and what they're used for.
Layers
So the layers are like layers in photoshop. Each layer contains a bunch of images. You can move layers within the SWF. If you have to move one image you have to edit the <assets> part so dont start adding x/y/z for no reason.
Example
Lets take a throne and we're going to look at the layers.
Open it with Furni Editor and find 9.bin.
Code:
<visualization size="64" layerCount="2" angle="45">
This shows the furniture. size="64" means we're in a normal room and not zooming out.
Layercount means how many layers are there. Here there are two layers (0 and 1).
Angle means when does it start.
Under there you see <layers>
and within this section you see one layer. This is the part of the throne. The z="30" means this layer is above anything else. Now lets add: x="-30"
Code:
  <directions>
        <direction id="0"/>
        <direction id="2"/>
        <direction id="4"/>
        <direction id="6"/>
</directions>After:
So this means our layer with id="1" is the side bar. Reason why this is in another layer is the fact that it has to be infront of your avatar to make it stand out.
Conclusion
Layers contain a bunch of images. You are not able to move a image inside a layer by editing the <layer> tag.
When coding customs you dont have to edit these there are some exceptions. One I tell you in part 5!
Directions
Directions are not hard to understand. They tell in which directions the furniture is allowed.
For a throne there are 4 directions in the room because you can rotate it in 4 different ways.
There is a bin that tells what direction is allowed:
Code:
Code:
<objectData type="testen">
<model>
<dimensions x="1" y="1" z="1.0"/>
<directions>
<direction id="0"/>
<direction id="90"/>
<direction id="180"/>
<direction id="270"/>
</directions>
</model>
</objectData>
I dont think our emulators use this but I think sulake coded their emulator so it reads this XML and then creates the furniture. You can see the z is also given so I think this is the way Habbo is doing it.
Dimensions mean what is the size of it and it even tells the height.
The direction are in degrees.
In visualization you see:
Code:
Code:
<directions>
<direction id="0"/>
<direction id="2"/>
<direction id="4"/>
<direction id="6"/>
</directions>
Those are the same directions you see when you say :coords in the hotel.
For the icon there is only one direction because you dont have to turn it.
Thats it for now. In part 4 I'll explain animations. Till then happy coding!
You are now able to:
create your own custom furniture.
fix image bugs like offset.
add directions and/or remove them.
You know what layers are and what they're used for.
Part 4 - Fixing New Furniture!
This is a small guide on how to fix the new furniture that bugs when you load it in your client.
Lets start:
1) Download the SWF you want to fix.
2) Open it with leensters furniture tool.
3) Search in the .bin files for <graphics> Once found remove it!
4) As we know every opening tag has a closing tag so search for </graphics> in the same binfile you found <graphics> in and remove it.
5) Save the swf and you're done!
You now know how to fix up new furniture!
Part 5 - Colorizing Furniture!Today I'll tell you how you can colorize furniture. For example the dragonlamps (rare_dragonlamp.swf) has 10 color options:
*0 till *9. With the color option you can colorize a image. If you open up the swf you see that there is only a silver version of the dragonlamp. Pic:
You must be registered for see links
If you open the swf in the furni editor and find the visualization file you notice that for every view (32 / 64 / icon) there are colors added between the <colors> </colors> tags. Every color has its own unique id and start with the <color> tag. For the color with id = 0 we see:
Code:
Code:
  <color id="0">
            <colorLayer id="1" color="FA2D00"/>
            <colorLayer id="2" color="FA2D00"/>
        </color>
This is the red dragon. If you go to your furnidata you can see rare_dragonlamp*0 -> Red Dragon.
Between the color tag we can specify on what layer the color should apply. In this case we apply it on layer 1 and 2 which are the head and the body of the dragon. The color is specified with a hexadecimal number. To find out the color belonging to the number you can use
You must be registered for see links
Well now you know about the colorizing feature but wait there is more!
There are no limitations to the number of colors you want to have. This means you can go past number 9 and thus being able to create a custom color for example <color id="10">
If you do that do not forget to add it also to the zoomed out view and the icon. Add to your furnidata rare_dragonlamp*10 and add it to your database just how you would normally add furniture.
If you did everything right you would now have your own colored dragon!
This is all about the color option. It is not complicated and it is easy to use.
Credits - HarryHils 70%
Credits - Me for releasing 30%
Last edited:
") , i did this because i was bored
, i did this because i was bored

