Kareem
Member
- Jul 6, 2012
- 54
- 11
Hey, welcome to my latest tutorial here on Devbest! Please let me know if any of the links below are down.
This tutorial took me a couple of hours to put together just for you. Give me some feedback by replying below. Thank you for checking out my second tutorial here on DevBest! My next tutorial will be how to create a server using shockbyte hosting.
Today, you will be learning how to create a Minecraft Server with plugins! In this tutorial, we will be going over how to get Spigot or Craftbukkit, where to learn how to configure plugins, basic server configuration, and how to get the server open for people to join! I want you guys to know that if you post your server using your home IP this can cause a risk (aka you getting DDOSED). If you really want to open a server for people to join, I'd strongly recommend you rent a server from Shockbyte. This is why you should make this server for friends, or for some trusted people. Now, let's get on with the tutorial!
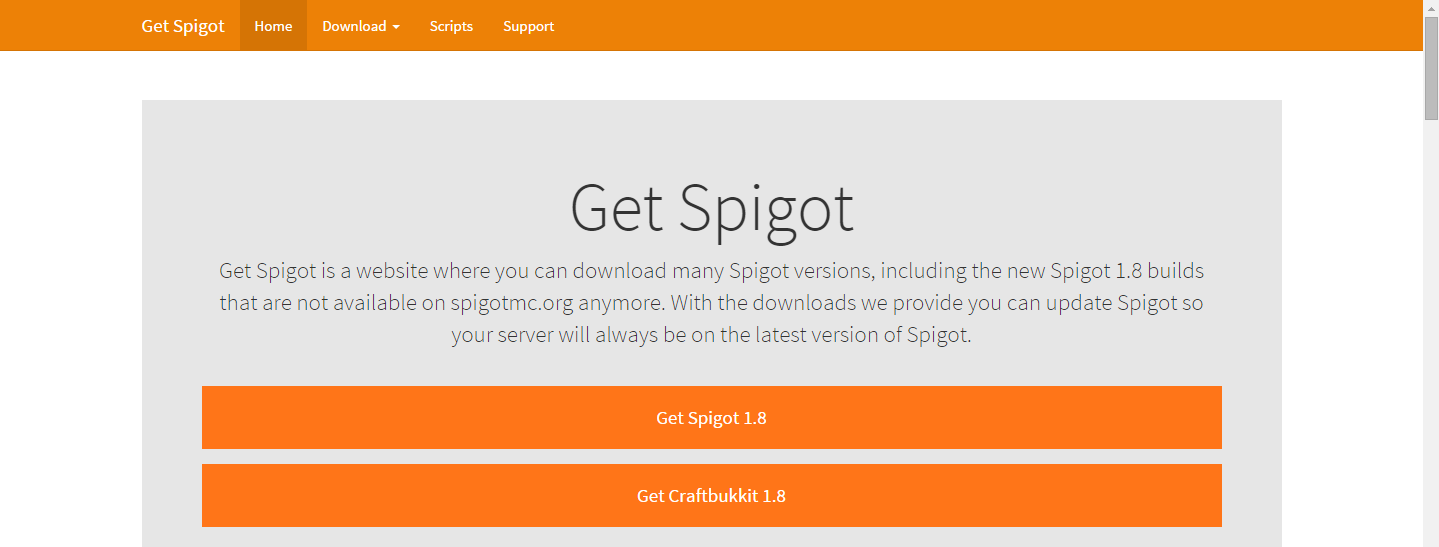
First off, we need to download Spigot or Craftbukkit before we can conclude with the tutorial. Let's begin by heading to
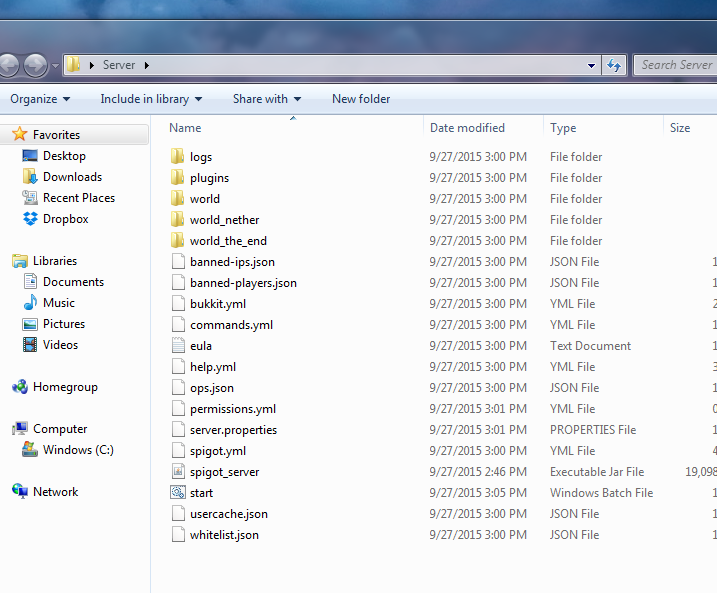
Alright, now that we have clicked "Get Spigot 1.8" we will then need to create the directory (aka folder) for the server. For me, I am going to place the server folder on my desktop, but for you it could be in a different spot. It's all up to you, but I recommend your desktop. Alright, so let's go to the place where we are going to store the servers directory (desktop, documents, downloads, etc) and create a new folder called "Server". (Keep in mind you can name the folder whatever you'd like, it does not matter what the folders name is).

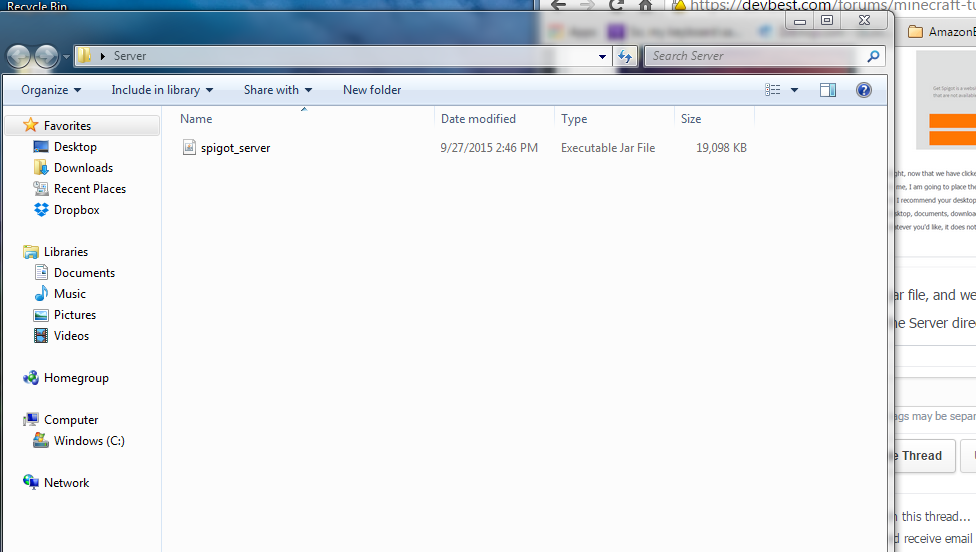
Now, we will need to take the spigot_server.jar file, and we need to move it into our server directory (or folder) that we have just created. Let's begin by dragging it into the Server directory.
Now that we have done that, we need to make sure we have Java installed. If you don't, click
Alright, I recommend that you download notepad++ because it will make your life so much easier when setting up a Minecraft Server. You can click
"#By changing the setting below to TRUE you are indicating your agreement to our EULA (
#Sun Sep 27 14:53:22 MST 2015
eula=false"
Okay, so now what we need to do is accept the EULA. To do this, edit where it says "eula=false" to "eula=true". Then, save the file and double click the Spigot Server .jar file. You should then see even more things pop up in the server directory.
If you are new to making Minecraft Servers with Spigot or Craftbukkit, I know what you are thinking. What the heck is all this stuff? Most if it you don't even touch, so don't worry. So now that we have the servers directory almost setup, we need a way to start the server. To do this, we need to go back into notepad++ (or notepad) and we need to create a start.bat file. To do this, let's create a new text document and we need to insert the following line of text:
"java -version
java -Xmx1G -jar spigot_server.jar
pause"
Remember to never include the "" in any part of this tutorial when i'm telling you to edit it. You should then go up to file, then hit "Save As" and save it into the servers directory (aka folder) as start.bat. When you do this, you now have a way to start up the server.
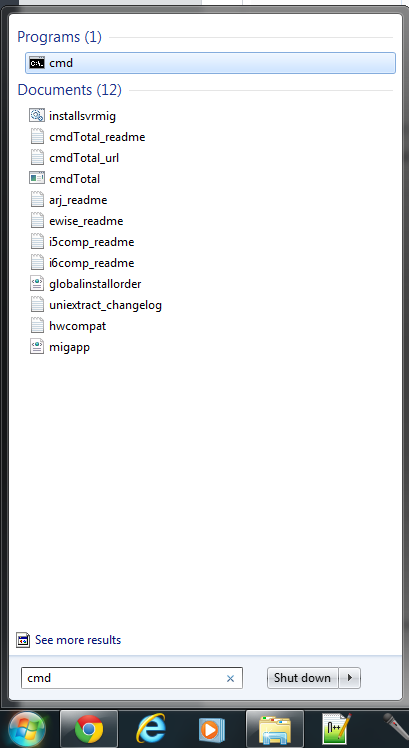
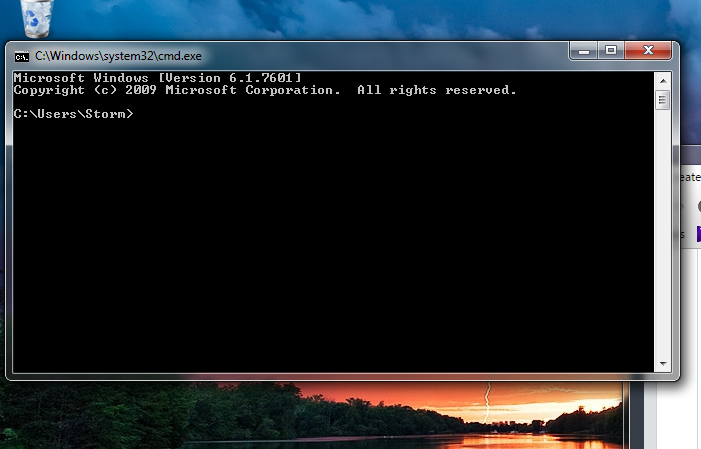
Now, we need to find out what are IPV4 address is. To do this, we need to have access to CMD. To go to CMD, hit the windows key, and then search for "CMD". You will then see CMD pop up. Click it, and it should open up a black box command console.
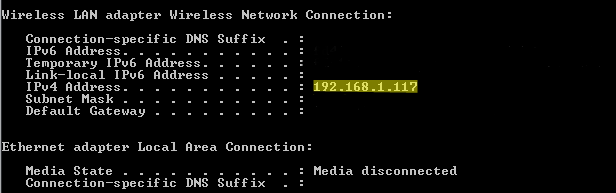
Alright, now we need to look up what our IPV4 Address is. To do this, type in the console, "ipconfig". When you do this, a bunch of stuff and information should come up. Scroll up until you see your IPV4 address, and copy it to Notepad or a stickynote (this will be helpful in the future). Your CMD should show a lot more than mine because I blacked out all the information you don't need. Highlighted in Yellow is your IPV4 address (yours should be different from mine.)
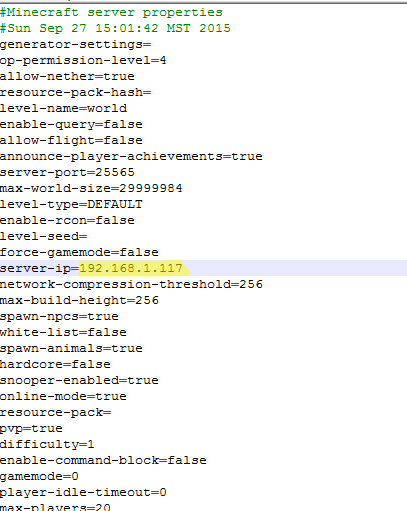
Now that we have copied that address, let's go ahead and go to the servers directory (aka folder) and go to the server.properties. Now, let's right click it and open it with notepad++. If you are using Notepad, open it with Notepad. You will see the following in the server.properties file:
"
#Minecraft server properties
#Sun Sep 27 15:01:42 MST 2015
generator-settings=
op-permission-level=4
allow-nether=true
resource-pack-hash=
level-name=world
enable-query=false
allow-flight=false
announce-player-achievements=true
server-port=25565
max-world-size=29999984
level-type=DEFAULT
enable-rcon=false
level-seed=
force-gamemode=false
server-ip=
network-compression-threshold=256
max-build-height=256
spawn-npcs=true
white-list=false
spawn-animals=true
hardcore=false
snooper-enabled=true
online-mode=true
resource-pack=
pvp=true
difficulty=1
enable-command-block=false
gamemode=0
player-idle-timeout=0
max-players=20
spawn-monsters=true
generate-structures=true
view-distance=10
motd=A Minecraft Server"
If you see those settings, that's good. It means everything is working perfectly fine. Alright, now let's begin by editing the settings. So to do this, let's start off with editing what some of these settings are saying. Let's begin by puting our IPV4 Address where it shows the "server-ip=" In the picture shown below, it shows my IPV4 Address highlighted in yellow where it asks for the "server-ip=".
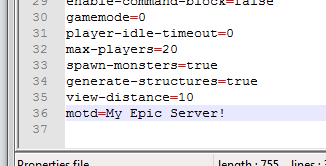
Now that we have that there let's go ahead and setup the servers name. To do this, go down to where it says "motd=A Minecraft Server" and change where it says "A Minecraft Server" to whatever you want. It could be called pretty much anything (Make sure it's not to long, though.)
*This is the hardest part of the tutorial*
I will not be describing to clearly on how to portforward as it is different for everybody. To learn how to portforward, please look up your router with keywords" How to portforward". If you know how to portforward, you are in luck!
Alright, now we need to port forward. Port Forwarding is way different for everybody because everybody is using a different router. For me, I will be telling you how to do it with mine. For you, it's going to be a little bit different. If you cannot figure out how to port forward, go ahead and reply below. I'll try my best to help you. To begin, let's go ahead and search "What's my IP" on google. It should have 4 different numbers with 3 different periods. (Example: 23.69.98.56) Copy it, and put it in your bar where you normally type in a website. (I'm not going to show you mine for security purposes). It should ask you to login, so go ahead and login with the username that your router has, and the password for your internet. Usually, the routers username is the type of router that you use. Mine is called LinksysE3200. Go ahead and login, and look for where you can PortForward with the router. If you are in the section where you can portforward, go ahead put your IPV4 Address as TCP or UDP, and make sure the PORT is 25565. If you can select the option "both" for TPC and UDP, then go ahead and select it. If you cant, type in your IPV4 Address in 2 fields, and then put one field as TCP and another as UDP. Make sure they both have the 25565 port, it's important.
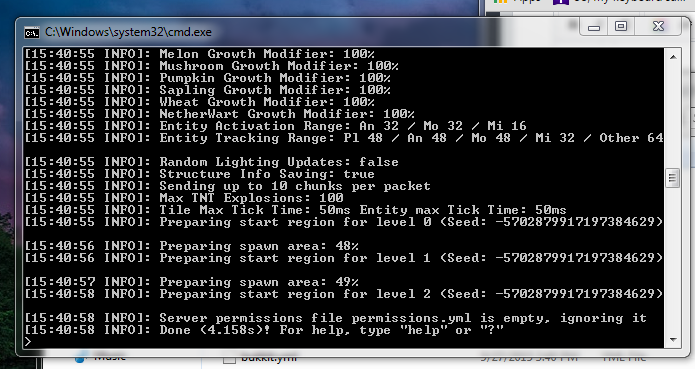
Now that we have done that, make sure everything is saved and let's go ahead and start up the server and find out if we can connect! To do this, go back into the servers directory file, and hit "Start.bat". The server will take about a minute to start up, then it should be good. Below is what you should see when starting up the server. (keep in mind it can take a bit for this information to appear, be patient.)
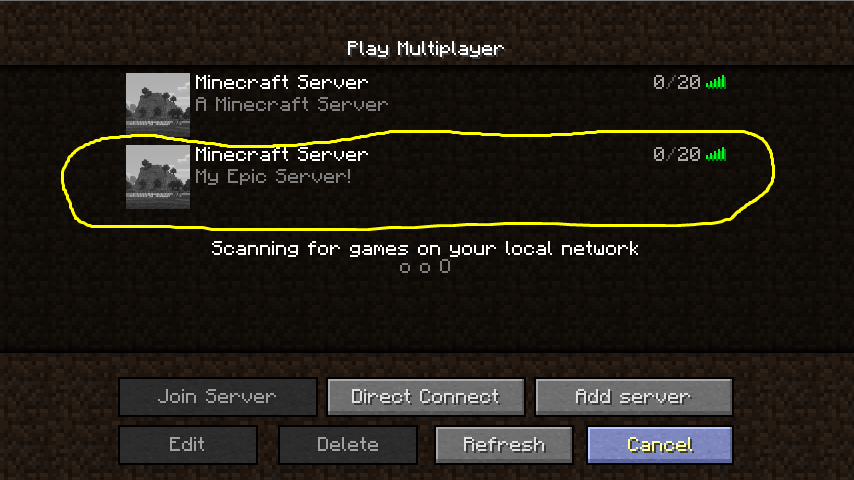
Now that you see this, go ahead and type "op username" (username being your username for Minecraft) and hit enter. (For me, it will be op gigas because my Minecraft name is Gigas). This will make you a server op (meaning you have control over everything). Now, let's go ahead and start up Minecraft. If you don't remember your IP Address, go to google and search "What's my ip". It should appear. Copy it, and then hit "Add Server" on Minecraft, and your server should appear. Join it, and make sure everything is working. (Keep in mind you must keep the start.bat console open or the server will not work. Never close out of it because it will not save. Instead, type /stop or put stop in the console. It will stop the server, and save everything.)
Wow! Now we have our very own Minecraft Server. Now, let's add some plugins to make it even better! Plugins is what makes a server even better. Every popular server that you play on uses plugins. Plugins is what makes the server come alive. Without them, you have the boring regular Minecraft. Below are some plugins you might want to add to your server. To add them to your server, go to the server directory (aka folder) and extract every plugin.jar that you have into the plugins folder. Everytime you add a plugin, make sure you never use /reload over and over again. This could break the server, and lead you to trouble. Instead, do /stop and stop the server. Then, restart it up and you should be good! (Below is a list of plugins from another user).
1. Essentials - A must have! it allows you to have a source of payment and has a lot of commands to have access to
2. Group Manager- Its related to Essentials but another live saver in the fight against grifers.
3. Some kind of Chest Shop plugin (IConomyChestShop)- Its like a store, in minecraft to buy things!
4. Simple Prefix- This allows you to have custom colors based on your rank! Very handy for donors
5. BuyCraft- A "non-plugin" to allow players to donate money to the server and you give them in-game items.
6. Anti-Cheat- This stops people with hacked clients from using them on your server, if they do it enough. They will be kicked (but not banned!)
7. HeroChat- If you have a lot of people and some staff but want to have separate channels to talk on, this is a lovely plugin.
8. WorldEdit/WorldGuard- Another helpful tool. Its self explanatory.
9. Factions- Kind of like GroupManager but also like a clan.
10. LWC- A plugin that allows players to protect chests/doors, etc.
All the plugins can be found here --->
To learn how to configure these plugins, watch a YouTube video that will describe to you how to configure them. Anyways guys, thanks for checking out my tutorial! In the next one, I will be showing you how to open a server with mods!
SOURCES:
Thank you for checking out the tutorial guys. If it was good, leave me some good feeback. If it was bad, tell me what I can improve in the next one.
This tutorial took me a couple of hours to put together just for you. Give me some feedback by replying below. Thank you for checking out my second tutorial here on DevBest! My next tutorial will be how to create a server using shockbyte hosting.
Today, you will be learning how to create a Minecraft Server with plugins! In this tutorial, we will be going over how to get Spigot or Craftbukkit, where to learn how to configure plugins, basic server configuration, and how to get the server open for people to join! I want you guys to know that if you post your server using your home IP this can cause a risk (aka you getting DDOSED). If you really want to open a server for people to join, I'd strongly recommend you rent a server from Shockbyte. This is why you should make this server for friends, or for some trusted people. Now, let's get on with the tutorial!
First off, we need to download Spigot or Craftbukkit before we can conclude with the tutorial. Let's begin by heading to
You must be registered for see links
, and hitting "Get Spigot 1.8". It will then download the Spigot Server .jar file. You will notice that it says "Get CraftBukkit 1.8 and Get Spigot 1.8". What's the difference? Really, nothing. Each plugin will work the same for CraftBukkit and Spigot. For this tutorial, I will be using Spigot 1.8.
Alright, now that we have clicked "Get Spigot 1.8" we will then need to create the directory (aka folder) for the server. For me, I am going to place the server folder on my desktop, but for you it could be in a different spot. It's all up to you, but I recommend your desktop. Alright, so let's go to the place where we are going to store the servers directory (desktop, documents, downloads, etc) and create a new folder called "Server". (Keep in mind you can name the folder whatever you'd like, it does not matter what the folders name is).
Now, we will need to take the spigot_server.jar file, and we need to move it into our server directory (or folder) that we have just created. Let's begin by dragging it into the Server directory.
Now that we have done that, we need to make sure we have Java installed. If you don't, click
You must be registered for see links
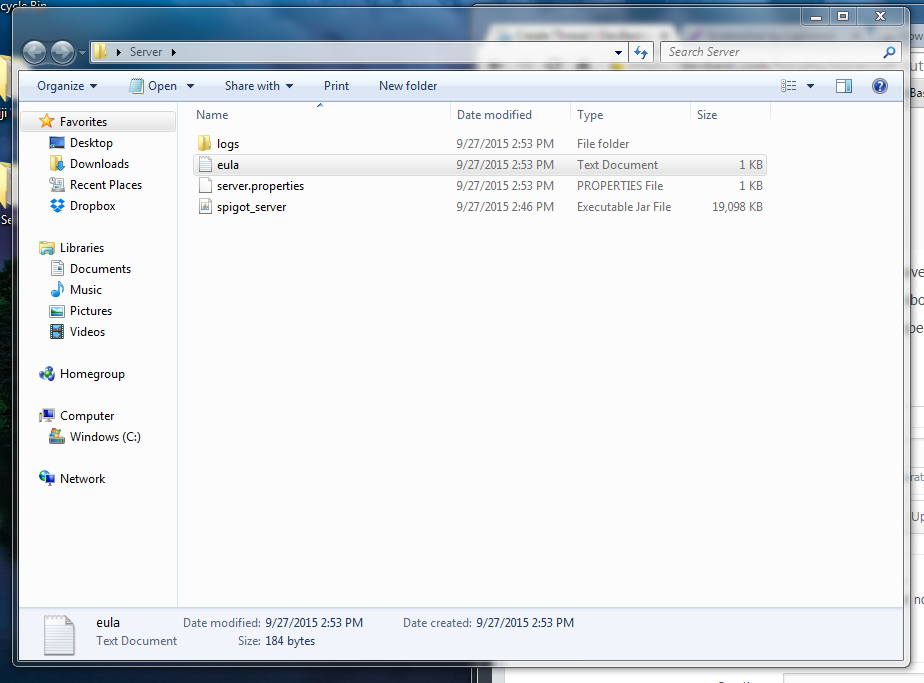
. If you do, let's begin by double clicking the servers .jar file. It will do it's thing for about a minute or so. When it's done, three things should pop up. A folder called "logs", a text document called "eula", a properties file called "server.properties".
Alright, I recommend that you download notepad++ because it will make your life so much easier when setting up a Minecraft Server. You can click
You must be registered for see links
to download notepad++, or you can use regular notepad. For me, I am using notepad++. Let's begin by right clicking the "eula.txt" text document, and hitting "Edit with notepad++". (If you are using regular notepad, you can double click it.) It should open up a text document that states this inside:"#By changing the setting below to TRUE you are indicating your agreement to our EULA (
You must be registered for see links
).#Sun Sep 27 14:53:22 MST 2015
eula=false"
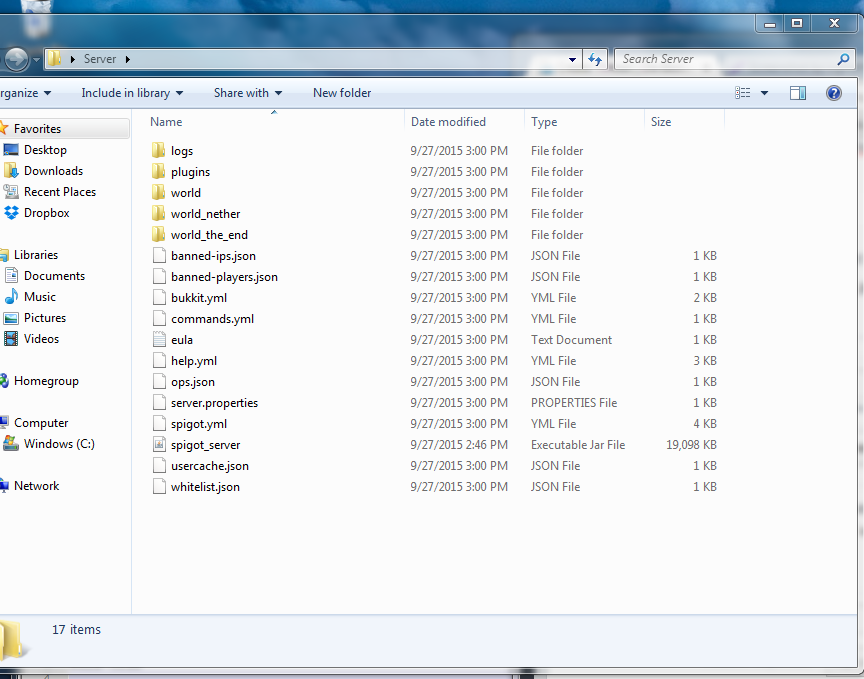
Okay, so now what we need to do is accept the EULA. To do this, edit where it says "eula=false" to "eula=true". Then, save the file and double click the Spigot Server .jar file. You should then see even more things pop up in the server directory.
If you are new to making Minecraft Servers with Spigot or Craftbukkit, I know what you are thinking. What the heck is all this stuff? Most if it you don't even touch, so don't worry. So now that we have the servers directory almost setup, we need a way to start the server. To do this, we need to go back into notepad++ (or notepad) and we need to create a start.bat file. To do this, let's create a new text document and we need to insert the following line of text:
"java -version
java -Xmx1G -jar spigot_server.jar
pause"
Remember to never include the "" in any part of this tutorial when i'm telling you to edit it. You should then go up to file, then hit "Save As" and save it into the servers directory (aka folder) as start.bat. When you do this, you now have a way to start up the server.
Now, we need to find out what are IPV4 address is. To do this, we need to have access to CMD. To go to CMD, hit the windows key, and then search for "CMD". You will then see CMD pop up. Click it, and it should open up a black box command console.
Alright, now we need to look up what our IPV4 Address is. To do this, type in the console, "ipconfig". When you do this, a bunch of stuff and information should come up. Scroll up until you see your IPV4 address, and copy it to Notepad or a stickynote (this will be helpful in the future). Your CMD should show a lot more than mine because I blacked out all the information you don't need. Highlighted in Yellow is your IPV4 address (yours should be different from mine.)
Now that we have copied that address, let's go ahead and go to the servers directory (aka folder) and go to the server.properties. Now, let's right click it and open it with notepad++. If you are using Notepad, open it with Notepad. You will see the following in the server.properties file:
"
#Minecraft server properties
#Sun Sep 27 15:01:42 MST 2015
generator-settings=
op-permission-level=4
allow-nether=true
resource-pack-hash=
level-name=world
enable-query=false
allow-flight=false
announce-player-achievements=true
server-port=25565
max-world-size=29999984
level-type=DEFAULT
enable-rcon=false
level-seed=
force-gamemode=false
server-ip=
network-compression-threshold=256
max-build-height=256
spawn-npcs=true
white-list=false
spawn-animals=true
hardcore=false
snooper-enabled=true
online-mode=true
resource-pack=
pvp=true
difficulty=1
enable-command-block=false
gamemode=0
player-idle-timeout=0
max-players=20
spawn-monsters=true
generate-structures=true
view-distance=10
motd=A Minecraft Server"
If you see those settings, that's good. It means everything is working perfectly fine. Alright, now let's begin by editing the settings. So to do this, let's start off with editing what some of these settings are saying. Let's begin by puting our IPV4 Address where it shows the "server-ip=" In the picture shown below, it shows my IPV4 Address highlighted in yellow where it asks for the "server-ip=".
Now that we have that there let's go ahead and setup the servers name. To do this, go down to where it says "motd=A Minecraft Server" and change where it says "A Minecraft Server" to whatever you want. It could be called pretty much anything (Make sure it's not to long, though.)
*This is the hardest part of the tutorial*
I will not be describing to clearly on how to portforward as it is different for everybody. To learn how to portforward, please look up your router with keywords" How to portforward". If you know how to portforward, you are in luck!
Alright, now we need to port forward. Port Forwarding is way different for everybody because everybody is using a different router. For me, I will be telling you how to do it with mine. For you, it's going to be a little bit different. If you cannot figure out how to port forward, go ahead and reply below. I'll try my best to help you. To begin, let's go ahead and search "What's my IP" on google. It should have 4 different numbers with 3 different periods. (Example: 23.69.98.56) Copy it, and put it in your bar where you normally type in a website. (I'm not going to show you mine for security purposes). It should ask you to login, so go ahead and login with the username that your router has, and the password for your internet. Usually, the routers username is the type of router that you use. Mine is called LinksysE3200. Go ahead and login, and look for where you can PortForward with the router. If you are in the section where you can portforward, go ahead put your IPV4 Address as TCP or UDP, and make sure the PORT is 25565. If you can select the option "both" for TPC and UDP, then go ahead and select it. If you cant, type in your IPV4 Address in 2 fields, and then put one field as TCP and another as UDP. Make sure they both have the 25565 port, it's important.
Now that we have done that, make sure everything is saved and let's go ahead and start up the server and find out if we can connect! To do this, go back into the servers directory file, and hit "Start.bat". The server will take about a minute to start up, then it should be good. Below is what you should see when starting up the server. (keep in mind it can take a bit for this information to appear, be patient.)
Now that you see this, go ahead and type "op username" (username being your username for Minecraft) and hit enter. (For me, it will be op gigas because my Minecraft name is Gigas). This will make you a server op (meaning you have control over everything). Now, let's go ahead and start up Minecraft. If you don't remember your IP Address, go to google and search "What's my ip". It should appear. Copy it, and then hit "Add Server" on Minecraft, and your server should appear. Join it, and make sure everything is working. (Keep in mind you must keep the start.bat console open or the server will not work. Never close out of it because it will not save. Instead, type /stop or put stop in the console. It will stop the server, and save everything.)
Wow! Now we have our very own Minecraft Server. Now, let's add some plugins to make it even better! Plugins is what makes a server even better. Every popular server that you play on uses plugins. Plugins is what makes the server come alive. Without them, you have the boring regular Minecraft. Below are some plugins you might want to add to your server. To add them to your server, go to the server directory (aka folder) and extract every plugin.jar that you have into the plugins folder. Everytime you add a plugin, make sure you never use /reload over and over again. This could break the server, and lead you to trouble. Instead, do /stop and stop the server. Then, restart it up and you should be good! (Below is a list of plugins from another user).
1. Essentials - A must have! it allows you to have a source of payment and has a lot of commands to have access to
2. Group Manager- Its related to Essentials but another live saver in the fight against grifers.
3. Some kind of Chest Shop plugin (IConomyChestShop)- Its like a store, in minecraft to buy things!
4. Simple Prefix- This allows you to have custom colors based on your rank! Very handy for donors
5. BuyCraft- A "non-plugin" to allow players to donate money to the server and you give them in-game items.
6. Anti-Cheat- This stops people with hacked clients from using them on your server, if they do it enough. They will be kicked (but not banned!)
7. HeroChat- If you have a lot of people and some staff but want to have separate channels to talk on, this is a lovely plugin.
8. WorldEdit/WorldGuard- Another helpful tool. Its self explanatory.
9. Factions- Kind of like GroupManager but also like a clan.
10. LWC- A plugin that allows players to protect chests/doors, etc.
All the plugins can be found here --->
You must be registered for see links
.To learn how to configure these plugins, watch a YouTube video that will describe to you how to configure them. Anyways guys, thanks for checking out my tutorial! In the next one, I will be showing you how to open a server with mods!
SOURCES:
You must be registered for see links
~
You must be registered for see links
on
You must be registered for see links
Mar 4, 2013. (Plugins List For Factions Server)
You must be registered for see links
(The game used)Thank you for checking out the tutorial guys. If it was good, leave me some good feeback. If it was bad, tell me what I can improve in the next one.
")
